Dell PowerEdge C6400 EMC Installation and Service Manual - Page 58
Installing the power interposer board
 |
View all Dell PowerEdge C6400 manuals
Add to My Manuals
Save this manual to your list of manuals |
Page 58 highlights
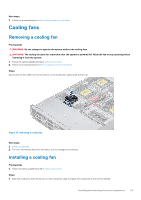
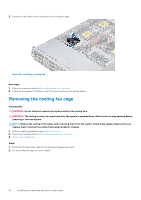
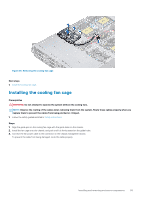
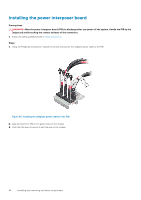
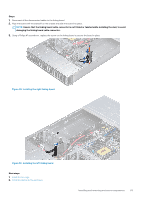
Installing the power interposer board Prerequisites WARNING: Allow the power interposer board (PIB) to discharge after you power off the system. Handle the PIB by the edges and avoid touching the contact surfaces of the connectors. 1. Follow the safety guidelines listed in Safety instructions. Steps 1. Using the Phillips #2 screwdriver, replace the screws that secure the midplane power cable to the PIB. Figure 43. Installing the midplane power cables to the PIB 2. Align and insert the PIB on the guide hooks on the chassis. 3. Push the PIB down to secure it with the lock on the chassis. 58 Installing and removing enclosure components
-
 1
1 -
2
-
3
-
4
-
5
-
6
-
7
-
8
-
9
-
10
-
11
-
12
-
13
-
14
-
15
-
16
-
17
-
18
-
19
-
20
-
21
-
22
-
23
-
24
-
25
-
26
-
27
-
28
-
29
-
30
-
31
-
32
-
33
-
34
-
35
-
36
-
37
-
38
-
39
-
40
-
41
-
42
-
43
-
44
-
45
-
46
-
47
-
48
-
49
-
50
-
51
-
52
-
 53
53 -
 54
54 -
 55
55 -
 56
56 -
 57
57 -
 58
58 -
 59
59 -
 60
60 -
 61
61 -
 62
62 -
 63
63 -
64
-
65
-
66
-
67
-
68
-
69
-
70
-
71
-
72
-
73
-
74
-
75
-
76
-
77
-
78
-
79
-
80
-
81
-
82
-
83
-
84
-
85
-
86
-
87
-
88
 |
 |
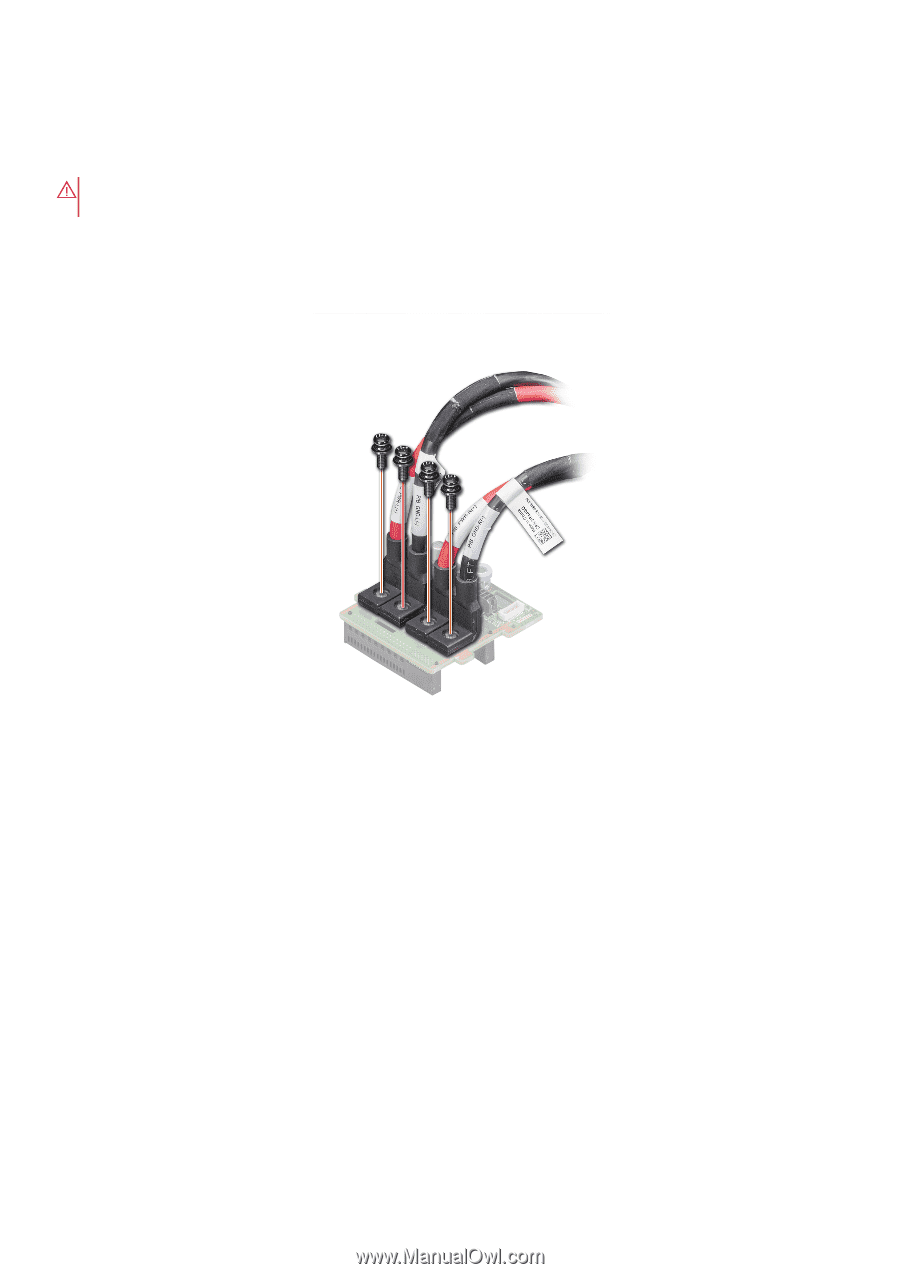
Installing the power interposer board
Prerequisites
WARNING:
Allow the power interposer board (PIB) to discharge after you power off the system. Handle the PIB by the
edges and avoid touching the contact surfaces of the connectors.
1.
Follow the safety guidelines listed in
Safety instructions
.
Steps
1.
Using the Phillips #2 screwdriver, replace the screws that secure the midplane power cable to the PIB.
Figure 43. Installing the midplane power cables to the PIB
2.
Align and insert the PIB on the guide hooks on the chassis.
3.
Push the PIB down to secure it with the lock on the chassis.
58
Installing and removing enclosure components