Dell PowerEdge R250 EMC Installation and Service Manual - Page 70
Installing the internal USB key, Power supply unit, Removing the cabled power supply unit
 |
View all Dell PowerEdge R250 manuals
Add to My Manuals
Save this manual to your list of manuals |
Page 70 highlights
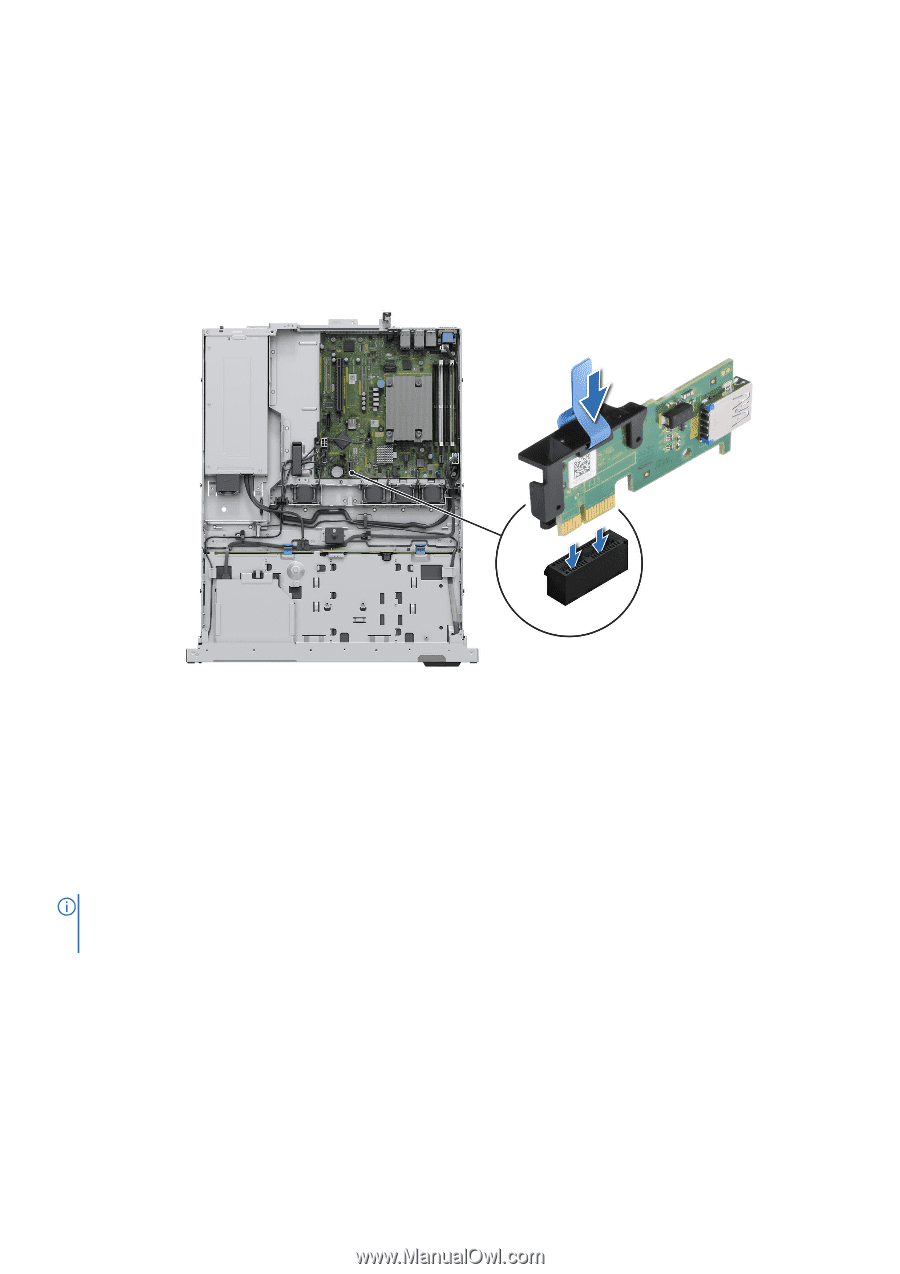
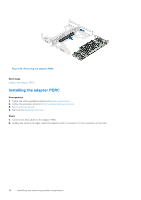
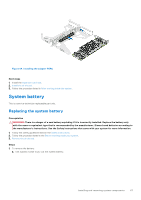
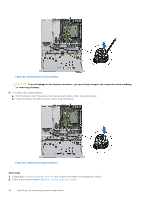
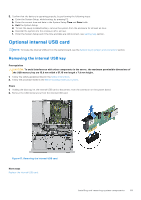
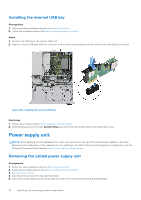
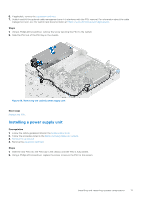
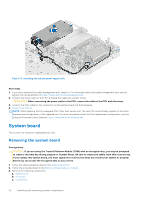
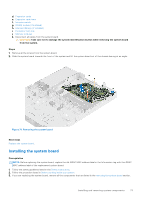
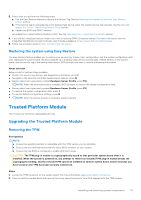
Installing the internal USB key Prerequisites 1. Follow the safety guidelines listed in the Safety instructions. 2. Follow the procedure listed in the Before working inside your system. Steps 1. Connect the USB key to the internal USB card. 2. Align the internal USB card with the connector on the system board and press firmly until the internal USB card is seated. Figure 68. Installing the internal USB key Next steps 1. Follow the procedure listed in After working inside the system. 2. While booting, press F2 to enter System Setup and verify that the system detects the USB memory key. Power supply unit NOTE: While replacing the hot swappable PSU, after next server boot; the new PSU automatically updates to the same firmware and configuration of the replaced one. For updating to the latest firmware and changing the configuration, see the Lifecycle Controller User's Guide at https://www.dell.com/idracmanuals. Removing the cabled power supply unit Prerequisites 1. Follow the safety guidelines listed in the Safety instructions. 2. Follow the procedure listed in the Before working inside your system. 3. Remove the air shroud. 4. Disconnect the system from the electrical outlet. 5. Disconnect all the cables that are connected from the PSU to the system board and the backplane. 70 Installing and removing system components
-
 1
1 -
2
-
3
-
4
-
5
-
6
-
7
-
8
-
9
-
10
-
11
-
12
-
13
-
14
-
15
-
16
-
17
-
18
-
19
-
20
-
21
-
22
-
23
-
24
-
25
-
26
-
27
-
28
-
29
-
30
-
31
-
32
-
33
-
34
-
35
-
36
-
37
-
38
-
39
-
40
-
41
-
42
-
43
-
44
-
45
-
46
-
47
-
48
-
49
-
50
-
51
-
52
-
53
-
54
-
55
-
56
-
57
-
58
-
59
-
60
-
61
-
62
-
63
-
64
-
 65
65 -
 66
66 -
 67
67 -
 68
68 -
 69
69 -
 70
70 -
 71
71 -
 72
72 -
 73
73 -
 74
74 -
 75
75 -
76
-
77
-
78
-
79
-
80
-
81
-
82
-
83
-
84
-
85
-
86
-
87
-
88
-
89
-
90
 |
 |