Epson 30000 User Manual
Epson 30000 - GT - Flatbed Scanner Manual
 |
UPC - 010343832800
View all Epson 30000 manuals
Add to My Manuals
Save this manual to your list of manuals |
Epson 30000 manual content summary:
- Epson 30000 | User Manual - Page 1
Color Scanner User's Guide - Epson 30000 | User Manual - Page 2
with SEIKO EPSON CORPORATION's operating and maintenance instructions. SEIKO EPSON CORPORATION shall not be liable for any damages or problems arising from digital cameras and scanners. Trademarks EPSON and EPSON Stylus are registered trademarks of SEIKO EPSON CORPORATION. EPSON Store and Micro - Epson 30000 | User Manual - Page 3
Guide Reading Your Other Electronic Manuals Registering Chapter 1 Setting Up Your Scanner Unpacking Your Scanner Choosing a Good Place for Your Scanner Identifying Scanner Parts Unlocking the Scanner Installing the Automatic Document Feeder Testing Your Scanner's Operation Connecting the Scanner - Epson 30000 | User Manual - Page 4
the Automatic Document Feeder 56 Placing a Single Original Document 57 Scanning with EPSON TWAIN HS 58 Using the a Start Button 60 Setting Up the a Start Button 60 Chapter 4 Network Scanning 63 Setting Up the Scanner Server 65 Installing the Scanner Server Software for Windows Me 66 - Epson 30000 | User Manual - Page 5
the Scanner Software Uninstalling EPSON TWAIN HS Uninstalling EPSON TWAIN HS Network Uninstalling EPSON Scan Server Solving Problems with the Automatic Document Feeder Fixing Paper Jams Changing the Document Feed Speed Where To Get Help EPSON Technical Support Software Technical Support 95 - Epson 30000 | User Manual - Page 6
Release) 124 Installing the TCP/IP Protocol on Windows NT 4.0 126 Assigning an IP Address on Windows NT 4.0 127 Appendix B Specifications 129 Appendix C Notices 133 System Requirements 133 Important Safety Instructions 134 Declaration of Conformity 135 FCC Compliance Statement 136 - Epson 30000 | User Manual - Page 7
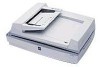
11.7 × 17-inch scan bed let you quickly capture incredibly sharp images from practically any size source document. About Your Scanner Your EPSON GT-30000 scanner includes these features: s 36-bit color depth and 600 × 1200 optical resolution lets you capture crisp, clean text and high-quality images - Epson 30000 | User Manual - Page 8
About Your Software The EPSON GT-30000 comes with these applications: EPSON TWAIN HS General-purpose driver for scanning photographs, artwork, or text for Optical Character Recognition (OCR). Includes automatic document size recognition. EPSON TWAIN HS Network and EPSON Scan Server Ideal general- - Epson 30000 | User Manual - Page 9
Documents Several of the applications that came with your scanner include electronic manuals in the Adobe Acrobat PDF format. You'll find electronic user's guides in the Manuals folder on the EPSON GT-30000 Scanning Tools CD-ROM, as well as in the product folders. See page 6 for instructions - Epson 30000 | User Manual - Page 10
EPSON GT-30000 Reference Guide is on your EPSON GT-30000 Scanner Software CD-ROM. You can view it from the CD-ROM or copy it to your hard drive and view it from there. You must have a web browser (for example, Netscape Navigator or Internet Explorer, versions 3.0 or later). If you copy the manual - Epson 30000 | User Manual - Page 11
4. Open the Manuals folder, then double-click the GT30000.exe icon. The Reference Guide window opens: Click to view the Reference Guide. Click to install the Reference Guide on your hard drive. 5. Click View Reference Guide. Your browser opens and you see this window: Click a topic to expand its - Epson 30000 | User Manual - Page 12
. expanded contents list Reading Your Other Electronic Manuals To read other PDF manuals on your CD-ROM, you'll use Acrobat Reader. If Acrobat Reader is not already installed on your computer, you can install it with the other scanner software. See the software installation instructions for your - Epson 30000 | User Manual - Page 13
Acrobat Reader Help menu. You can download and view a PDF version of the GT-30000 User's Guide from the EPSON support web site at http://support.epson.com. PixTools QuickScan includes on-screen help. To access it, click Start, Programs, PixTools Products, Documentation, and select QuickScan Help. 7 - Epson 30000 | User Manual - Page 14
form which appears at the end of the software installation process (see "Chapter 2, Installing the Software"). Registering enables you to receive special information on options, new products, and software upgrades. You'll get immediate attention if you have a problem with your scanner. 8 - Epson 30000 | User Manual - Page 15
is easy-just follow the steps in this chapter in the order listed below. 1. Unpack and choose a good place for the scanner. 2. Unlock the scanner. 3. Install the automatic document feeder. 4. Test the scanner. 5. Set the SCSI ID number and terminator switch (SCSI connections only). 6. Connect - Epson 30000 | User Manual - Page 16
and heavy, so you may need to have someone help you unpack and lift them. Along with this guide, your EPSON GT-30000 comes with these items: EPSON GT-30000 power cable EPSON GT-30000 Scanner Software CD-ROM automatic document feeder knobs installation screws screwdriver 10 Setting Up Your - Epson 30000 | User Manual - Page 17
s Make sure there's enough room behind the scanner for the cables, and above the scanner so you can fully raise the document cover. 23.4 inches (596 mm) 3.9 inches or more (100 mm) 19.2 inches (488 mm) 25.9 inches (658 mm) * When automatic document feeder is closed. 10 inches* (254 mm) Setting - Epson 30000 | User Manual - Page 18
Identifying Scanner Parts Operate button automatic document feeder document table a Start button ERROR light READY light SCSI terminator switch SCSI interface (50-pin) ADF connector optional interface slot SCSI interface (68-pin) AC socket SCSI select switch N/W SCSI - Epson 30000 | User Manual - Page 19
document feeder and connecting the scanner to a power source, you must release the transportation lock on the back of the scanner. scanner. Whenever the transportation lock is locked, the scanner lamp must be in the home position (on the left side of the scanner). See "Transporting the Scanner - Epson 30000 | User Manual - Page 20
Document Feeder The automatic document feeder (ADF) automatically loads multi-page documents into your scanner. The ADF is large and heavy. Clear a wide space around the scanner ADF: 1. Make sure your scanner is turned off, then unplug the scanner's power and interface cables, if necessary. 2. Insert - Epson 30000 | User Manual - Page 21
4. Slide the ADF onto the scanner, lining up the screws with the holes as shown. 5. Twist the knobs onto the ends of the screws and tighten them using the screwdriver tool. 6. Attach the ADF's connector to the scanner's option interface. Then tighten the connector screws. 7. Close the ADF. - Epson 30000 | User Manual - Page 22
working properly, it's a good idea to turn it on before you connect it to your computer. The scanner's voltage cannot be changed. If the label on the back of the scanner does not display the correct voltage for your area, contact your dealer. Do not plug in the power cord. 1. Plug the - Epson 30000 | User Manual - Page 23
the optional IEEE 1394 scanner interface card, you can connect the scanner to your PC with the IEEE 1394 cable. Your PC must have an OHCI compliant port or card, and must be running a pre-installed version of Windows Me or Windows 2000. For installation instructions, see page 21. Connecting - Epson 30000 | User Manual - Page 24
Setting the SCSI Terminator The scanner's SCSI terminator is built-in, with a switch to turn it on or off on the scanner's back panel. If the scanner is your only SCSI device, leave the terminator turned ON (the default setting). If the scanner is the last device in the chain, leave the terminator - Epson 30000 | User Manual - Page 25
a chain, turn the switch OFF. Setting the Select Switch The scanner has two SCSI connectors: one for a 68-pin SCSI cable and the other for a 50-pin SCSI cable. You may need to change the select switch setting depending on the SCSI card and cable you are using in your computer. If you are using - Epson 30000 | User Manual - Page 26
may not work properly. Don't use an external terminator. 4. Plug in the power cables for your computer, scanner, and other external SCSI devices. Always turn on your scanner first. Otherwise, the computer may not recognize your EPSON scanner when you install your software. 20 Setting Up Your - Epson 30000 | User Manual - Page 27
scanner interface card (B808342), follow the instructions in this section to install the interface card in your scanner and connect the scanner to your computer. You can purchase genuine EPSON supplies and accessories from the EPSON Store™ at (800) 873-7766, or visit www.epsonstore.com (U.S. sales - Epson 30000 | User Manual - Page 28
. 3. Tighten the retaining screws and reconnect the scanner's cables. circuit board, face down Connecting the IEEE 1394 Cable to Your Computer The IEEE 1394 scanner interface card has two cable connectors. You can use either one to connect the scanner directly to your computer. At the same time - Epson 30000 | User Manual - Page 29
4, "Network Scanning." Installing the Scanner Software Before you begin installing software, make sure you recalibrate your monitor to factory specifications (see your monitor documentation for instructions). Then follow the instructions for your operating system: s If you're running Windows Me - Epson 30000 | User Manual - Page 30
the Software for Windows Me Before you begin, make sure the GT-30000 is connected to your computer. Also, make sure you've recalibrated your monitor to factory specifications (see your monitor documentation for instructions). This procedure automatically installs your EPSON TWAIN HS driver. You - Epson 30000 | User Manual - Page 31
, the wrong driver may be installed. 5. Browse to EPSON\ English\WINME on your CD-ROM drive. (The example to the right uses "E" as the CD-ROM drive letter. Your CD-ROM drive letter may be different.) Click OK to close the Browse window, and then click Next. 6. Follow the instructions on the screen - Epson 30000 | User Manual - Page 32
same display. If you need to recalibrate your screen at a later time, double-click the Scanners and Cameras icon in your Windows Control Panel to open the Scanners and Cameras Properties window. Select EPSON GT-30000 on the Devices tab, if necessary, and click the Properties button to display the - Epson 30000 | User Manual - Page 33
, EPSON TWAIN HS Network or EPSON Scan Server. The EPSON TWAIN HS driver, which is already installed on your computer, lets you scan to a GT-30000 connected to your computer. If you want to install software for a network scanner, go to Chapter 4, "Network Scanning" 5. Follow the instructions on - Epson 30000 | User Manual - Page 34
Me) Follow these steps to test scanner operation: 1. Open the Windows Control Panel and double-click the Scanners and Cameras icon to open the Scanners and Cameras Properties window. 2. Double-click the EPSON GT-30000 icon to display the Properties window. 3. Click the General tab, then click - Epson 30000 | User Manual - Page 35
Windows Control Panel and double-click the Scanners and Cameras icon. 2. Double-click the EPSON GT-30000 icon. You see the EPSON GT-30000 Properties window. 3. Click the Utility tab. Make sure Select as default scanner for EPSON TWAIN HS is checked, click Apply, and then OK. Installing the Software - Epson 30000 | User Manual - Page 36
the Software for Windows 2000 Before you begin, make sure the GT-30000 is connected to your computer. Also, make sure you've recalibrated your monitor to factory specifications (see your monitor documentation for instructions). This procedure automatically installs your EPSON TWAIN HS driver. You - Epson 30000 | User Manual - Page 37
click OK (or click Browse and locate the Windows 2000 source files on your hard drive; then click OK). 7. When you see the Digital Signature Not Found screen, click Yes. If prompted for the EPSON Scanners Driver Disk 1, reinsert your EPSON GT-30000 Scanning Tools CD-ROM. Installing the Software 31 - Epson 30000 | User Manual - Page 38
Properties button to display the EPSON GT-30000 Properties window. Click the Utility tab, and then click the Screen Calibration Utility button. 9. Click Finish when you see a message that installation is complete, then continue with the instructions in the next section. 32 Installing the Software - Epson 30000 | User Manual - Page 39
, EPSON TWAIN HS Network or EPSON Scan Server. The EPSON TWAIN HS driver, which is already installed on your computer, lets you scan to a GT-30000 connected to your computer. If you want to install software for a network scanner, go to Chapter 4, "Network Scanning." 5. Follow the instructions on - Epson 30000 | User Manual - Page 40
If you're done installing software, remove the EPSON GT-30000 Scanning Tools CD-ROM and restart your computer. Then follow the instructions in the next section to make sure your scanner is operating properly. If you want to install the ISIS driver, PixTools QuickScan, or Presto! PageManager continue - Epson 30000 | User Manual - Page 41
Make sure EPSON GT-30000 is selected, and click the Properties button. You see the EPSON GT-30000 Properties window. 3. Click the Utility tab. Make sure Select as default scanner for EPSON TWAIN HS is checked, and then click OK. 4. Click OK to close the Properties window. Installing the Software 35 - Epson 30000 | User Manual - Page 42
the Software for Windows 98 Before you begin, make sure the GT-30000 is connected to your computer. Also, make sure you've recalibrated your monitor to factory specifications (see your monitor documentation for instructions). This procedure automatically installs your EPSON TWAIN HS driver. If - Epson 30000 | User Manual - Page 43
the EPSON GT-30000 Properties window. Click the Utility tab, and then click the Screen Calibration Utility button. 7. When installation is complete, click Finish. Continue with the instructions in the next section to install Acrobat Reader, if necessary, and register your scanner online. Installing - Epson 30000 | User Manual - Page 44
, EPSON TWAIN HS Network or EPSON Scan Server. The EPSON TWAIN HS driver, which is already installed on your computer, lets you scan to a GT-30000 connected to your computer. If you want to install software for a network scanner, go to Chapter 4, "Network Scanning." 5. Follow the instructions on - Epson 30000 | User Manual - Page 45
If you're done installing software, remove the EPSON GT-30000 Scanning Tools CD-ROM and restart your computer. Then follow the instructions in the next section to make sure your scanner is operating properly. If you want to install the ISIS driver, PixTools QuickScan, or Presto! PageManager continue - Epson 30000 | User Manual - Page 46
to your computer and you're running Windows 98, you can set up the EPSON GT-30000 as your default scanner. 1. Open the Windows Control Panel and double-click the Scanners and Cameras icon to open the Scanners and Cameras Properties window. 2. Select EPSON GT-30000, if necessary, and click the - Epson 30000 | User Manual - Page 47
section to install your EPSON GT-30000 scanner driver and other software on your scanner software CD-ROM for stand-alone scanning. Before you begin installing software, make sure you recalibrate your monitor to factory specifications. (See your monitor documentation for instructions.) If you want to - Epson 30000 | User Manual - Page 48
3. Make sure your scanner software CD-ROM is in the drive. Browse to the following location on your CD-ROM drive: EPSON\English\WIN95. Then click OK. (The example on the right shows "G" as the CD-ROM drive. Your CD-ROM drive letter may be different.) 4. When you see the window on the right, click - Epson 30000 | User Manual - Page 49
the software selection window. 4. You must install EPSON TWAIN HS to use your scanner. Make sure a check mark appears beside it. Also select Acrobat Reader (if you need to install it) and EPSON GT-30000 Registration, then click OK. Don't select either of the two network applications, EPSON TWAIN - Epson 30000 | User Manual - Page 50
5. Follow the instructions on the screen to install EPSON TWAIN HS. When installation is complete, you see the window on the right. Make sure SCSI is selected and GT-30000 appears in the Scanner Selection list. 6. Click Test to check the connection. If the scanner software is installed correctly, - Epson 30000 | User Manual - Page 51
the Windows Device Manager. (Click Start, Settings, Control Panel, then double-click the System icon. Select the Device Manager tab and double-click EPSON Scanners. GT-30000 should appear in the list.) If you're done installing software, restart your computer. If you want to install the ISIS driver - Epson 30000 | User Manual - Page 52
Software for Windows NT 4.0 Follow the instructions in this section to install the EPSON GT-30000 scanner driver and other software on your scanner software CD-ROM. Before you begin installing software, make sure you recalibrate your monitor to factory specifications. (See your monitor documentation - Epson 30000 | User Manual - Page 53
on a network, go to Chapter 4, "Network Scanning," instead. 7. Follow the instructions on the screen to install EPSON TWAIN HS. When installation is complete, you see the window on the right. Make sure SCSI is selected and GT-30000 appears in the Scanner Selection list. Installing the Software 47 - Epson 30000 | User Manual - Page 54
. If the scanner software is installed correctly, you see Status: Device Ready under Scanner Information. Click OK to close the window. You can test your scanner connection at any time. (Double-click the EPSON TWAIN HS icon in the Windows Control Panel to open the EPSON TWAIN HS window. Then click - Epson 30000 | User Manual - Page 55
, then double-click the Epson CD-ROM icon. 2. Make sure English is selected and click OK. The Software Setup window appears. 3. Click Browse This CD. 4. To install the ISIS driver, double-click the ISIS folder, then double-click the Setup.exe icon. Then follow the instructions on the screen. 5. When - Epson 30000 | User Manual - Page 56
, then double-click the Epson CD-ROM icon. 2. Make sure English is selected and click OK. The Software Setup window appears. 3. Click Browse This CD. 4. To install QuickScan, double-click the Quickscn folder, then double-click the Setup.exe icon. Then follow the instructions on the screen. 5. When - Epson 30000 | User Manual - Page 57
ISIS Driver from QuickScan Before you can scan, you must select the GT-30000 as your scanner. To select the scanner: 1. Choose Select Scanner from the File menu. In a few moments, the Scanner Selection dialog appears. 2. Make sure EPSON GT-30000 is selected and click OK. Installing the Software 51 - Epson 30000 | User Manual - Page 58
: 1. If necessary, insert your scanner software CD-ROM in the drive. If you don't see the Select Language screen, double-click My Computer on your desktop, then double-click the Epson CD-ROM icon. 2. Make sure English is selected and click OK. The Software Setup window appears. 3. Click Browse This - Epson 30000 | User Manual - Page 59
as Adobe Photoshop®. To get the best possible scan, keep the document table clean, and make sure the document is flat against the glass surface. Selecting Your Scanner Source Your EPSON GT-30000 scanner comes with two all-purpose drivers, EPSON TWAIN HS and EPSON TWAIN HS Network, as well as the - Epson 30000 | User Manual - Page 60
EPSON TWAIN HS or EPSON TWAIN HS Network, see page 58 and your electronic EPSON GT-30000 Reference Guide. You can also install the ISIS driver and use it as your source. (See the ISIS User's Guide on your GT-30000 ink jet printers, such as the EPSON Stylus® Color series, use a scanning resolution of - Epson 30000 | User Manual - Page 61
colors in your scanned image don't match those in your original document, try experimenting with the Unsharp Mask setting. Click the Destination button on the EPSON TWAIN HS or EPSON TWAIN HS Network main window to display the Destination window EPSON GT-30000 Reference Guide. How to Scan 55 - Epson 30000 | User Manual - Page 62
no cut-out areas. When scanning high-quality color or halftone documents, it's best to open the ADF and scan documents manually. Don't open the ADF while scanning. You'll get an option error and possibly a paper feeding error. Always close the ADF before scanning or using the feeder. 56 How to Scan - Epson 30000 | User Manual - Page 63
face up into the ADF until it meets resistance. Then move the right edge guide so it is flush with the right edge of your document. 3. Continue with the scanning procedure on page 58. Placing a Single Original Document Follow these steps to position a single page: 1. Raise the ADF and place your - Epson 30000 | User Manual - Page 64
. For example, choose Acquire from Presto! PageManager's File menu. The EPSON TWAIN HS main window appears. 3. Choose the Document Source and Image Type. For example, if you're scanning a photograph, select Flatbed as your Document Source and 24-bit Color (Std) as your Image Type. When using the ADF - Epson 30000 | User Manual - Page 65
electronic EPSON GT-30000 Reference Guide for more information about choosing settings. If you need to remove color cast from your image, use the Gray Balance Intensity feature. 6. When you've finished making adjustments, click the Scan button. The READY light on the front of the scanner flickers - Epson 30000 | User Manual - Page 66
your document. This section shows you how to set up the a Start button to launch an application which supports this feature. The a Start button features described in this chapter are only available when you use EPSON TWAIN HS to access a scanner connected to your computer and you are running Windows - Epson 30000 | User Manual - Page 67
to the a Start button. 5. Click OK to close the EPSON GT-30000 Properties window, then click OK again to close the Scanners and Cameras Properties window. Press the scanner's a Start button to have EPSON TWAIN HS started and the document scanned into the assigned application. You can disable the - Epson 30000 | User Manual - Page 68
62 How to Scan - Epson 30000 | User Manual - Page 69
Scanning You can use EPSON Scan Server and EPSON TWAIN HS Network, two applications on your EPSON GT-30000 Scanner Software CD-ROM, to share your scanner with other users in a small workgroup. Your network must have a scanner server (the Windows computer connected to the scanner) and one or more - Epson 30000 | User Manual - Page 70
you're setting up-a scanner server or client computer. EPSON GT-30000 Scanner Server EPSON Scan Server EPSON TWAIN HS* TWAIN-compliant software Network Client Computers EPSON TWAIN HS Network TWAIN-compliant software * If you installed EPSON TWAIN HS on the scanner server so that you could - Epson 30000 | User Manual - Page 71
set up any Windows Me, Windows 2000, Windows 98, Windows 95, or Windows NT 4.0 computer as a scanner server, as long as it has a network interface card installed and is running the TCP/IP protocol. Before you begin, make sure the scanner is unlocked and connected to the scanner server (see Chapter - Epson 30000 | User Manual - Page 72
Installing the Scanner Server Software for Windows Me Before you begin, make sure the GT-30000 is connected to your computer. Also, make sure you've recalibrated your monitor to factory specifications. (See your monitor documentation for instructions.) Depending on how your computer system was - Epson 30000 | User Manual - Page 73
, the wrong driver may be installed. 5. Browse to EPSON\ English\WINME on your CD-ROM drive. (The example to the right uses "E" as the CD-ROM drive letter. Your CD-ROM drive letter may be different.) Click OK to close the Browse window, and then click Next. 6. Follow the instructions on the screen - Epson 30000 | User Manual - Page 74
on Windows Me Before your computer can share its scanner, you must install EPSON Scan Server. At the same time, you can install other software that came with your scanner. Your scanner comes with a multi-user license (6) for Presto! PageManager, an unlimited license for EPSON TWAIN HS Network and - Epson 30000 | User Manual - Page 75
the scanner server software. Only install EPSON TWAIN HS Network if you want to use a GT-30000 connected to another computer. 5. Follow the instructions on the screen to install EPSON Scan Server and any other software you selected in the software selection window. 6. Follow the instructions in - Epson 30000 | User Manual - Page 76
Open the Windows Control Panel and double-click the Scanners and Cameras icon. 2. Double-click the EPSON GT-30000 icon. You see the EPSON GT-30000 Properties window. 3. Click the Utility tab. Make sure Select as default scanner for EPSON Scan Server is checked, and then click OK. 70 Network Scanning - Epson 30000 | User Manual - Page 77
the instructions on the screen to install the best driver, then continue with the scanner server installation. 1. Turn on your scanner first, then turn on your computer. 2. When you see the window on the right, insert the EPSON GT-30000 Scanning Tools CD-ROM in your drive and click Next. Network - Epson 30000 | User Manual - Page 78
, and then click Next. 6. Follow the instructions on the screen to complete the driver installation. If you see a message asking for your Windows 2000 CD-ROM, insert it and click OK (or click Browse and locate the Windows 2000 source files on your hard drive; then click OK). 72 Network Scanning - Epson 30000 | User Manual - Page 79
prompted for the EPSON Scanners Driver Disk 1, reinsert your EPSON GT-30000 Scanning Tools CD-ROM. 8. Click Finish when you see a message that installation is complete. Continue with the instructions in the next section. Finishing the Scanner Server Installation on Windows 2000 Before your computer - Epson 30000 | User Manual - Page 80
the scanner server software. Only install EPSON TWAIN HS Network if you want to use a GT-30000 attached to another computer. 5. Follow the instructions on the screen to install EPSON Scan Server and any other software you selected in the software selection window. 6. Follow the instructions in - Epson 30000 | User Manual - Page 81
open the Scanners and Cameras Properties window. 2. Make sure EPSON GT-30000 is selected, and click the Properties button. You see the EPSON GT-30000 Properties window. 3. Click the Utility tab. Make sure Select as default scanner for EPSON Scan Server is checked, and then click OK. Network Scanning - Epson 30000 | User Manual - Page 82
the Scanner Server Software for Windows 98 Follow the instructions in this section to install your EPSON GT-30000 scanner driver and other software on your scanner software CD-ROM. Before you begin, make sure you recalibrate your monitor to factory specifications. (See your monitor documentation for - Epson 30000 | User Manual - Page 83
time, double-click the Scanners and Cameras icon in your Windows Control Panel to open the Scanners and Cameras Properties window. In the Devices tab, make sure EPSON GT-30000 is selected, and then click the Properties button to display the EPSON GT-30000 Properties window. Click the Utility tab - Epson 30000 | User Manual - Page 84
Continue with the instructions in the next section to install EPSON Scan Server and Acrobat Reader (if necessary). 78 Network Scanning - Epson 30000 | User Manual - Page 85
on Windows 98 Before your computer can share its scanner, you must install EPSON Scan Server. At the same time, you can install other software that came with your scanner. Your scanner comes with a multi-user license (6) for Presto! PageManager, an unlimited license for EPSON TWAIN HS Network and - Epson 30000 | User Manual - Page 86
the scanner server software. Only install EPSON TWAIN HS Network if you want to use a GT-30000 connected to another computer. 5. Follow the instructions on the screen. If you're installing EPSON TWAIN HS Network in order to use a GT-30000 scanner attached to another computer, you'll see a window - Epson 30000 | User Manual - Page 87
EPSON GT-30000 as your default scanner. 1. Open the Windows Control Panel and double-click the Scanners and Cameras icon. You see the Scanners and Cameras Properties window. 2. Select EPSON GT-30000, if necessary, and click the Properties button. You see the EPSON GT-30000 Properties window. Network - Epson 30000 | User Manual - Page 88
3. Click the Utility tab. Make sure Select as default scanner for EPSON Scan Server is checked, and then click OK. 4. Click OK to close the EPSON GT-30000 Properties window. The EPSON GT-30000 remains the default scanner until a different default scanner is selected. 82 Network Scanning - Epson 30000 | User Manual - Page 89
the Scanner Server Software for Windows 95 Follow the instructions in this section to install your EPSON GT-30000 scanner driver and other software on your scanner software CD-ROM. Before you begin, make sure you recalibrate your monitor to factory specifications. (See your monitor documentation for - Epson 30000 | User Manual - Page 90
right shows "G"as the CD-ROM drive. Your CD-ROM drive letter may be different.) 4. When you see the window on the right, click Finish. Then restart your computer. Continue with the instructions in the next section to install EPSON Scan Server and Acrobat Reader (if necessary). 84 Network Scanning - Epson 30000 | User Manual - Page 91
to purchase additional licenses. The ISIS driver and PixTools QuickScan cannot be run over a network. 1. Insert your scanner software CD-ROM if it's not already in your CD-ROM drive. 2. Double-click the My Computer icon on your Windows desktop, then double-click the Epson CD-ROM icon. 3. Make sure - Epson 30000 | User Manual - Page 92
HS to scan from the EPSON GT-30000 connected to your computer. Only install EPSON TWAIN HS Network if you want to access a GT-30000 scanner connected to another computer. 6. If you're installing EPSON TWAIN HS, follow the instructions on the screen. When you see the window on the right, make sure - Epson 30000 | User Manual - Page 93
calibrates the preview image you see in your EPSON TWAIN HS driver to match your monitor settings. 9. Follow the instructions on the screen to install EPSON Scan Server. When you see the window on the right, make sure GT-30000 is selected under Scanner Selection. Select either Icon or Dialogbox as - Epson 30000 | User Manual - Page 94
to purchase additional licenses. The ISIS driver and PixTools QuickScan cannot be run over a network. 1. Insert your scanner software CD-ROM if it's not already in your CD-ROM drive. 2. Double-click the My Computer icon on your Windows desktop, then double-click the Epson CD-ROM icon. 3. Make sure - Epson 30000 | User Manual - Page 95
TWAIN HS, follow the instructions on the screen. When you see the window on the right, make sure SCSI and GT-30000 are selected under Scanner Selection. If you're installing EPSON TWAIN HS Network in order to use a GT-30000 scanner attached to another computer, you'll see a window that asks for the - Epson 30000 | User Manual - Page 96
calibrates the preview image you see in your EPSON TWAIN HS driver to match your monitor settings. 9. Follow the instructions on the screen to install EPSON Scan Server. When you see the window on the right, make sure GT-30000 is selected under Scanner Selection. Select either Icon or Dialogbox as - Epson 30000 | User Manual - Page 97
on the taskbar and click Taskbar Icon to deselect it. Your setting takes effect when you exit and restart EPSON Scan Server. See page 97 for instructions on starting EPSON Scan Server. Make sure no client computer is accessing the scanner server when you exit EPSON Scan Server. Network Scanning 91 - Epson 30000 | User Manual - Page 98
manufacturer to purchase additional licenses. The ISIS driver and PixTools QuickScan cannot be run over a network. 1. Insert the EPSON GT-30000 Scanner Software CD-ROM in the CD-ROM drive. If the Select Language window doesn't appear, double-click the My Computer icon on your desktop, and then - Epson 30000 | User Manual - Page 99
or the GT-30000 Registration (as shown), click the application to clear the check mark. Then click OK. If you're installing the scanner software on Windows 95 or Windows NT, click EPSON TWAIN HS to deselect it. EPSON TWAIN HS only works if the scanner is connected to your computer. Network Scanning - Epson 30000 | User Manual - Page 100
. Then click OK to save your settings. If you need to connect to a different GT-30000 scanner or change the timeout setting, you can open the EPSON TWAIN HS Network window any time by double-clicking the EPSON TWAIN HS Network icon in the Control Panel. You can enter up to five IP addresses or host - Epson 30000 | User Manual - Page 101
the EPSON HS Network window. Then click the Screen Calibration Utility button at the bottom of the window. 8. Follow the instructions on the screen to complete installation of any other software you've selected in the EPSON Software Setup window. 9. If you want to install the ISIS driver, PixTools - Epson 30000 | User Manual - Page 102
server. Only one client computer can access the scanner server at a time. (See "Starting EPSON TWAIN HS Network" on page 98 for instructions.) s Choose your settings, then place your document on the scanner or in the automatic document feeder. (See Chapter 3, "How to Scan," for more information - Epson 30000 | User Manual - Page 103
starts automatically whenever the scanner server is turned on. When EPSON Scan Server is running, you'll see either the EPSON Scan Server dialog box, or the EPSON Scan Server icon on the Windows taskbar. If you need to start EPSON Scan Server manually, click Start, Programs, EPSON Scan Server, and - Epson 30000 | User Manual - Page 104
the settings and controls for EPSON TWAIN HS Network are the same as those for EPSON TWAIN HS, see "Step-by-Step Scanning Instructions" on page 56 for scanning instructions. For more detailed information about the settings, see the EPSON GT-30000 Reference Guide on your scanner software CD-ROM. 98 - Epson 30000 | User Manual - Page 105
application, make your scan settings, and click the Scan button on the EPSON TWAIN HS Network main window. The scanned image is imported into your host application's window. s You can press the a Start button on the scanner to send the scanned image to the client computer that is currently connected - Epson 30000 | User Manual - Page 106
the Cancel button at the bottom of the EPSON Scan Server dialog box. s To break the connection between the client computer and the scanner server, click the Stop button on the EPSON Scan Server dialog box. This closes EPSON TWAIN HS Network on the client computer and allows other client computers - Epson 30000 | User Manual - Page 107
transport your scanner safely. Cleaning the Scanner To keep your scanner operating at its best, you should clean it periodically. Before cleaning, unplug the power cord. Then clean the outer case using a soft cloth with mild detergent dissolved in water. If the document table glass gets dirty, clean - Epson 30000 | User Manual - Page 108
or becomes too dim to operate normally, the scanner stops working and both the READY and ERROR lights flash. If this happens, the lamp assembly may need to be replaced. Contact EPSON. (See "Where To Get Help" on page 118.) Never open the case of the scanner. If you think repairs or adjustments are - Epson 30000 | User Manual - Page 109
also describes how to uninstall your software (if necessary), fix problems with the automatic document feeder, and get help from EPSON and other software manufacturers. For additional troubleshooting tips, see your electronic EPSON GT-30000 Reference Guide. Scanner Lights The tables below explain - Epson 30000 | User Manual - Page 110
lock is released, and then turn the scanner off and on again. If this doesn't solve the problem, call your EPSON dealer. Option error: There's a problem with an installed option. Check to make sure the automatic document feeder is flat against the document table. Check that your option is securely - Epson 30000 | User Manual - Page 111
. For additional software troubleshooting tips, see your electronic EPSON GT-30000 Reference Guide. Setup Problems Your system doesn't recognize the scanner or EPSON TWAIN HS (or EPSON TWAIN HS Network) doesn't appear in the list where you select your scanner. s Check your cable connections. If - Epson 30000 | User Manual - Page 112
server. If it is, make sure the router for the scanner server is configured to allow traffic from your network. s Uninstall and reinstall your software. See the instructions for uninstalling software beginning on page 114. Scanner Problems The READY light doesn't come on or flashes. s Check the - Epson 30000 | User Manual - Page 113
need to upgrade your RAM. s If you're using a network scanner, the scanner may have timed out. Check the time out setting on the EPSON TWAIN HS Network window and increase the value, if necessary. You're using the automatic document feeder. s Make sure the unit is correctly installed and connected - Epson 30000 | User Manual - Page 114
, see your computer manual. s If you have more than one scanner connected to your computer, make sure the GT-30000 is selected as your default scanner. For Windows Me, Windows 2000, or Windows 98, check the Utility tab on the GT-30000 Properties window. For Windows 95 or NT, check the EPSON TWAIN HS - Epson 30000 | User Manual - Page 115
sure the network interface card is installed correctly in both the scanner server and the client computer. s Make sure both the scanner server and client computer are running the TCP/IP protocol. s If more than one scanner is connected to the scanner server, make sure the GT-30000 is selected as - Epson 30000 | User Manual - Page 116
only part of the image. 110 Solving Problems Your scanned image is faint or has gaps. s Check the brightness. Decrease the software or driver's brightness setting. s Try adjusting the Gamma and Exposure settings in the Image Controls window. s Check the condition of your original. If the document - Epson 30000 | User Manual - Page 117
or distorted. s Check the position and condition of your document. Make sure the document is placed flat against the scanner's document table glass. If only part of the image is blurred, part of your document may be wrinkled or warped. s Make sure the document table glass is clean. s Make sure the - Epson 30000 | User Manual - Page 118
the Unsharp Mask setting. Check or uncheck the Unsharp Mask box in the EPSON TWAIN HS main window. s Try different combinations of gamma and color settings in your scanner software. s If you're using the automatic document feeder, make sure it's closed when scanning. The printed image is larger or - Epson 30000 | User Manual - Page 119
re using the correct cable. s Make sure the correct printer is selected in your printer software. OCR scanning produces poor character recognition. s Make sure your document is properly aligned on the flatbed. s Adjust the Threshold setting in the Image Controls window. s Increase the resolution to - Epson 30000 | User Manual - Page 120
Devices tab, select EPSON GT-30000. 3. Click the Remove button. Then click OK to close the window. 4. Restart your computer. Windows 95 and Windows NT 1. Click Start, then click Programs, EPSON Scanner, EPSON TWAIN HS Uninstall. 2. When you're finished, restart your computer. 114 Solving Problems - Epson 30000 | User Manual - Page 121
Programs, EPSON Network Scanner, EPSON TWAIN HS Network Uninstall. 2. When you're finished, restart your computer. Uninstalling EPSON Scan Server 1. Click Start, Programs, EPSON Scan Server, and select EPSON Scan Server Uninstall. 2. When you're finished, restart your computer. Solving Problems 115 - Epson 30000 | User Manual - Page 122
Solving Problems with the Automatic Document Feeder This section gives you instructions for fixing paper jams and adjusting the scanning position for the automatic document feeder (ADF). Fixing Paper Jams 1. First open the ADF cover to determine where the paper jam occurred. 2. If paper is jammed - Epson 30000 | User Manual - Page 123
more difficult to remove.) 4. If the paper tears, open the middle cover and remove the paper. Changing the Document Feed Speed When you scan using the automatic document feeder, you can select a document feed speed of Low and High. Under normal conditions, use High the high speed mode. If you want - Epson 30000 | User Manual - Page 124
telephone services listed in the following table: Service World Wide Web Automated Telephone Services Access From the Internet, you can reach EPSON Support at http://support.epson.com. At this site, you can download drivers and other files, look at product documentation, access troubleshooting - Epson 30000 | User Manual - Page 125
Software Technical Support Software EPSON TWAIN HS PixTools QuickScan ISIS Driver NewSoft Presto! PageManager Telephone (562) 276-4382 (800) 922-8911 (408) 325-3800 (510) 445-8616 Fax (800) 922-8911 fax-on-demand system (408) 232-9292 (510) 445-8601 Online and E-mail http://support.epson.com www - Epson 30000 | User Manual - Page 126
120 Solving Problems - Epson 30000 | User Manual - Page 127
the TCP/IP Protocol To use your EPSON GT-30000 as a network scanner, your client computers and scanner server must have a network interface card, a network interface card driver, and the TCP/IP protocol installed. In addition, both the client computers and the scanner server must have an IP address - Epson 30000 | User Manual - Page 128
Windows Me and Windows 2000 When running Windows Me or Windows 2000, your TCP/IP protocol should automatically be set correctly for the station it is installed on if you are not running a DHCP server. To check the protocol, follow these steps. 1. Open the Control Panel and double-click the Network - Epson 30000 | User Manual - Page 129
click OK. (If you need to manually assign an IP address, contact your Network Administrator.) 5. Click OK to close the window on the right. 2. Check that TCP/IP appears in the list of installed network components. If it appears in the list, go to "Assigning an IP Address for Windows 95 and Windows - Epson 30000 | User Manual - Page 130
Select Microsoft from the Manufacturers list, and TCP/IP from the Network Protocols list. Then click OK. 6. Continue with the instructions in the next section to assign an IP address. Assigning an IP Address for Windows 95 and Windows 98 (First Release) If your network is connected to the Internet - Epson 30000 | User Manual - Page 131
. 1. Select TCP/IP on the list of installed network components, and then click the Properties button If you're using a DHCP server on your network, you can assign an IP address automatically by selecting the TCP/IP Properties window, then click OK again to close the Network window and have your IP - Epson 30000 | User Manual - Page 132
, click the Protocols tab. 2. Check that TCP/IP Protocol appears in the list of network protocols. If it appears in the list, go to "Assigning an IP Address on Windows NT 4.0" on page 127. If you don't see TCP/IP Protocol in the list, continue with the next step. 3. Click the Add button. You see - Epson 30000 | User Manual - Page 133
If you are running a mixed Windows 95, Windows 98, Windows Me, Windows 2000 and Windows NT environment, you can use an IP address in the range of 169.254.XXX.XXX. If you use IP addresses in the ranges listed above, you need to change them before you connect the network to the Internet. Otherwise you - Epson 30000 | User Manual - Page 134
128 Installing the TCP/IP Protocol - Epson 30000 | User Manual - Page 135
Appendix B Specifications General Scanner type Flatbed, color Photoelectric device Color CCD line sensor Effective pixels 7020 × 10200 pixels at 600 dpi, 100% scaling Color depth 36-bit internal/24-bit external Grayscale depth 12-bit internal/8-bit external Maximum document size 11.7 × 17.0 inches - Epson 30000 | User Manual - Page 136
downloadable dither patterns) Gamma correction 2 types for CRT display 3 types for printer 1 type user-defined Color correction 1 type for CRT display 3 types for printer (available in color byte sequence mode and color UL 1950 CSA C22.2 No. 950 EMC FCC part 15 subpart B class B CSA C108.8 class - Epson 30000 | User Manual - Page 137
140 °F (−25 to 60 °C) Humidity (without condensation) Operating: 10 to 80% Standby: 10 to 85% Option Interface Connector Interface type For use with the automatic document feeder (B813212) Output voltage 21.6 to 26.4 VDC 4.75 to 5.25 VDC Output current 0.6 A (24 V) 0.3 A (5 V) Specifications 131 - Epson 30000 | User Manual - Page 138
Automatic Document Feeder (B813212) General Paper input/output Load face up; eject face down Paper quantity 100 pages (80 g/m2 paper, maximum total (10 to 32 °C) Standby: −4 to 140 °F (−20 to 60 °C) Humidity (without condensation) Operating: 20 to 80% Standby: 95% or less 132 Specifications - Epson 30000 | User Manual - Page 139
s VGA color monitor with 640 × 480 resolution (a color monitor with a resolution of 800 × 600 or higher recommended) s 8-bit, 256-color display adapter card (24-bit display adapter card with millions of colors recommended) s Existing network with TCP/IP support for GT-30000 network scanning 133 - Epson 30000 | User Manual - Page 140
instructions marked on the scanner. s Unplug the scanner before cleaning. Clean with a damp cloth only. Do not spill liquid on the scanner. s Do not place the scanner Do not attempt to service the scanner yourself. s Unplug the scanner and refer servicing to qualified service personnel under the - Epson 30000 | User Manual - Page 141
conditions: (1) this device may not cause harmful interference, and (2) this device must accept any interference received, including interference that may cause undesired operation. Trade Name: EPSON Type of Product: Image Scanner Model: G830A Product: EPSON GT-30000 Notices 135 - Epson 30000 | User Manual - Page 142
a Class B digital device, pursuant to Part 15 of the FCC Rules. These limits are not installed and used in accordance with the instructions, may cause harmful interference to radio or The connection of a non-shielded equipment interface cable to this equipment will invalidate the FCC Certification - Epson 30000 | User Manual - Page 143
a refurbished product, like-new components and parts which perform like new and meet the EPSON standard of quality. For warranty service, you must provide proof of the date of original purchase. What EPSON Will Do To Correct Problems: Should your EPSON product prove defective during the warranty - Epson 30000 | User Manual - Page 144
such as fire, flood, and lightning, improper electrical current, software problems, interaction with non-EPSON products, or service other than by an EPSON Authorized Servicer. If a claimed defect cannot be identified or reproduced in service, you will be held responsible for costs incurred. THE - Epson 30000 | User Manual - Page 145
the PDF manuals, 7 Auto Exposure button, 59 Auto Locate button, 59 Automatic document feeder document feed speed, 117 installing, 14 to 15 paper jams, fixing, 116 to 117 problems, 109 specifications, 132 using, 56 to 57 B Batch scanning, 55 Blurred image, 111 C Cable length, 17 Cleaning the scanner - Epson 30000 | User Manual - Page 146
Fluorescent lamp, replacing, 102 H Help EPSON, 118 to 119 software, 119 Highlight setting, 59 Home position, 102 I IEEE 1394 connecting the scanner, 21 to 22 specifications, 131 Image quality problems, 110 to 113 Installing automatic document feeder, 14 to 15 TCP/IP on a network, 121 to 127 Windows - Epson 30000 | User Manual - Page 147
, 131 select switch, 19 terminator switch, SCSI, 18 Service, 118 to 119 Setup problems, 105 to 106 Shadow setting, 59 Software problems, 108 to 109 settings, 59 uninstalling, 114 to 115 Specifications automatic document feeder, 132 IEEE 1394, 131 scanner, 129 to 131 SCSI, 131 Start button assigning - Epson 30000 | User Manual - Page 148
Troubleshooting automatic document feeder, 109, 116 image quality, 110 to 113 scanner, 106 to 107 setup, 105 to 106 software, 108 to 109 testing the scanner, 16, 28, 34, 39 U Uninstalling software, 114 to 115 Unlocking scanner, 13 Unpacking scanner, 10 to 11 W Warranty, 137 Windows 2000 scanner
-
 1
1 -
 2
2 -
 3
3 -
 4
4 -
 5
5 -
 6
6 -
 7
7 -
8
-
9
-
10
-
11
-
12
-
13
-
14
-
15
-
16
-
17
-
18
-
19
-
20
-
21
-
22
-
23
-
24
-
25
-
26
-
27
-
28
-
29
-
30
-
31
-
32
-
33
-
34
-
35
-
36
-
37
-
38
-
39
-
40
-
41
-
42
-
43
-
44
-
45
-
46
-
47
-
48
-
49
-
50
-
51
-
52
-
53
-
54
-
55
-
56
-
57
-
58
-
59
-
60
-
61
-
62
-
63
-
64
-
65
-
66
-
67
-
68
-
69
-
70
-
71
-
72
-
73
-
74
-
75
-
76
-
77
-
78
-
79
-
80
-
81
-
82
-
83
-
84
-
85
-
86
-
87
-
88
-
89
-
90
-
91
-
92
-
93
-
94
-
95
-
96
-
97
-
98
-
99
-
100
-
101
-
102
-
103
-
104
-
105
-
106
-
107
-
108
-
109
-
110
-
111
-
112
-
113
-
114
-
115
-
116
-
117
-
118
-
119
-
120
-
121
-
122
-
123
-
124
-
125
-
126
-
127
-
128
-
129
-
130
-
131
-
132
-
133
-
134
-
135
-
136
-
137
-
138
-
139
-
140
-
141
-
142
-
143
-
144
-
145
-
146
-
147
-
148
 |
 |

Color Scanner
User’s Guide