Epson PictureMate User's Guide - Page 106
Macintosh OS X 10.2.x - 10.3.x
 |
UPC - 010343849952
View all Epson PictureMate manuals
Add to My Manuals
Save this manual to your list of manuals |
Page 106 highlights
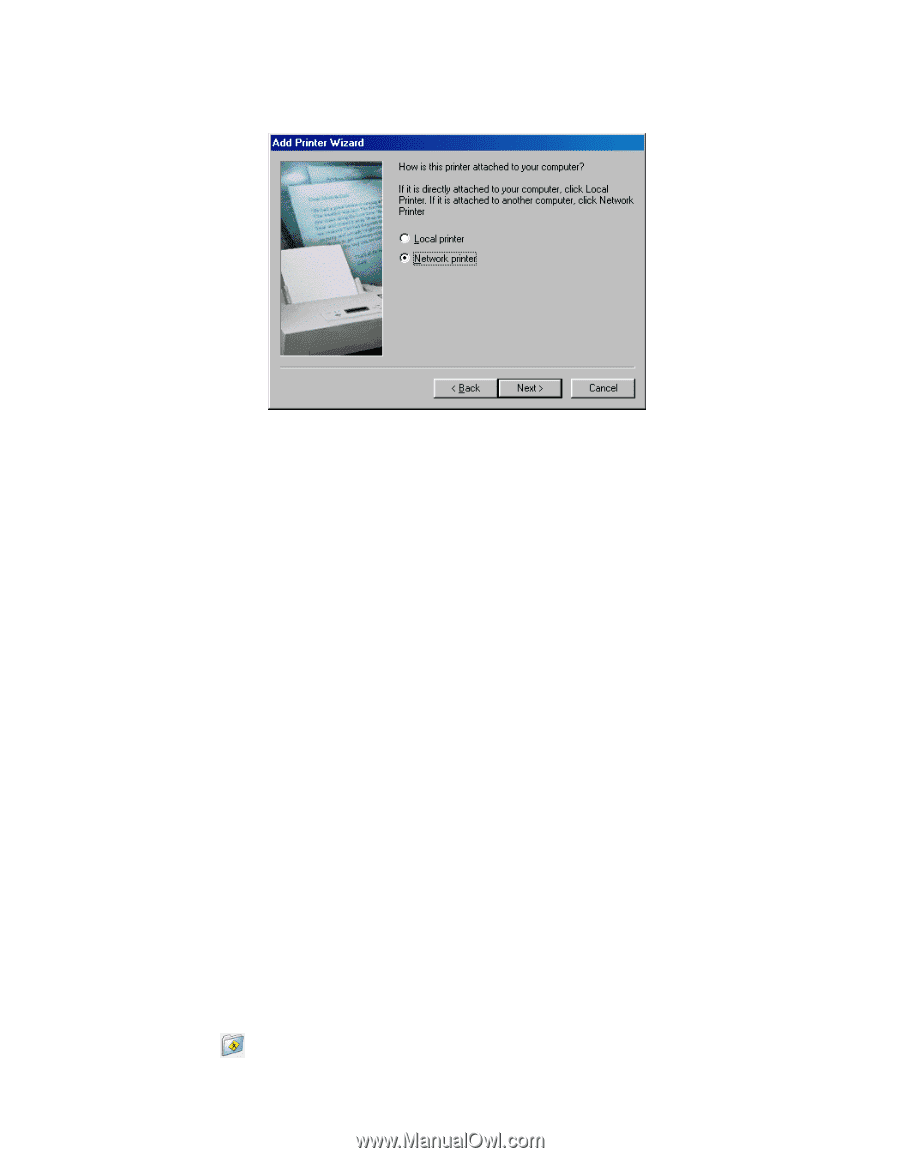
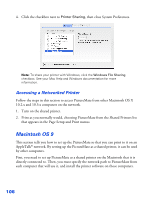
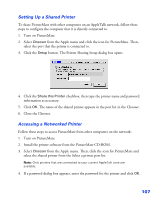
4. Select Network printer, then click Next. 5. On the next screen, click Browse. 6. Double-click the icon of the computer that PictureMate is directly connected to. Then, click the icon for PictureMate. 7. Click OK and follow the on-screen instructions. Macintosh OS X 10.2.x - 10.3.x This section tells you how to set up PictureMate so that you can print to it on a network. By setting up PictureMate as a shared printer, it can be used by other computers. First, you need to set up PictureMate as a shared printer on the Macintosh that it is directly connected to. Then, you must choose the shared PictureMate in the Page Setup and Print menus when you print your photos. Setting Up a Shared Printer To share PictureMate with other Mac OS X 10.2.x - 10.3.x computers on a network, follow these steps to configure the computer that it is directly connected to: 1. Turn on PictureMate. 2. Select System Preferences from the dock at the bottom of the screen. 3. Click the Sharing icon. 105
-
 1
1 -
2
-
3
-
4
-
5
-
6
-
7
-
8
-
9
-
10
-
11
-
12
-
13
-
14
-
15
-
16
-
17
-
18
-
19
-
20
-
21
-
22
-
23
-
24
-
25
-
26
-
27
-
28
-
29
-
30
-
31
-
32
-
33
-
34
-
35
-
36
-
37
-
38
-
39
-
40
-
41
-
42
-
43
-
44
-
45
-
46
-
47
-
48
-
49
-
50
-
51
-
52
-
53
-
54
-
55
-
56
-
57
-
58
-
59
-
60
-
61
-
62
-
63
-
64
-
65
-
66
-
67
-
68
-
69
-
70
-
71
-
72
-
73
-
74
-
75
-
76
-
77
-
78
-
79
-
80
-
81
-
82
-
83
-
84
-
85
-
86
-
87
-
88
-
89
-
90
-
91
-
92
-
93
-
94
-
95
-
96
-
97
-
98
-
99
-
100
-
 101
101 -
 102
102 -
 103
103 -
 104
104 -
 105
105 -
 106
106 -
 107
107 -
 108
108 -
 109
109 -
 110
110 -
 111
111 -
112
-
113
-
114
-
115
-
116
-
117
-
118
-
119
-
120
-
121
-
122
-
123
-
124
-
125
-
126
 |
 |