Epson PictureMate User's Guide - Page 50
Printing Photos in Black and White or Sepia
 |
UPC - 010343849952
View all Epson PictureMate manuals
Add to My Manuals
Save this manual to your list of manuals |
Page 50 highlights
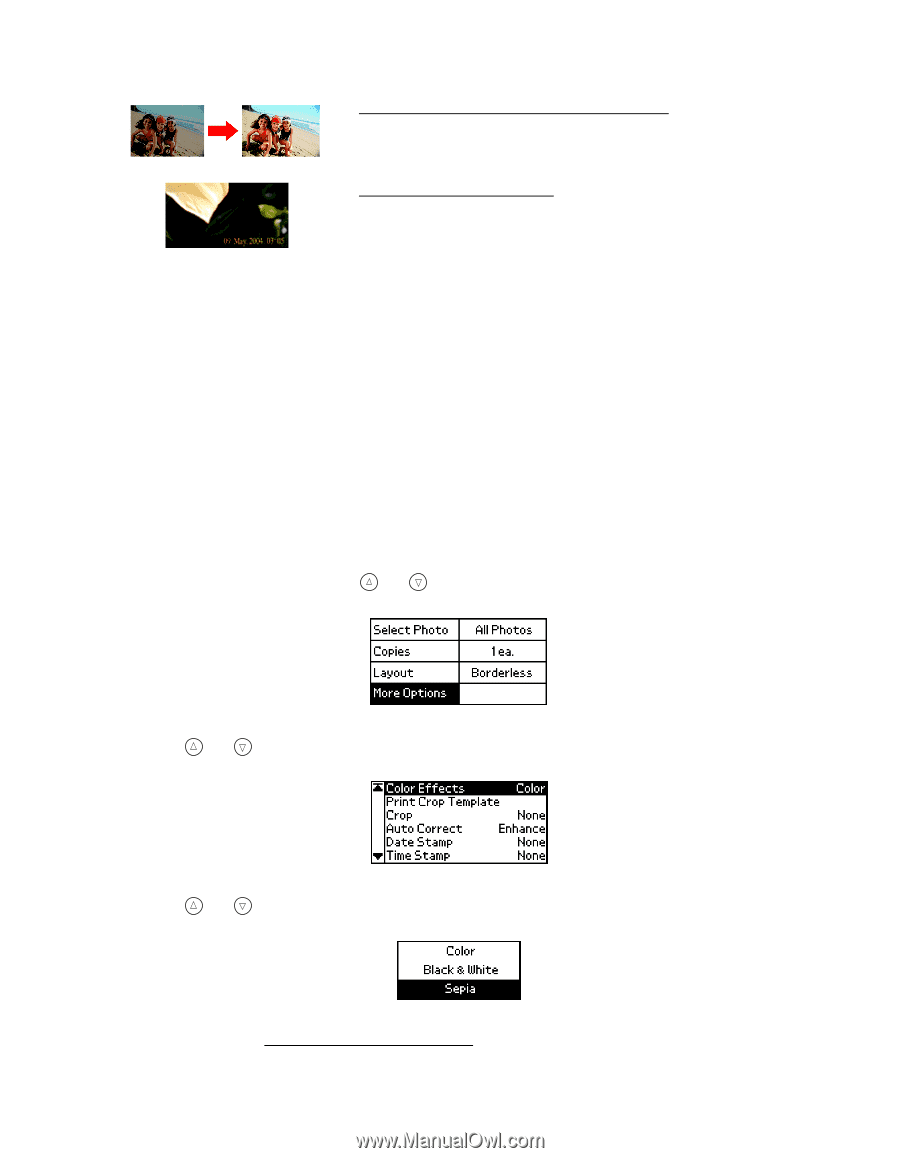
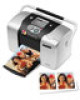
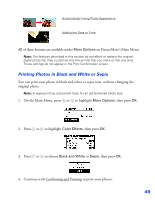
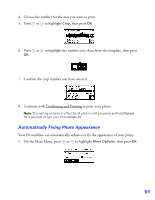
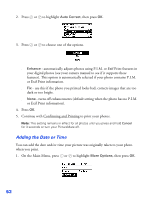
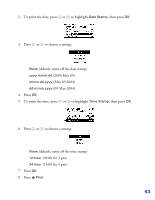
Automatically Fixing Photo Appearance Adding the Date or Time All of these features are available under More Options on PictureMate's Main Menu. Note: The features described in this section do not affect or replace the original digital photo file; they customize only the print(s) that you make at that one time. These settings do not appear in the Print Confirmation screen. Printing Photos in Black and White or Sepia You can print your photo in black and white or sepia tone, without changing the original photo. Note: A sepia print has a brownish tone, for an old-fashioned photo look. 1. On the Main Menu, press or to highlight More Options, then press OK. 2. Press or to highlight Color Effects, then press OK. 3. Press or to choose Black and White or Sepia, then press OK. 4. Continue with Confirming and Printing to print your photos. 49
-
 1
1 -
2
-
3
-
4
-
5
-
6
-
7
-
8
-
9
-
10
-
11
-
12
-
13
-
14
-
15
-
16
-
17
-
18
-
19
-
20
-
21
-
22
-
23
-
24
-
25
-
26
-
27
-
28
-
29
-
30
-
31
-
32
-
33
-
34
-
35
-
36
-
37
-
38
-
39
-
40
-
41
-
42
-
43
-
44
-
 45
45 -
 46
46 -
 47
47 -
 48
48 -
 49
49 -
 50
50 -
 51
51 -
 52
52 -
 53
53 -
 54
54 -
 55
55 -
56
-
57
-
58
-
59
-
60
-
61
-
62
-
63
-
64
-
65
-
66
-
67
-
68
-
69
-
70
-
71
-
72
-
73
-
74
-
75
-
76
-
77
-
78
-
79
-
80
-
81
-
82
-
83
-
84
-
85
-
86
-
87
-
88
-
89
-
90
-
91
-
92
-
93
-
94
-
95
-
96
-
97
-
98
-
99
-
100
-
101
-
102
-
103
-
104
-
105
-
106
-
107
-
108
-
109
-
110
-
111
-
112
-
113
-
114
-
115
-
116
-
117
-
118
-
119
-
120
-
121
-
122
-
123
-
124
-
125
-
126
 |
 |