HP Integrity rx2800 Installation Guide - Page 53
Security Access Settings, Accessing the Host Console
 |
View all HP Integrity rx2800 manuals
Add to My Manuals
Save this manual to your list of manuals |
Page 53 highlights
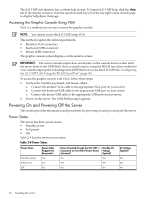
Security Access Settings CAUTION: When DHCP is enabled, the system is vulnerable to security risks because anyone can access the iLO 3 MP until you change the default user name and password. HP strongly recommends you assign user groups and rights before proceeding. Determine the security access required and user accounts and privileges needed. The iLO 3 MP provides options to control user access. Select one of the following options to prevent unauthorized access to the iLO 3 MP: • Change the default user name and password. See "Modifying User Accounts and Default Password" (page 52). • Create local accounts. You can store up to 19 user names and passwords to manage iLO 3 MP access. This is ideal for small environments such as labs and small-to-medium sized businesses. • Use directory services. Use the corporate directory to manage iLO 3 MP user access. This is ideal for environments with a large number of frequently changing users. If you plan to use directory services, HP recommends leaving at least one local account enabled as an alternate method of access. Accessing the Host Console This section describes the different ways to access the host console of the server. Accessing the Host Console With the TUI - CO Command This section describes the steps to access the host console using the text user interface (TUI). To access the host console through the iLO 3 MP, follow these steps: 1. Log in using your user account name and password at the login page. 2. At the iLO 3 MP login MP> prompt, enter the CO command to switch the console terminal from the MP Main Menu to mirrored/redirected console mode. All mirrored data displays. 3. To return to the iLO 3 MP command interface, enter Ctrl-B or Esc and + and press Enter. Interacting with the iLO 3 MP Using the Web GUI Web browser access is an embedded feature of the iLO 3 MP. The iLO 3 MP has a separate LAN port from the system LAN port. It requires a separate LAN drop, IP address, and networking information from that of the port used by the operating system. IMPORTANT: Make sure you use the MAC address to the iLO 3 MP LAN, and not the MAC address to the server core LAN. Before starting this procedure, you must have the following information: • IP address for the iLO 3 MP LAN • Host name (used when messages are logged or printed) To interact with the iLO 3 MP through the web GUI, follow these steps: 1. Open a web browser and enter the host name or the IP address for the iLO 3 MP. 2. Log in using your user account name and password at the web login page. 3. Click Sign In. The Status Summary page appears after login. 4. Select the web interface functions by clicking the Function tabs at the top of the page. Each function lists options in the Navigation Bar on the left side of the page. 5. Click an option link to display data in the display screen. 6. Click Refresh to update the display. Accessing the Host Console 53
-
 1
1 -
2
-
3
-
4
-
5
-
6
-
7
-
8
-
9
-
10
-
11
-
12
-
13
-
14
-
15
-
16
-
17
-
18
-
19
-
20
-
21
-
22
-
23
-
24
-
25
-
26
-
27
-
28
-
29
-
30
-
31
-
32
-
33
-
34
-
35
-
36
-
37
-
38
-
39
-
40
-
41
-
42
-
43
-
44
-
45
-
46
-
47
-
 48
48 -
 49
49 -
 50
50 -
 51
51 -
 52
52 -
 53
53 -
 54
54 -
 55
55 -
 56
56 -
 57
57 -
 58
58 -
59
-
60
-
61
-
62
-
63
-
64
-
65
-
66
-
67
-
68
-
69
 |
 |