HP Photosmart A640 User Guide - Page 36
Add frames, Add captions, View and Print - windows 7
 |
View all HP Photosmart A640 manuals
Add to My Manuals
Save this manual to your list of manuals |
Page 36 highlights
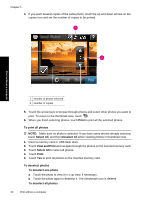
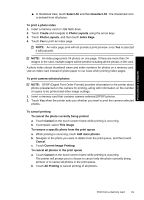
Chapter 5 For more information on specific creative options, refer to the sections below. • Add frames • Add captions • Draw on photos • Add clip art • Use Design Gallery • Specialty printing projects Add frames The Frames creative option lets you add a frame to the current photo. You can select from several categories, including: Seasons, Kids, Daily Life, and Special Events. Each frame has a landscape and portrait version. Print without a computer To use the Frames creative option 1. Insert a memory card or USB flash drive. 2. Touch View and Print on the Photosmart menu. 3. Navigate to the photo you wish to edit, and then touch Effect when viewing a photo in 1-up view. 4. Touch the Frames creative option. Use the onscreen arrows to navigate to this option if it is not visible. 5. Touch the desired category to view the frames available in that category. Touch to return to the main Frames window to select a different category. 6. Touch the desired frame. 7. Adjust the photo by using the Zoom buttons. You can move the photo around within the frame with the stylus or rotate it by touching the Rotate button. 8. When you are finished, touch Done. 9. To save your creative project, touch Save to Card. NOTE: If you choose Continue without Saving, you can later delete the frame from the photo by touching the Effect button in 1-up view and then touching Remove Frame. Follow the prompts on the touch screen. Once you remove the memory card or turn off the printer, the frame(s) are deleted, unless you chose to save them to the card. Add captions The Caption creative option lets you add text (24 characters maximum) to the current photo by using a touch screen keyboard. You can select from five fonts and twenty colors 34 Print without a computer
-
 1
1 -
2
-
3
-
4
-
5
-
6
-
7
-
8
-
9
-
10
-
11
-
12
-
13
-
14
-
15
-
16
-
17
-
18
-
19
-
20
-
21
-
22
-
23
-
24
-
25
-
26
-
27
-
28
-
29
-
30
-
 31
31 -
 32
32 -
 33
33 -
 34
34 -
 35
35 -
 36
36 -
 37
37 -
 38
38 -
 39
39 -
 40
40 -
 41
41 -
42
-
43
-
44
-
45
-
46
-
47
-
48
-
49
-
50
-
51
-
52
-
53
-
54
-
55
-
56
-
57
-
58
-
59
-
60
-
61
-
62
-
63
-
64
-
65
-
66
-
67
-
68
-
69
-
70
-
71
-
72
-
73
-
74
-
75
-
76
-
77
-
78
-
79
-
80
-
81
-
82
-
83
-
84
-
85
-
86
-
87
-
88
-
89
-
90
-
91
-
92
-
93
-
94
-
95
-
96
 |
 |
