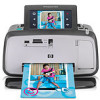
HP Photosmart A640 User Guide - Page 49
Create and view slide shows, When the photo you want to print is displayed
 |
View all HP Photosmart A640 manuals
Add to My Manuals
Save this manual to your list of manuals |
Page 49 highlights
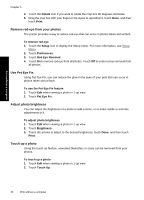
3. Use the Zoom button to see more details and to position the selection box precisely over the blemished area. Using the stylus or your finger, move the selection box over the area of the photo you want to touch up. Touch Fix. 4. Touch Done, and then touch Print. Touched-up photos cannot be saved. Print as many copies of the touched-up photo as you need before turning off the printer or removing the memory card. Create and view slide shows Play your favorite photos as a slide show on the printer touch screen. It is a fun and convenient way to share your photos with family and friends. You can also print all or just some of the photos in the slide show as you view it. To view photos in a slideshow 1. Insert a memory card. 2. Touch Slideshow on the Photosmart menu. • Touch Select Photos to select a few photos for the slideshow. Touch Done to start the slideshow. • Touch Use all photos to view a slideshow of all images on the memory card. 3. Touch anywhere on the touch screen to pause the slideshow. Touch Resume to continue the slideshow. To change slideshow settings, touch the Settings icon before touching Slideshow. 4. Touch Home to stop the slideshow. To print from a slideshow 1. When the photo you want to print is displayed, touch anywhere on the touch screen to pause the slideshow. 2. Touch Print to print the photo. The slideshow resumes after printing. Print without a computer Create and view slide shows 47
-
 1
1 -
2
-
3
-
4
-
5
-
6
-
7
-
8
-
9
-
10
-
11
-
12
-
13
-
14
-
15
-
16
-
17
-
18
-
19
-
20
-
21
-
22
-
23
-
24
-
25
-
26
-
27
-
28
-
29
-
30
-
31
-
32
-
33
-
34
-
35
-
36
-
37
-
38
-
39
-
40
-
41
-
42
-
43
-
 44
44 -
 45
45 -
 46
46 -
 47
47 -
 48
48 -
 49
49 -
 50
50 -
 51
51 -
 52
52 -
 53
53 -
 54
54 -
55
-
56
-
57
-
58
-
59
-
60
-
61
-
62
-
63
-
64
-
65
-
66
-
67
-
68
-
69
-
70
-
71
-
72
-
73
-
74
-
75
-
76
-
77
-
78
-
79
-
80
-
81
-
82
-
83
-
84
-
85
-
86
-
87
-
88
-
89
-
90
-
91
-
92
-
93
-
94
-
95
-
96
 |
 |
