HP Photosmart A640 User Guide - Page 61
Maintenance, Align the print cartridge, Clean the print cartridge automatically - manual
 |
View all HP Photosmart A640 manuals
Add to My Manuals
Save this manual to your list of manuals |
Page 61 highlights
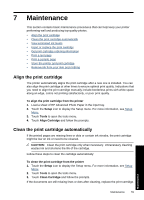
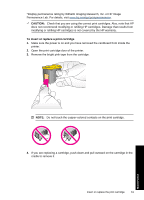
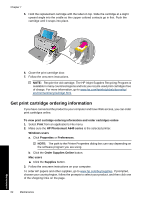
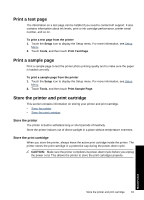
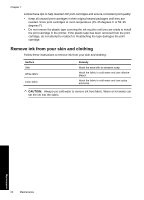
7 Maintenance This section contains basic maintenance procedures that can help keep your printer performing well and producing top-quality photos. • Align the print cartridge • Clean the print cartridge automatically • View estimated ink levels • Insert or replace the print cartridge • Get print cartridge ordering information • Print a test page • Print a sample page • Store the printer and print cartridge • Remove ink from your skin and clothing Align the print cartridge The printer automatically aligns the print cartridge after a new one is installed. You can also align the print cartridge at other times to ensure optimal print quality. Indications that you need to align the print cartridge manually include borderless prints with white space along an edge, colors not printing satisfactorily, or poor print quality. To align the print cartridge from the printer 1. Load a sheet of HP Advanced Photo Paper in the input tray. 2. Touch the Setup icon to display the Setup menu. For more information, see Setup Menu. 3. Touch Tools to open the tools menu. 4. Touch Align Cartridge and follow the prompts. Clean the print cartridge automatically If the printed pages are missing lines or dots or contain ink streaks, the print cartridge might be low on ink or need to be cleaned. CAUTION: Clean the print cartridge only when necessary. Unnecessary cleaning wastes ink and shortens the life of the cartridge. Follow these steps to clean the cartridge automatically: To clean the print cartridge from the printer 1. Touch the Setup icon to display the Setup menu. For more information, see Setup Menu. 2. Touch Tools to open the tools menu. 3. Touch Clean Cartridge and follow the prompts. If the documents are still missing lines or dots after cleaning, replace the print cartridge. Maintenance Maintenance 59
-
 1
1 -
2
-
3
-
4
-
5
-
6
-
7
-
8
-
9
-
10
-
11
-
12
-
13
-
14
-
15
-
16
-
17
-
18
-
19
-
20
-
21
-
22
-
23
-
24
-
25
-
26
-
27
-
28
-
29
-
30
-
31
-
32
-
33
-
34
-
35
-
36
-
37
-
38
-
39
-
40
-
41
-
42
-
43
-
44
-
45
-
46
-
47
-
48
-
49
-
50
-
51
-
52
-
53
-
54
-
55
-
 56
56 -
 57
57 -
 58
58 -
 59
59 -
 60
60 -
 61
61 -
 62
62 -
 63
63 -
 64
64 -
 65
65 -
 66
66 -
67
-
68
-
69
-
70
-
71
-
72
-
73
-
74
-
75
-
76
-
77
-
78
-
79
-
80
-
81
-
82
-
83
-
84
-
85
-
86
-
87
-
88
-
89
-
90
-
91
-
92
-
93
-
94
-
95
-
96
 |
 |
