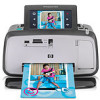
HP Photosmart A640 User Guide - Page 57
Print photos with a border
 |
View all HP Photosmart A640 manuals
Add to My Manuals
Save this manual to your list of manuals |
Page 57 highlights
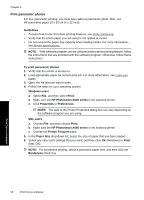
6. In the Paper Size drop-down list, select the size of paper that you have loaded. 7. Select any other print settings that you want, and then click OK (Windows) or Print (Mac OS). If you printed on photo paper with a tear-off tab, remove the tab to make the document completely borderless. Print from a computer Print photos with a border Guidelines • To learn how to use the photo printing features, see Enhance your photos. • Verify the photo paper you are using is not rippled or curled. • Do not exceed the paper tray capacity when loading media. For more information, see Printer specifications. To print a photo with borders 1. Verify that the printer is turned on. 2. Load appropriate paper for current print job. For more information, see Load your paper. 3. Open the file that you want to print. 4. Follow the steps for your operating system. Windows users a. Select File, and then select Print. b. Make sure the HP Photosmart A640 series is the selected printer. c. Click Properties or Preferences. NOTE: The path to the Printer Properties dialog box can vary depending on the software program you are using. Mac users a. Choose File, and then choose Print. b. Make sure the HP Photosmart A640 series is the selected printer. c. Choose the Printer Features pane. 5. Uncheck the Borderless check box, if it is checked. 6. Select any other print settings that you want, and then click OK (Windows) or Print (Mac OS). Print photos 55
-
 1
1 -
2
-
3
-
4
-
5
-
6
-
7
-
8
-
9
-
10
-
11
-
12
-
13
-
14
-
15
-
16
-
17
-
18
-
19
-
20
-
21
-
22
-
23
-
24
-
25
-
26
-
27
-
28
-
29
-
30
-
31
-
32
-
33
-
34
-
35
-
36
-
37
-
38
-
39
-
40
-
41
-
42
-
43
-
44
-
45
-
46
-
47
-
48
-
49
-
50
-
51
-
 52
52 -
 53
53 -
 54
54 -
 55
55 -
 56
56 -
 57
57 -
 58
58 -
 59
59 -
 60
60 -
 61
61 -
 62
62 -
63
-
64
-
65
-
66
-
67
-
68
-
69
-
70
-
71
-
72
-
73
-
74
-
75
-
76
-
77
-
78
-
79
-
80
-
81
-
82
-
83
-
84
-
85
-
86
-
87
-
88
-
89
-
90
-
91
-
92
-
93
-
94
-
95
-
96
 |
 |