HP Scanjet 7450c HP Scanjet 7400C Series Scanner Mac - (English) User Manual - Page 12
Frequently asked questions, Automatic Set Type, Grayscale
 |
View all HP Scanjet 7450c manuals
Add to My Manuals
Save this manual to your list of manuals |
Page 12 highlights
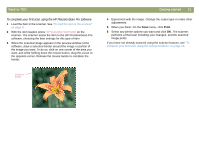
12 Getting started Frequently asked questions This section contains answers to some questions users frequently ask about scanning. What settings does the HP PrecisionScan Pro software set automatically for an item I scan? Based on the scanned item, the software automatically chooses optimal values for these settings: q output type q resolution q sharpening q exposure (midtones, highlights, and shadows) q color (hue and saturation or black-and-white threshold) Usually, the values the software selects provides optimal results. However, you can change these values in the HP PrecisionScan Pro software. Back to TOC How can I reduce the time it takes to scan? You can reduce the time it takes to scan an item by scanning in black and white when the original: q Is a black-and-white photograph or drawing. q Is a color photo or drawing, but you want a black-and-white image to appear on the computer screen. q Contains only text. Scan color originals as black and white by changing the color option for the scanner button (such as E-MAIL) you will be using. See "Changing settings for buttons" on page 25. Or, in the HP PrecisionScan Pro software, clear the Automatic Set Type option and choose Grayscale or a black-and-white output type before you scan. See "Selecting output type" on page 33. How can I reduce the file size? To reduce file size: q Save files using a compressed format, such as compressed TIFF or JPEG. q Avoid using the True Color output type unless necessary. This output type offers exceptional quality for color photos or drawings, but it also creates large file sizes. q Set the resolution no higher than necessary. Generally, the resolution the software automatically sets provides the best balance between image quality and small file size. q For photos, significantly reduce file size by cropping the photo to select just one area as the final scanned image. Or, resize the entire photo to smaller dimensions.
-
 1
1 -
2
-
3
-
4
-
5
-
6
-
 7
7 -
 8
8 -
 9
9 -
 10
10 -
 11
11 -
 12
12 -
 13
13 -
 14
14 -
 15
15 -
 16
16 -
 17
17 -
18
-
19
-
20
-
21
-
22
-
23
-
24
-
25
-
26
-
27
-
28
-
29
-
30
-
31
-
32
-
33
-
34
-
35
-
36
-
37
-
38
-
39
-
40
-
41
-
42
-
43
-
44
-
45
-
46
-
47
-
48
-
49
-
50
-
51
-
52
-
53
-
54
-
55
-
56
-
57
-
58
-
59
-
60
-
61
-
62
-
63
-
64
-
65
-
66
-
67
-
68
-
69
-
70
-
71
-
72
-
73
-
74
-
75
-
76
-
77
-
78
-
79
-
80
-
81
-
82
-
83
-
84
-
85
-
86
-
87
-
88
-
89
-
90
-
91
-
92
-
93
-
94
-
95
-
96
-
97
-
98
-
99
-
100
-
101
-
102
-
103
-
104
-
105
-
106
-
107
-
108
-
109
-
110
-
111
-
112
-
113
-
114
-
115
-
116
-
117
-
118
-
119
-
120
-
121
-
122
-
123
-
124
-
125
-
126
-
127
-
128
-
129
-
130
-
131
-
132
 |
 |
