HP Scanjet 7450c HP Scanjet 7400C Series Scanner Mac - (English) User Manual - Page 38
Sharpening an image, Resetting all adjustments, Tools, Sharpen, Undo Editing Changes
 |
View all HP Scanjet 7450c manuals
Add to My Manuals
Save this manual to your list of manuals |
Page 38 highlights
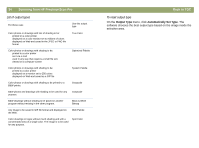
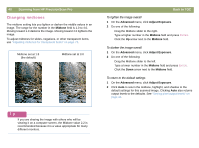
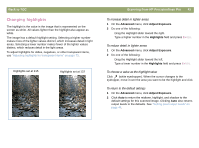
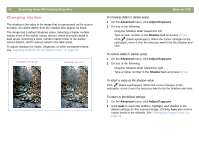
38 Scanning from HP PrecisionScan Pro Sharpening an image Increasing sharpening enhances detail in the image. The HP PrecisionScan Pro software automatically selects the optimal sharpen level, but you can change it. You might want to increase sharpening if the image looks fuzzy. Conversely, you might want to decrease sharpening if the original item has flaws or marks on it. Increasing sharpening, or increasing it too much, can accent the flaws and create undesirable patterns. To sharpen an image 1 On the Tools menu, click Sharpen. 2 Select a sharpen level from the list. The viewer shows the effect of the changes on the image. To reset sharpen levels 1 On the Tools menu, click Sharpen. 2 Click . Back to TOC Resetting all adjustments You can reset images to the optimal (default) values the scanning software chose for the image. Optimal values are based on the output type selected. Resetting removes all adjustments you have made except the output type, zoom level, or the selection area. To reset all adjustments Do one of the following: q On the Edit menu, click Undo Editing Changes. q On the toolbar, click .
-
 1
1 -
2
-
3
-
4
-
5
-
6
-
7
-
8
-
9
-
10
-
11
-
12
-
13
-
14
-
15
-
16
-
17
-
18
-
19
-
20
-
21
-
22
-
23
-
24
-
25
-
26
-
27
-
28
-
29
-
30
-
31
-
32
-
 33
33 -
 34
34 -
 35
35 -
 36
36 -
 37
37 -
 38
38 -
 39
39 -
 40
40 -
 41
41 -
 42
42 -
 43
43 -
44
-
45
-
46
-
47
-
48
-
49
-
50
-
51
-
52
-
53
-
54
-
55
-
56
-
57
-
58
-
59
-
60
-
61
-
62
-
63
-
64
-
65
-
66
-
67
-
68
-
69
-
70
-
71
-
72
-
73
-
74
-
75
-
76
-
77
-
78
-
79
-
80
-
81
-
82
-
83
-
84
-
85
-
86
-
87
-
88
-
89
-
90
-
91
-
92
-
93
-
94
-
95
-
96
-
97
-
98
-
99
-
100
-
101
-
102
-
103
-
104
-
105
-
106
-
107
-
108
-
109
-
110
-
111
-
112
-
113
-
114
-
115
-
116
-
117
-
118
-
119
-
120
-
121
-
122
-
123
-
124
-
125
-
126
-
127
-
128
-
129
-
130
-
131
-
132
 |
 |
