HP XP20000/XP24000 HP StorageWorks XP24000/XP20000 Remote Web Console User Gui - Page 113
Text Import Wizard - Step 1 of 3 Dialog Box
 |
View all HP XP20000/XP24000 manuals
Add to My Manuals
Save this manual to your list of manuals |
Page 113 highlights
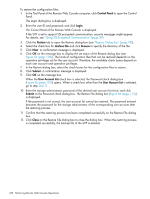
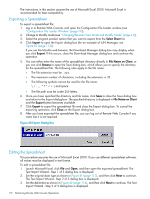
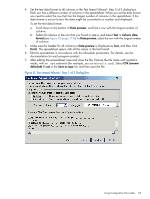
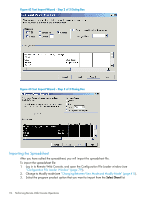
4. Set the text data format to all columns in the Text Import Wizard - Step 3 of 3 dialog box. Each row has a different number of columns in the spreadsheet. When you set the data format, you need to select the row that has the largest number of columns in the spreadsheet. If the data format is not set to text, the data might be converted to a number and displayed. To set the text data format: a. Scroll down to the bottom of Data preview, and find a row with the largest number of columns. b. Select all columns in the row that you found in step a, and select Text in Column data format (see Figure 63 (page 114)). In Data preview, select the row with the largest number of columns. 5. Make sure the header for all columns in Data preview is displayed as Text, and then click Finish. The spreadsheet opens with all the values in the text format. 6. Edit the spreadsheet in accordance with the allowable parameters. For details, see the documentation for each program product. 7. After editing the spreadsheet, save and close the file. Enclose the file name with quotation marks, with an .spd extension (for example, spreadsheet1a.spd). Select CSV (comma delimited) (*.csv) in the Save as type list, and then save the file. Figure 61 Text Import Wizard - Step 1 of 3 Dialog Box Using Configuration File Loader 113
-
 1
1 -
2
-
3
-
4
-
5
-
6
-
7
-
8
-
9
-
10
-
11
-
12
-
13
-
14
-
15
-
16
-
17
-
18
-
19
-
20
-
21
-
22
-
23
-
24
-
25
-
26
-
27
-
28
-
29
-
30
-
31
-
32
-
33
-
34
-
35
-
36
-
37
-
38
-
39
-
40
-
41
-
42
-
43
-
44
-
45
-
46
-
47
-
48
-
49
-
50
-
51
-
52
-
53
-
54
-
55
-
56
-
57
-
58
-
59
-
60
-
61
-
62
-
63
-
64
-
65
-
66
-
67
-
68
-
69
-
70
-
71
-
72
-
73
-
74
-
75
-
76
-
77
-
78
-
79
-
80
-
81
-
82
-
83
-
84
-
85
-
86
-
87
-
88
-
89
-
90
-
91
-
92
-
93
-
94
-
95
-
96
-
97
-
98
-
99
-
100
-
101
-
102
-
103
-
104
-
105
-
106
-
107
-
 108
108 -
 109
109 -
 110
110 -
 111
111 -
 112
112 -
 113
113 -
 114
114 -
 115
115 -
 116
116 -
 117
117 -
 118
118 -
119
-
120
-
121
-
122
-
123
-
124
-
125
-
126
-
127
-
128
-
129
-
130
-
131
-
132
-
133
-
134
-
135
-
136
-
137
-
138
-
139
-
140
-
141
-
142
-
143
-
144
-
145
-
146
-
147
-
148
-
149
-
150
-
151
 |
 |
