HP XP20000/XP24000 HP StorageWorks XP24000/XP20000 Remote Web Console User Gui - Page 25
For Windows: Go to the Windows Control Panel and double-click the Java icon.
 |
View all HP XP20000/XP24000 manuals
Add to My Manuals
Save this manual to your list of manuals |
Page 25 highlights
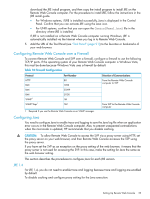
1. Start Java Control Panel. • For Windows: Go to the Windows Control Panel and double-click the Java icon. • For UNIX: Do one of the following: Execute the Java Control Panel executable file. The file is stored in one of the following locations: /jre/bin/ControlPanel /jre/ControlPanel /jre/ControlPanel or Use a web browser to display the Control Panel page. The file is stored in one of the following locations: /jre/ControlPanel.html /ControlPanel.html 2. Click the Advanced tab of Java Control Panel. 3. Double-click Debugging in the tree. 4. Under Debugging, select the Enable tracing check box and the Enable logging check box (see Figure 4 (page 26)). 5. Click the General tab of Java Control Panel. 6. Click Settings in Temporary Internet Files to display the Temporary Files Settings dialog box. 7. Do the following in the Temporary Files Settings dialog box: • For JRE 5.0: Select Maximum in Amount of disk space to use and enter 0 (see Figure 5 (page 26)). • For JRE 6.0 earlier than Update 10: Clear the Keep temporary files on my computer check box (see Figure 6 (page 27)). • For JRE 6.0 Update 10 or later: Select the Keep temporary files on my computer check box and specify 1 MB for Disk Space (see Figure 7 (page 27)). 8. Click OK to close the Temporary Files Settings dialog box. 9. If necessary, configure the proxy setting on the Network Settings dialog box as the web browser setting. To display this dialog box, click the General tab of Java Control Panel and click the Network Settings button. 10. Click Apply. 11. Click OK to close Java Control Panel. Setting Up Remote Web Console 25
-
 1
1 -
2
-
3
-
4
-
5
-
6
-
7
-
8
-
9
-
10
-
11
-
12
-
13
-
14
-
15
-
16
-
17
-
18
-
19
-
 20
20 -
 21
21 -
 22
22 -
 23
23 -
 24
24 -
 25
25 -
 26
26 -
 27
27 -
 28
28 -
 29
29 -
 30
30 -
31
-
32
-
33
-
34
-
35
-
36
-
37
-
38
-
39
-
40
-
41
-
42
-
43
-
44
-
45
-
46
-
47
-
48
-
49
-
50
-
51
-
52
-
53
-
54
-
55
-
56
-
57
-
58
-
59
-
60
-
61
-
62
-
63
-
64
-
65
-
66
-
67
-
68
-
69
-
70
-
71
-
72
-
73
-
74
-
75
-
76
-
77
-
78
-
79
-
80
-
81
-
82
-
83
-
84
-
85
-
86
-
87
-
88
-
89
-
90
-
91
-
92
-
93
-
94
-
95
-
96
-
97
-
98
-
99
-
100
-
101
-
102
-
103
-
104
-
105
-
106
-
107
-
108
-
109
-
110
-
111
-
112
-
113
-
114
-
115
-
116
-
117
-
118
-
119
-
120
-
121
-
122
-
123
-
124
-
125
-
126
-
127
-
128
-
129
-
130
-
131
-
132
-
133
-
134
-
135
-
136
-
137
-
138
-
139
-
140
-
141
-
142
-
143
-
144
-
145
-
146
-
147
-
148
-
149
-
150
-
151
 |
 |
