Netgear DG834Gv3 DG834Gv3 Reference Manual - Page 108
Connect using Secure Gateway Tunnel, IP Address, Security Policy, Main Mode
 |
View all Netgear DG834Gv3 manuals
Add to My Manuals
Save this manual to your list of manuals |
Page 108 highlights
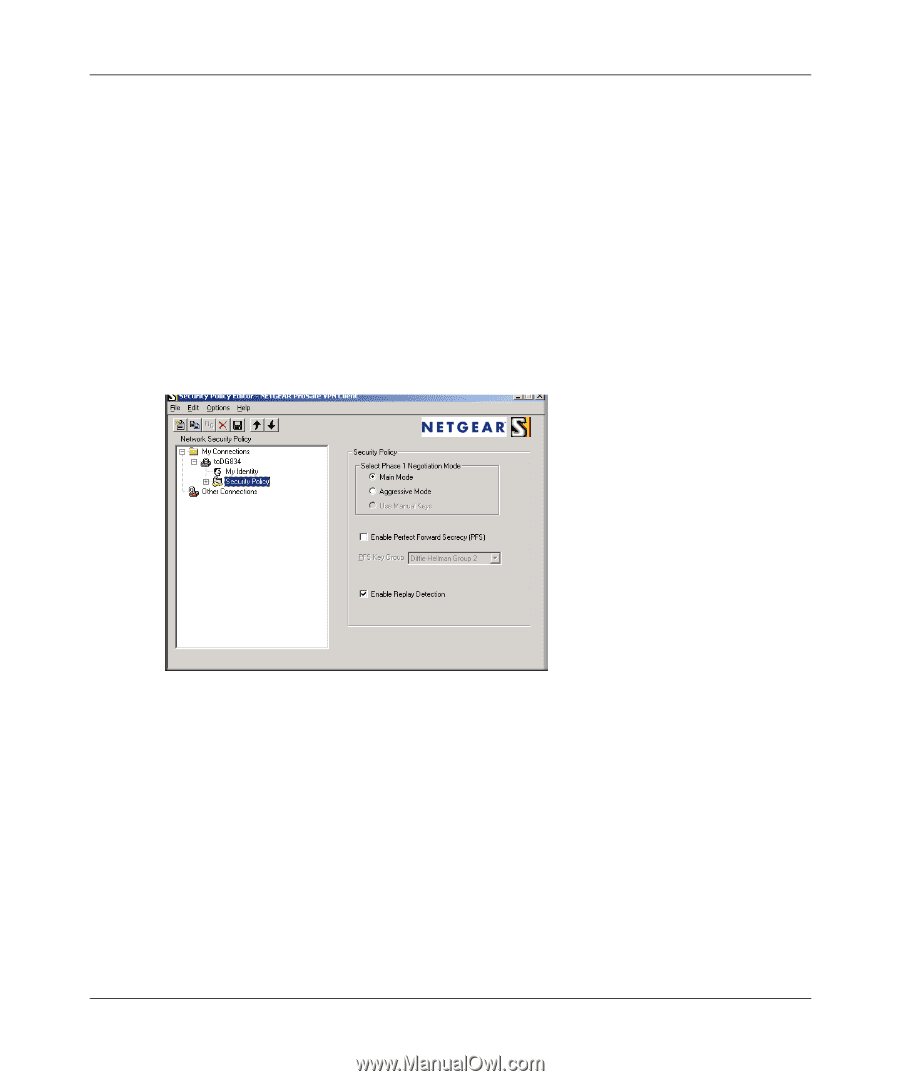
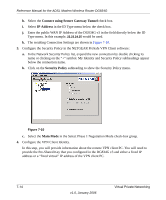
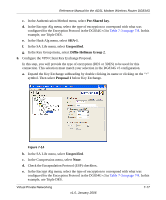
Reference Manual for the ADSL Modem Wireless Router DG834G h. Select the Connect using Secure Gateway Tunnel check box. i. Select IP Address in the ID Type menu below the check box. j. Enter the public WAN IP Address of the DG834G v3 in the field directly below the ID Type menu. In this example, 22.23.24.25 would be used. k. The resulting Connection Settings are shown in Figure 7-10. 3. Configure the Security Policy in the NETGEAR ProSafe VPN Client software: a. In the Network Security Policy list, expand the new connection by double clicking its name or clicking on the "+" symbol. My Identity and Security Policy subheadings appear below the connection name. b. Click on the Security Policy subheading to show the Security Policy menu. Figure 7-10 c. Select the Main Mode in the Select Phase 1 Negotiation Mode check-box group. 4. Configure the VPN Client Identity. In this step, you will provide information about the remote VPN client PC. You will need to provide the Pre-Shared Key that you configured in the DG834G v3 and either a fixed IP address or a "fixed virtual" IP address of the VPN client PC. 7-14 v1.0, January 2006 Virtual Private Networking
-
 1
1 -
2
-
3
-
4
-
5
-
6
-
7
-
8
-
9
-
10
-
11
-
12
-
13
-
14
-
15
-
16
-
17
-
18
-
19
-
20
-
21
-
22
-
23
-
24
-
25
-
26
-
27
-
28
-
29
-
30
-
31
-
32
-
33
-
34
-
35
-
36
-
37
-
38
-
39
-
40
-
41
-
42
-
43
-
44
-
45
-
46
-
47
-
48
-
49
-
50
-
51
-
52
-
53
-
54
-
55
-
56
-
57
-
58
-
59
-
60
-
61
-
62
-
63
-
64
-
65
-
66
-
67
-
68
-
69
-
70
-
71
-
72
-
73
-
74
-
75
-
76
-
77
-
78
-
79
-
80
-
81
-
82
-
83
-
84
-
85
-
86
-
87
-
88
-
89
-
90
-
91
-
92
-
93
-
94
-
95
-
96
-
97
-
98
-
99
-
100
-
101
-
102
-
 103
103 -
 104
104 -
 105
105 -
 106
106 -
 107
107 -
 108
108 -
 109
109 -
 110
110 -
 111
111 -
 112
112 -
 113
113 -
114
-
115
-
116
-
117
-
118
-
119
-
120
-
121
-
122
-
123
-
124
-
125
-
126
-
127
-
128
-
129
-
130
-
131
-
132
-
133
-
134
-
135
-
136
-
137
-
138
-
139
-
140
-
141
-
142
-
143
-
144
-
145
-
146
-
147
-
148
-
149
-
150
-
151
-
152
-
153
-
154
-
155
-
156
-
157
-
158
-
159
-
160
-
161
-
162
-
163
-
164
-
165
-
166
-
167
-
168
-
169
-
170
-
171
-
172
-
173
-
174
-
175
-
176
-
177
-
178
-
179
-
180
-
181
-
182
-
183
-
184
-
185
-
186
-
187
-
188
-
189
-
190
 |
 |