Netgear EVA8000 EVA8000 User Manual - Page 19
Completing the Basic Setup Steps, Basic Setup - linux
 |
UPC - 606449049787
View all Netgear EVA8000 manuals
Add to My Manuals
Save this manual to your list of manuals |
Page 19 highlights
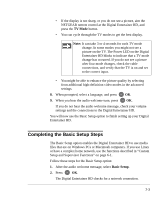
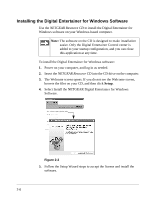
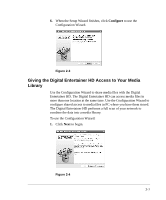
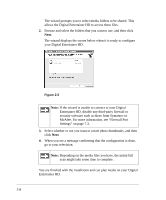
• If the display is not sharp, or you do not see a picture, aim the NETGEAR remote control at the Digital Entertainer HD, and press the TV Mode button. • You can cycle through the TV modes to get the best display. Note: It can take 3 or 4 seconds for each TV mode change. In some modes you might not see a picture on the TV. The Power LED on the Digital Entertainer HD blinks to indicate that a TV mode change has occurred. If you do not see a picture after four mode changes, check the cable connections, and verify that the TV is on and set to the correct input. • You might be able to enhance the picture quality by selecting from additional high-definition video modes in the advanced settings. 8. When prompted, select a language, and press OK. 9. When you hear the audio welcome tune, press OK. If you do not hear the audio welcome message, check your volume settings and the connections to the Digital Entertainer HD. You will now use the Basic Setup option to finish setting up your Digital Entertainer HD. Completing the Basic Setup Steps The Basic Setup option enables the Digital Entertainer HD to use media files that are on Windows PCs or Macintosh computers. If you use Linux or have a complex home network, use the functions described in "Custom Setup and Supervisor Functions" on page 6-1. Follow these steps for the Basic Setup option: 1. After the audio welcome message, select Basic Setup. 2. Press OK. The Digital Entertainer HD checks for a network connection. 2-3
-
 1
1 -
2
-
3
-
4
-
5
-
6
-
7
-
8
-
9
-
10
-
11
-
12
-
13
-
 14
14 -
 15
15 -
 16
16 -
 17
17 -
 18
18 -
 19
19 -
 20
20 -
 21
21 -
 22
22 -
 23
23 -
 24
24 -
25
-
26
-
27
-
28
-
29
-
30
-
31
-
32
-
33
-
34
-
35
-
36
-
37
-
38
-
39
-
40
-
41
-
42
-
43
-
44
-
45
-
46
-
47
-
48
-
49
-
50
-
51
-
52
-
53
-
54
-
55
-
56
-
57
-
58
-
59
-
60
-
61
-
62
-
63
-
64
-
65
-
66
-
67
-
68
-
69
-
70
-
71
-
72
-
73
-
74
-
75
-
76
-
77
-
78
-
79
-
80
-
81
-
82
-
83
-
84
-
85
-
86
-
87
-
88
-
89
-
90
-
91
-
92
-
93
-
94
-
95
-
96
-
97
-
98
-
99
-
100
-
101
-
102
-
103
-
104
-
105
-
106
-
107
-
108
-
109
-
110
-
111
-
112
-
113
-
114
 |
 |