Netgear GS748Tv5 Software Administration Manual - Page 155
Con and View Routes, To con a static route, Routing, Route Configuration, Static
 |
View all Netgear GS748Tv5 manuals
Add to My Manuals
Save this manual to your list of manuals |
Page 155 highlights
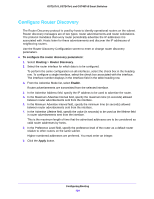
GS716Tv3, GS724Tv4, and GS748Tv5 Smart Switches Configure and View Routes From the Route Configuration screen, you can configure static and default routes and view the routes that the switch has already learned. To configure a static route: 1. Select Routing > Route Configuration. 2. From the Route Type field, select Static. When you create a default route, you must specify only the next hop IP address. By default, the default route has a preference of 1. 3. In the Network Address field, specify the IP route prefix for the destination. To create a route, a valid routing interface must exist, and the next hop IP Address must be on the same network as the routing interface. 4. In the Subnet Mask field, specify the subnet mask. Also referred to as the subnet/network mask, this indicates the portion of the IP address that identifies the attached network. 5. In the Next Hop IP Address field, specify the next hop IP address. This is the outgoing router IP address to use when forwarding traffic to the next router (if any) in the path towards the destination. The next router is always one of the adjacent neighbors or the IP address of the local interface for a directly attached network. When creating a route, the next hop IP must be on the same network as the routing interface. Valid next hop IP Addresses can be seen in the Route Status table. 6. In the Preference field, specify the preference value for the route. Among routes to the same destination, the route with the lowest preference value is the route entered into the forwarding database. By specifying the preference of a static route, you can control whether a static route is more or less preferred. The preference also controls whether a static route is more or less preferred than other static routes to the same destination. 7. (Optionally) In the Description field, specify a description to help identify the route. 8. Click the Add button. Configuring Routing 155
-
 1
1 -
2
-
3
-
4
-
5
-
6
-
7
-
8
-
9
-
10
-
11
-
12
-
13
-
14
-
15
-
16
-
17
-
18
-
19
-
20
-
21
-
22
-
23
-
24
-
25
-
26
-
27
-
28
-
29
-
30
-
31
-
32
-
33
-
34
-
35
-
36
-
37
-
38
-
39
-
40
-
41
-
42
-
43
-
44
-
45
-
46
-
47
-
48
-
49
-
50
-
51
-
52
-
53
-
54
-
55
-
56
-
57
-
58
-
59
-
60
-
61
-
62
-
63
-
64
-
65
-
66
-
67
-
68
-
69
-
70
-
71
-
72
-
73
-
74
-
75
-
76
-
77
-
78
-
79
-
80
-
81
-
82
-
83
-
84
-
85
-
86
-
87
-
88
-
89
-
90
-
91
-
92
-
93
-
94
-
95
-
96
-
97
-
98
-
99
-
100
-
101
-
102
-
103
-
104
-
105
-
106
-
107
-
108
-
109
-
110
-
111
-
112
-
113
-
114
-
115
-
116
-
117
-
118
-
119
-
120
-
121
-
122
-
123
-
124
-
125
-
126
-
127
-
128
-
129
-
130
-
131
-
132
-
133
-
134
-
135
-
136
-
137
-
138
-
139
-
140
-
141
-
142
-
143
-
144
-
145
-
146
-
147
-
148
-
149
-
 150
150 -
 151
151 -
 152
152 -
 153
153 -
 154
154 -
 155
155 -
 156
156 -
 157
157 -
 158
158 -
 159
159 -
 160
160 -
161
-
162
-
163
-
164
-
165
-
166
-
167
-
168
-
169
-
170
-
171
-
172
-
173
-
174
-
175
-
176
-
177
-
178
-
179
-
180
-
181
-
182
-
183
-
184
-
185
-
186
-
187
-
188
-
189
-
190
-
191
-
192
-
193
-
194
-
195
-
196
-
197
-
198
-
199
-
200
-
201
-
202
-
203
-
204
-
205
-
206
-
207
-
208
-
209
-
210
-
211
-
212
-
213
-
214
-
215
-
216
-
217
-
218
-
219
-
220
-
221
-
222
-
223
-
224
-
225
-
226
-
227
-
228
-
229
-
230
-
231
-
232
-
233
-
234
-
235
-
236
-
237
-
238
-
239
-
240
-
241
-
242
-
243
-
244
-
245
-
246
-
247
-
248
-
249
-
250
-
251
-
252
-
253
-
254
-
255
-
256
-
257
-
258
-
259
-
260
-
261
-
262
-
263
-
264
-
265
-
266
-
267
-
268
-
269
-
270
-
271
-
272
-
273
-
274
-
275
-
276
-
277
-
278
-
279
-
280
-
281
-
282
-
283
-
284
-
285
-
286
-
287
-
288
-
289
-
290
 |
 |