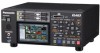
Panasonic AG-HPD24PJ Operating Instructions - Page 29
Basic Operation, About P2 Cards, Inserting a P2 Card, P2 Card Access Lamp and P2 Card Status
 |
View all Panasonic AG-HPD24PJ manuals
Add to My Manuals
Save this manual to your list of manuals |
Page 29 highlights
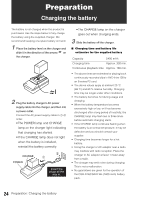
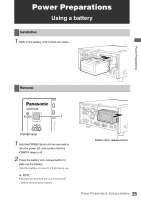
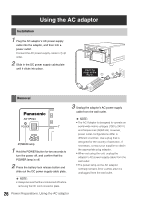
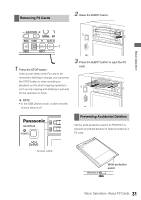
Basic Operation Basic Operation About P2 Cards Inserting a P2 Card P2 Card Access Lamp and P2 Card Status ヒ ビ 1 1 Hold the POWER button for one second to turn the unit on. 2 Insert a P2 card into a P2 card slot until the EJECT button pops out. 3 Fold the EJECT button toward the right. P2 Card Access Lamp P2 Card Status Lights green Writing and reading are enabled. Lights orange Writing and reading are enabled for the current recording (including LOOP REC). Flashing orange Writing or reading is in progress. Currently accessing P2 card using USB device mode. NOTE: • Do not turn the unit off or eject the P2 card when the lamp is flashing orange, such as while recording. Fast flashing P2 card being recognized. orange Flashing green No available space on the P2 card. Only reading is possible. The P2 card contains the maximum number of clips. Only reading is possible. The write-protect switch on the P2 card is set to PROTECT. Only reading is possible. Basic Operation: About P2 Cards 29
-
 1
1 -
2
-
3
-
4
-
5
-
6
-
7
-
8
-
9
-
10
-
11
-
12
-
13
-
14
-
15
-
16
-
17
-
18
-
19
-
20
-
21
-
22
-
23
-
 24
24 -
 25
25 -
 26
26 -
 27
27 -
 28
28 -
 29
29 -
 30
30 -
 31
31 -
 32
32 -
 33
33 -
 34
34 -
35
-
36
-
37
-
38
-
39
-
40
-
41
-
42
-
43
-
44
-
45
-
46
-
47
-
48
-
49
-
50
-
51
-
52
-
53
-
54
-
55
-
56
-
57
-
58
-
59
-
60
-
61
-
62
-
63
-
64
-
65
-
66
-
67
-
68
-
69
-
70
-
71
-
72
-
73
-
74
-
75
-
76
-
77
-
78
-
79
-
80
-
81
-
82
-
83
-
84
-
85
-
86
-
87
-
88
-
89
-
90
-
91
-
92
-
93
-
94
-
95
-
96
-
97
-
98
-
99
-
100
-
101
-
102
-
103
-
104
-
105
-
106
-
107
-
108
-
109
-
110
-
111
-
112
-
113
-
114
-
115
-
116
-
117
-
118
-
119
-
120
-
121
-
122
-
123
-
124
-
125
-
126
-
127
-
128
-
129
-
130
-
131
-
132
-
133
-
134
-
135
-
136
-
137
-
138
-
139
-
140
-
141
-
142
-
143
-
144
-
145
-
146
-
147
-
148
-
149
-
150
-
151
-
152
-
153
-
154
-
155
-
156
-
157
-
158
-
159
-
160
-
161
 |
 |
