Panasonic AG-HPD24PJ Operating Instructions - Page 88
Formatting P2 and SD Memory Cards, Use the Up/Down/Left/Right cursor buttons to select
 |
View all Panasonic AG-HPD24PJ manuals
Add to My Manuals
Save this manual to your list of manuals |
Page 88 highlights
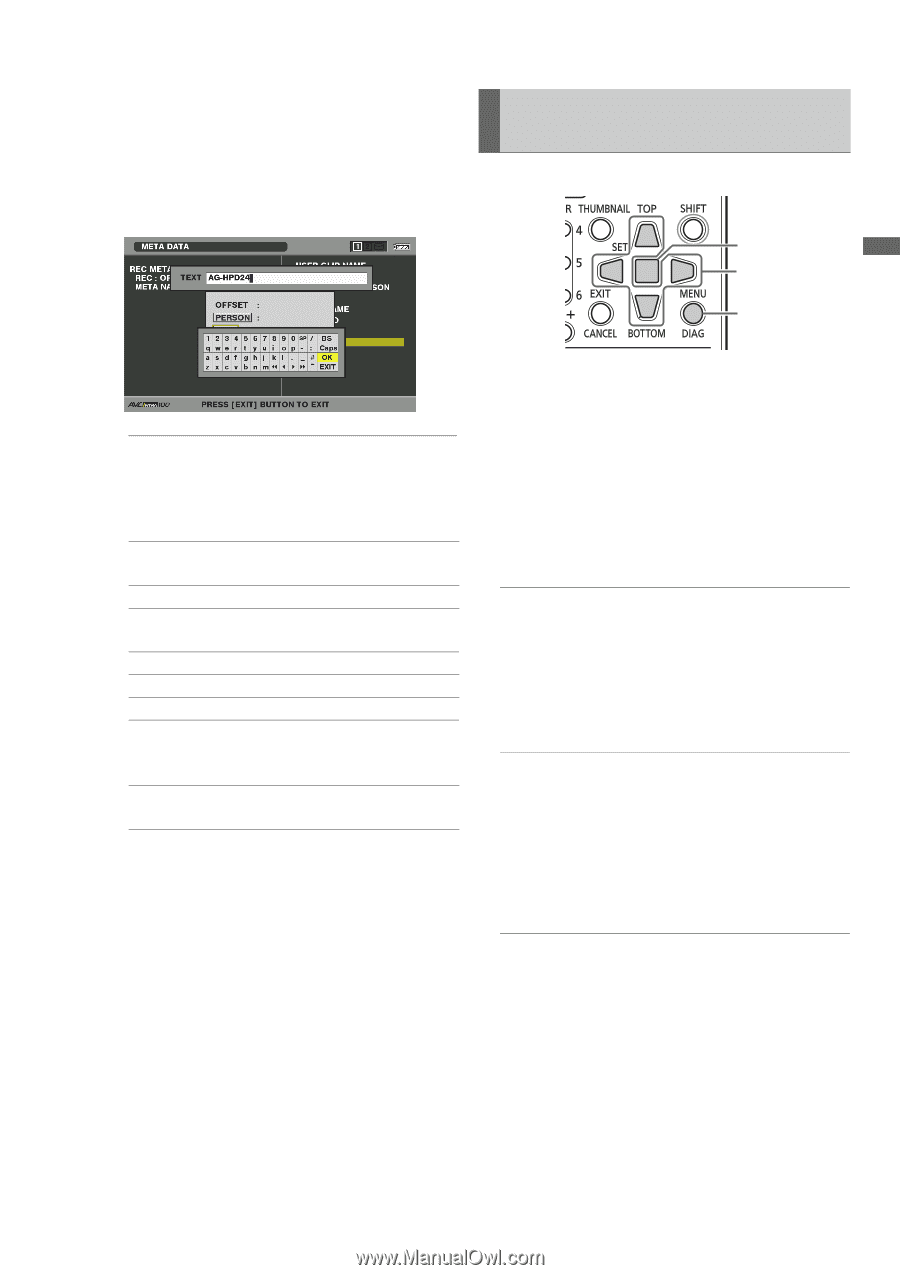
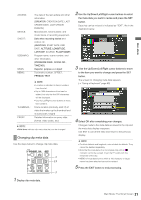
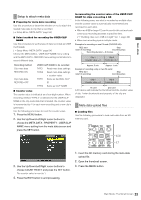
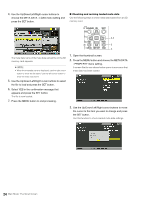
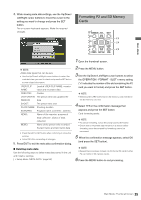
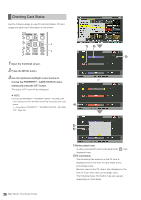
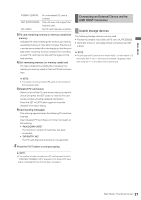
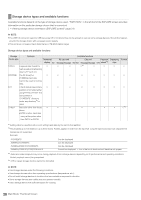
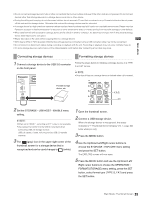
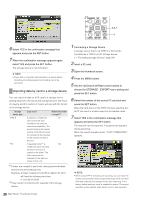
Main Mode 4. While viewing meta data settings, use the Up/Down/ Left/Right cursor buttons to move the cursor to the setting you want to change and press the SET button. The on-screen keyboard appears. Make the required changes. Formatting P2 and SD Memory Cards 4,5 3,4 2,6 1 Open the thumbnail screen. ◆ NOTE: • Use the Up/Down/Left/Right cursor buttons to select the meta data item you want to check and press the SET button to view related information. USER CLIP NAME: Loaded USER CLIP NAME, counter value and recorded data CREATOR: Creator LAST UPDATE The person who last updated the PERSON: data SHOOT: The person who shot PLACE NAME: Shooting location SCENARIO: Program name, scene No., take No. NEWS: Name of the reporter, purpose of data collection, object of data collection MEMO: Name of the person who recorded the text memo and text memo data • Press the EXIT or SET button after confirming to close the window. • Select OK after completing all changes. 5. Press EXIT to exit the meta data confirmation dialog. ■ Deleting meta data Use the following steps to delete meta data stored in the unit and initialize settings. (➝ Setup Menu "META DATA" page 54) 2 Press the MENU button. 3 Use the Up/Down/Left/Right cursor buttons to select the OPERATION - FORMAT - SLOT n menu setting ("n" indicates the number of the slot containing the P2 card you want to format) and press the SET button. ◆ NOTE: • Selecting SD CARD will format an SD memory card inserted in the SD memory card slot. 4 Select YES in the confirmation message that appears and press the SET button. Card formatting starts. ◆ NOTE: • To cancel formatting, select NO and press the SET button. • Check that no important data remains on a device before formatting since data erased by formatting cannot be recovered. 5 When the confirmation message appears, select OK (and press the SET button). ◆ NOTE: • Repeat the procedures in steps 3 to 5 to format P2 cards in other P2 card slots or SD memory cards. 6 Press the MENU button to end processing. Main Mode: Thumbnail Screen 25
-
 1
1 -
2
-
3
-
4
-
5
-
6
-
7
-
8
-
9
-
10
-
11
-
12
-
13
-
14
-
15
-
16
-
17
-
18
-
19
-
20
-
21
-
22
-
23
-
24
-
25
-
26
-
27
-
28
-
29
-
30
-
31
-
32
-
33
-
34
-
35
-
36
-
37
-
38
-
39
-
40
-
41
-
42
-
43
-
44
-
45
-
46
-
47
-
48
-
49
-
50
-
51
-
52
-
53
-
54
-
55
-
56
-
57
-
58
-
59
-
60
-
61
-
62
-
63
-
64
-
65
-
66
-
67
-
68
-
69
-
70
-
71
-
72
-
73
-
74
-
75
-
76
-
77
-
78
-
79
-
80
-
81
-
82
-
 83
83 -
 84
84 -
 85
85 -
 86
86 -
 87
87 -
 88
88 -
 89
89 -
 90
90 -
 91
91 -
 92
92 -
 93
93 -
94
-
95
-
96
-
97
-
98
-
99
-
100
-
101
-
102
-
103
-
104
-
105
-
106
-
107
-
108
-
109
-
110
-
111
-
112
-
113
-
114
-
115
-
116
-
117
-
118
-
119
-
120
-
121
-
122
-
123
-
124
-
125
-
126
-
127
-
128
-
129
-
130
-
131
-
132
-
133
-
134
-
135
-
136
-
137
-
138
-
139
-
140
-
141
-
142
-
143
-
144
-
145
-
146
-
147
-
148
-
149
-
150
-
151
-
152
-
153
-
154
-
155
-
156
-
157
-
158
-
159
-
160
-
161
 |
 |