Panasonic AG-HPD24PJ Operating Instructions - Page 44
Recording and Playback, Recording
 |
View all Panasonic AG-HPD24PJ manuals
Add to My Manuals
Save this manual to your list of manuals |
Page 44 highlights
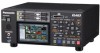
Recording and Playback When the 3D REC/PB mode is enabled, all operations are performed from the master unit. Slave unit operations are disabled. Recording Master/Slave Unit 2 Insert P2 cards in the corresponding slots in both master and slave units. ヒ ビ 1 Master Unit ◆ NOTE: • Card insertion confirmation on both master and slave units requires more time than card confirmation and recording preparation in normal main mode. If recording perparation fails, "CANNOT REC" or "E-62 SLAVE WARNING" may be displayed. 3 Press the master unit's REC and PLAY buttons simultaneously. Recording begins on the P2 card in the slot with its access lamp lit orange. 4 3 1 Hold each unit's POWER button for one second to turn the master and slave units on. Set the format, input signal, and etc. (➝ "Setup Menu" Vol. 2, page 50) ◆ NOTE: • The recording frequency must be set in the main mode beforehand. • Only the AVC-Intra format can be used for 3D recording. ◆ NOTE: • Recording is disabled when the thumbnail screen is open. Close the thumbnail screen before starting to record. • Recording is disabled when 3D singlesignal output (side-by-side or frame packing) is enabled. • LOOP REC and variable frame rate recording are disabled. • Recording is possible on the master and slave unit only for recordable slots (when the write protect switch is not set to PROTECT). • The remaining 3D recording time is the shortest remaining time on the cards in both master and slave units. 4 Press the STOP button to stop recording. 44 3D Signal Recording and Playback: Recording and Playback
-
 1
1 -
2
-
3
-
4
-
5
-
6
-
7
-
8
-
9
-
10
-
11
-
12
-
13
-
14
-
15
-
16
-
17
-
18
-
19
-
20
-
21
-
22
-
23
-
24
-
25
-
26
-
27
-
28
-
29
-
30
-
31
-
32
-
33
-
34
-
35
-
36
-
37
-
38
-
 39
39 -
 40
40 -
 41
41 -
 42
42 -
 43
43 -
 44
44 -
 45
45 -
 46
46 -
 47
47 -
 48
48 -
 49
49 -
50
-
51
-
52
-
53
-
54
-
55
-
56
-
57
-
58
-
59
-
60
-
61
-
62
-
63
-
64
-
65
-
66
-
67
-
68
-
69
-
70
-
71
-
72
-
73
-
74
-
75
-
76
-
77
-
78
-
79
-
80
-
81
-
82
-
83
-
84
-
85
-
86
-
87
-
88
-
89
-
90
-
91
-
92
-
93
-
94
-
95
-
96
-
97
-
98
-
99
-
100
-
101
-
102
-
103
-
104
-
105
-
106
-
107
-
108
-
109
-
110
-
111
-
112
-
113
-
114
-
115
-
116
-
117
-
118
-
119
-
120
-
121
-
122
-
123
-
124
-
125
-
126
-
127
-
128
-
129
-
130
-
131
-
132
-
133
-
134
-
135
-
136
-
137
-
138
-
139
-
140
-
141
-
142
-
143
-
144
-
145
-
146
-
147
-
148
-
149
-
150
-
151
-
152
-
153
-
154
-
155
-
156
-
157
-
158
-
159
-
160
-
161
 |
 |
