Ricoh Aficio MP W3600 General Settings Guide - Page 124
Managing names in the Address Book, Sending e-mail by Quick Dial
 |
View all Ricoh Aficio MP W3600 manuals
Add to My Manuals
Save this manual to your list of manuals |
Page 124 highlights
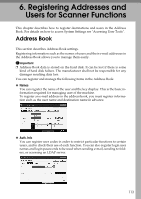
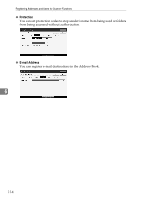
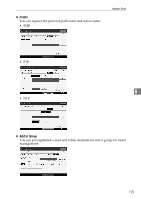
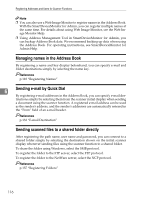
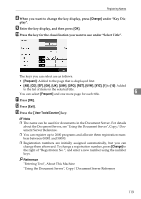
Registering Addresses and Users for Scanner Functions Note ❒ You can also use a Web Image Monitor to register names in the Address Book. With the SmartDeviceMonitor for Admin, you can register multiple names at the same time. For details about using Web Image Monitor, see the Web Image Monitor Help. ❒ Using Address Management Tool in SmartDeviceMonitor for Admin, you can backup Address Book data. We recommend backing up data when using the Address Book. For operating instructions, see SmartDeviceMonitor for Admin Help. Managing names in the Address Book By registering a name and key display beforehand, you can specify e-mail and folder destinations simply by selecting the name key. Reference p.118 "Registering Names" 6 Sending e-mail by Quick Dial By registering e-mail addresses in the Address Book, you can specify e-mail destinations simply by selecting them from the scanner initial display when sending a document using the scanner function. A registered e-mail address can be used as the sender's address, and the sender's addresses are automatically entered in the "From" field of an e-mail header. Reference p.132 "E-mail Destination" Sending scanned files to a shared folder directly After registering the path name, user name and password, you can connect to a shared folder simply by selecting the destination shown on the initial scanner display whenever sending files using the scanner function to a shared folder. To share the folder using Windows, select the SMB protocol. To register the folder to the FTP server, select the FTP protocol. To register the folder to the NetWare server, select the NCP protocol. Reference p.137 "Registering Folders" 116
-
 1
1 -
2
-
3
-
4
-
5
-
6
-
7
-
8
-
9
-
10
-
11
-
12
-
13
-
14
-
15
-
16
-
17
-
18
-
19
-
20
-
21
-
22
-
23
-
24
-
25
-
26
-
27
-
28
-
29
-
30
-
31
-
32
-
33
-
34
-
35
-
36
-
37
-
38
-
39
-
40
-
41
-
42
-
43
-
44
-
45
-
46
-
47
-
48
-
49
-
50
-
51
-
52
-
53
-
54
-
55
-
56
-
57
-
58
-
59
-
60
-
61
-
62
-
63
-
64
-
65
-
66
-
67
-
68
-
69
-
70
-
71
-
72
-
73
-
74
-
75
-
76
-
77
-
78
-
79
-
80
-
81
-
82
-
83
-
84
-
85
-
86
-
87
-
88
-
89
-
90
-
91
-
92
-
93
-
94
-
95
-
96
-
97
-
98
-
99
-
100
-
101
-
102
-
103
-
104
-
105
-
106
-
107
-
108
-
109
-
110
-
111
-
112
-
113
-
114
-
115
-
116
-
117
-
118
-
 119
119 -
 120
120 -
 121
121 -
 122
122 -
 123
123 -
 124
124 -
 125
125 -
 126
126 -
 127
127 -
 128
128 -
 129
129 -
130
-
131
-
132
-
133
-
134
-
135
-
136
-
137
-
138
-
139
-
140
-
141
-
142
-
143
-
144
-
145
-
146
-
147
-
148
-
149
-
150
-
151
-
152
-
153
-
154
-
155
-
156
-
157
-
158
-
159
-
160
-
161
-
162
-
163
-
164
-
165
-
166
-
167
-
168
-
169
-
170
-
171
-
172
-
173
-
174
-
175
-
176
-
177
-
178
-
179
-
180
-
181
-
182
-
183
-
184
-
185
-
186
-
187
-
188
-
189
-
190
-
191
-
192
-
193
-
194
-
195
-
196
-
197
-
198
-
199
-
200
-
201
-
202
-
203
-
204
-
205
-
206
-
207
-
208
-
209
-
210
 |
 |