Roxio Creator 2010 Product Manual - Page 131
Improving the quality of photos, Using the AutoFix feature
 |
View all Roxio Creator 2010 manuals
Add to My Manuals
Save this manual to your list of manuals |
Page 131 highlights
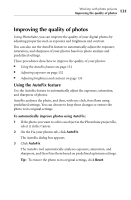
Working with photo projects Improving the quality of photos 131 Improving the quality of photos Using PhotoSuite, you can improve the quality of your digital photos by adjusting properties such as exposure and brightness and contrast. You can also use the AutoFix feature to automatically adjust the exposure, saturation, and sharpness of your photos based on photo analysis and predefined settings. These procedures show how to improve the quality of your photos: ■ Using the AutoFix feature on page 131 ■ Adjusting exposure on page 132 ■ Adjusting brightness and contrast on page 133 Using the AutoFix feature Use the AutoFix feature to automatically adjust the exposure, saturation, and sharpness of photos. AutoFix analyzes the photo, and then, with one click, fixes flaws using predefined settings. You can choose to keep these changes or restore the photo to its original settings. To automatically improve photos using AutoFix: 1 If the photo you want to edit is an object in the PhotoSuite project file, select it in the Canvas. 2 On the Fix your photos tab, click AutoFix. The AutoFix dialog box appears. 3 Click AutoFix. The AutoFix tool automatically analyses exposure, saturation, and sharpness, and then fixes them based on predefined optimum settings. Tip: To restore the photo to its original settings, click Reset.
-
 1
1 -
2
-
3
-
4
-
5
-
6
-
7
-
8
-
9
-
10
-
11
-
12
-
13
-
14
-
15
-
16
-
17
-
18
-
19
-
20
-
21
-
22
-
23
-
24
-
25
-
26
-
27
-
28
-
29
-
30
-
31
-
32
-
33
-
34
-
35
-
36
-
37
-
38
-
39
-
40
-
41
-
42
-
43
-
44
-
45
-
46
-
47
-
48
-
49
-
50
-
51
-
52
-
53
-
54
-
55
-
56
-
57
-
58
-
59
-
60
-
61
-
62
-
63
-
64
-
65
-
66
-
67
-
68
-
69
-
70
-
71
-
72
-
73
-
74
-
75
-
76
-
77
-
78
-
79
-
80
-
81
-
82
-
83
-
84
-
85
-
86
-
87
-
88
-
89
-
90
-
91
-
92
-
93
-
94
-
95
-
96
-
97
-
98
-
99
-
100
-
101
-
102
-
103
-
104
-
105
-
106
-
107
-
108
-
109
-
110
-
111
-
112
-
113
-
114
-
115
-
116
-
117
-
118
-
119
-
120
-
121
-
122
-
123
-
124
-
125
-
 126
126 -
 127
127 -
 128
128 -
 129
129 -
 130
130 -
 131
131 -
 132
132 -
 133
133 -
 134
134 -
 135
135 -
 136
136 -
137
-
138
-
139
-
140
-
141
-
142
-
143
-
144
-
145
-
146
-
147
-
148
-
149
-
150
-
151
-
152
-
153
-
154
-
155
-
156
-
157
-
158
-
159
-
160
-
161
-
162
-
163
-
164
-
165
-
166
-
167
-
168
-
169
-
170
-
171
-
172
-
173
-
174
-
175
-
176
-
177
-
178
-
179
-
180
-
181
-
182
-
183
-
184
-
185
-
186
-
187
-
188
-
189
-
190
-
191
-
192
-
193
-
194
-
195
-
196
-
197
-
198
-
199
-
200
-
201
-
202
-
203
-
204
-
205
-
206
-
207
-
208
-
209
-
210
-
211
-
212
-
213
-
214
-
215
-
216
-
217
-
218
-
219
-
220
-
221
-
222
-
223
-
224
-
225
-
226
-
227
-
228
-
229
-
230
-
231
-
232
-
233
-
234
-
235
-
236
-
237
-
238
-
239
-
240
 |
 |