Roxio Creator 2010 Product Manual - Page 87
Adding tracks from audio CDs, To add tracks from audio CDs to your project, Import from CD/DVD, Custom - key
 |
View all Roxio Creator 2010 manuals
Add to My Manuals
Save this manual to your list of manuals |
Page 87 highlights
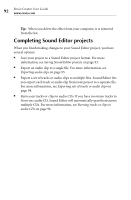
Creating audio projects Getting started with Sound Editor projects 87 Adding tracks from audio CDs To add tracks from audio CDs to your project: 1 Insert the CD from which you want to copy tracks into your CD drive. 2 In the task area, under Add to Project, click Import from CD/DVD. The Media Selector dialog box opens. 3 In the Browse area, click the drive containing the audio CD. 4 In the Track View page on the right, select the tracks you want to import, and then click OK. Tip: To select multiple tracks, hold down the Ctrl key while you click the tracks to be imported. The Import from CD/DVD dialog box appears. 5 In the Import Settings box, select one of the available formats. To define your own combination of settings, including alternate file format, encoder type, bit rate, and file location, select Custom and click Options (see the following step). 6 Optional: To define custom settings, click Options. The Output Settings dialog box appears. For more information, click Help in the dialog box. 7 In the Save To box, enter the folder in which the tracks will be saved. 8 Click Save. The tracks appear as audio clips in the Clip Editor.
-
 1
1 -
2
-
3
-
4
-
5
-
6
-
7
-
8
-
9
-
10
-
11
-
12
-
13
-
14
-
15
-
16
-
17
-
18
-
19
-
20
-
21
-
22
-
23
-
24
-
25
-
26
-
27
-
28
-
29
-
30
-
31
-
32
-
33
-
34
-
35
-
36
-
37
-
38
-
39
-
40
-
41
-
42
-
43
-
44
-
45
-
46
-
47
-
48
-
49
-
50
-
51
-
52
-
53
-
54
-
55
-
56
-
57
-
58
-
59
-
60
-
61
-
62
-
63
-
64
-
65
-
66
-
67
-
68
-
69
-
70
-
71
-
72
-
73
-
74
-
75
-
76
-
77
-
78
-
79
-
80
-
81
-
 82
82 -
 83
83 -
 84
84 -
 85
85 -
 86
86 -
 87
87 -
 88
88 -
 89
89 -
 90
90 -
 91
91 -
 92
92 -
93
-
94
-
95
-
96
-
97
-
98
-
99
-
100
-
101
-
102
-
103
-
104
-
105
-
106
-
107
-
108
-
109
-
110
-
111
-
112
-
113
-
114
-
115
-
116
-
117
-
118
-
119
-
120
-
121
-
122
-
123
-
124
-
125
-
126
-
127
-
128
-
129
-
130
-
131
-
132
-
133
-
134
-
135
-
136
-
137
-
138
-
139
-
140
-
141
-
142
-
143
-
144
-
145
-
146
-
147
-
148
-
149
-
150
-
151
-
152
-
153
-
154
-
155
-
156
-
157
-
158
-
159
-
160
-
161
-
162
-
163
-
164
-
165
-
166
-
167
-
168
-
169
-
170
-
171
-
172
-
173
-
174
-
175
-
176
-
177
-
178
-
179
-
180
-
181
-
182
-
183
-
184
-
185
-
186
-
187
-
188
-
189
-
190
-
191
-
192
-
193
-
194
-
195
-
196
-
197
-
198
-
199
-
200
-
201
-
202
-
203
-
204
-
205
-
206
-
207
-
208
-
209
-
210
-
211
-
212
-
213
-
214
-
215
-
216
-
217
-
218
-
219
-
220
-
221
-
222
-
223
-
224
-
225
-
226
-
227
-
228
-
229
-
230
-
231
-
232
-
233
-
234
-
235
-
236
-
237
-
238
-
239
-
240
 |
 |
