Roxio Creator 2010 Product Manual - Page 180
Preview area, Production Editor, Media Selector, Tools area, View > Dock Media Selector
 |
View all Roxio Creator 2010 manuals
Add to My Manuals
Save this manual to your list of manuals |
Page 180 highlights
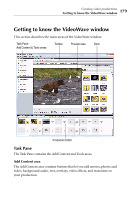
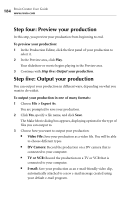
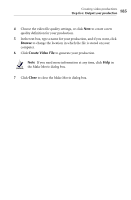
180 Roxio Creator User Guide www.roxio.com Tools area The Tools area provides quick access to several useful tools including Media Selector, Effect Selector, and the Settings dialog box. Preview area The Preview area displays your production and provides all the tools you need to customize the content of your production.There are two Preview area toolbars: the standard toolbar, which provides the common tools that are always available, and the context-sensitive toolbar, which changes to display the tools to manipulate the item you have displayed in the Preview area. Tip: You can increase the size of the Preview area by hiding the Task Pane. You can also drag the split bars at the bottom or right side of the Preview area to resize your workspace. Production Editor The Production Editor is where you add and arrange the content of your video production. You can drag and drop video clips and photos from the Media Selector to the Production Editor, and add color panels, audio, transitions, overlays, text, and effects. There are two ways to view the Production Editor-the Storyline view, and the optional Timeline view. Media Selector Use Media Selector to add content such as images, video, and audio clips to the Production Editor. Media Selector appears in the dock by default. It can be undocked or closed, if you prefer. Tip: When the Media Selector is open, you can dock or undock the panel by choosing View > Dock Media Selector.
-
 1
1 -
2
-
3
-
4
-
5
-
6
-
7
-
8
-
9
-
10
-
11
-
12
-
13
-
14
-
15
-
16
-
17
-
18
-
19
-
20
-
21
-
22
-
23
-
24
-
25
-
26
-
27
-
28
-
29
-
30
-
31
-
32
-
33
-
34
-
35
-
36
-
37
-
38
-
39
-
40
-
41
-
42
-
43
-
44
-
45
-
46
-
47
-
48
-
49
-
50
-
51
-
52
-
53
-
54
-
55
-
56
-
57
-
58
-
59
-
60
-
61
-
62
-
63
-
64
-
65
-
66
-
67
-
68
-
69
-
70
-
71
-
72
-
73
-
74
-
75
-
76
-
77
-
78
-
79
-
80
-
81
-
82
-
83
-
84
-
85
-
86
-
87
-
88
-
89
-
90
-
91
-
92
-
93
-
94
-
95
-
96
-
97
-
98
-
99
-
100
-
101
-
102
-
103
-
104
-
105
-
106
-
107
-
108
-
109
-
110
-
111
-
112
-
113
-
114
-
115
-
116
-
117
-
118
-
119
-
120
-
121
-
122
-
123
-
124
-
125
-
126
-
127
-
128
-
129
-
130
-
131
-
132
-
133
-
134
-
135
-
136
-
137
-
138
-
139
-
140
-
141
-
142
-
143
-
144
-
145
-
146
-
147
-
148
-
149
-
150
-
151
-
152
-
153
-
154
-
155
-
156
-
157
-
158
-
159
-
160
-
161
-
162
-
163
-
164
-
165
-
166
-
167
-
168
-
169
-
170
-
171
-
172
-
173
-
174
-
 175
175 -
 176
176 -
 177
177 -
 178
178 -
 179
179 -
 180
180 -
 181
181 -
 182
182 -
 183
183 -
 184
184 -
 185
185 -
186
-
187
-
188
-
189
-
190
-
191
-
192
-
193
-
194
-
195
-
196
-
197
-
198
-
199
-
200
-
201
-
202
-
203
-
204
-
205
-
206
-
207
-
208
-
209
-
210
-
211
-
212
-
213
-
214
-
215
-
216
-
217
-
218
-
219
-
220
-
221
-
222
-
223
-
224
-
225
-
226
-
227
-
228
-
229
-
230
-
231
-
232
-
233
-
234
-
235
-
236
-
237
-
238
-
239
-
240
 |
 |