Roxio Creator 2010 Product Manual - Page 93
Saving Sound Editor projects, Exporting audio clips, To save your project, File > Save Project
 |
View all Roxio Creator 2010 manuals
Add to My Manuals
Save this manual to your list of manuals |
Page 93 highlights
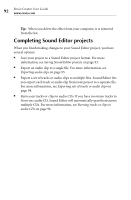
Creating audio projects Installing new sound effects 93 Saving Sound Editor projects Sound Editor lets you save your work to a Sound Editor project file (DMSE), so you can continue working on it later. The DMSE format preserves all of the information about the audio clips, tracks, and layers used in your project. For more information about the Sound Editor project format, see Sound Editor project file format (.dmse) on page 84. To save your project: 1 Choose File > Save Project. If this is the first time you are saving your project to a file, the Save As dialog box appears. 2 Choose the folder in which you want to save the project, specify the file name, and click Save. Exporting audio clips Sound Editor lets you export audio clips from your project to a variety of popular file formats. To export an audio clip: 1 Right-click the audio clip in the Project View area, and choose Export Current Clip. The Export Current Clip dialog box appears. 2 In the Output Settings box, select one of the available formats. To define your own customized settings, select Custom and click Options (see the following step). 3 Optional: To define custom settings, click Options. The File Format dialog box appears. For more information, click Help in the dialog box. 4 In the Save To box, specify the folder in which you want to save the files, or click Browse to search for a folder. 5 In the File name box, specify the name of the exported file. 6 Click Export.
-
 1
1 -
2
-
3
-
4
-
5
-
6
-
7
-
8
-
9
-
10
-
11
-
12
-
13
-
14
-
15
-
16
-
17
-
18
-
19
-
20
-
21
-
22
-
23
-
24
-
25
-
26
-
27
-
28
-
29
-
30
-
31
-
32
-
33
-
34
-
35
-
36
-
37
-
38
-
39
-
40
-
41
-
42
-
43
-
44
-
45
-
46
-
47
-
48
-
49
-
50
-
51
-
52
-
53
-
54
-
55
-
56
-
57
-
58
-
59
-
60
-
61
-
62
-
63
-
64
-
65
-
66
-
67
-
68
-
69
-
70
-
71
-
72
-
73
-
74
-
75
-
76
-
77
-
78
-
79
-
80
-
81
-
82
-
83
-
84
-
85
-
86
-
87
-
 88
88 -
 89
89 -
 90
90 -
 91
91 -
 92
92 -
 93
93 -
 94
94 -
 95
95 -
 96
96 -
 97
97 -
 98
98 -
99
-
100
-
101
-
102
-
103
-
104
-
105
-
106
-
107
-
108
-
109
-
110
-
111
-
112
-
113
-
114
-
115
-
116
-
117
-
118
-
119
-
120
-
121
-
122
-
123
-
124
-
125
-
126
-
127
-
128
-
129
-
130
-
131
-
132
-
133
-
134
-
135
-
136
-
137
-
138
-
139
-
140
-
141
-
142
-
143
-
144
-
145
-
146
-
147
-
148
-
149
-
150
-
151
-
152
-
153
-
154
-
155
-
156
-
157
-
158
-
159
-
160
-
161
-
162
-
163
-
164
-
165
-
166
-
167
-
168
-
169
-
170
-
171
-
172
-
173
-
174
-
175
-
176
-
177
-
178
-
179
-
180
-
181
-
182
-
183
-
184
-
185
-
186
-
187
-
188
-
189
-
190
-
191
-
192
-
193
-
194
-
195
-
196
-
197
-
198
-
199
-
200
-
201
-
202
-
203
-
204
-
205
-
206
-
207
-
208
-
209
-
210
-
211
-
212
-
213
-
214
-
215
-
216
-
217
-
218
-
219
-
220
-
221
-
222
-
223
-
224
-
225
-
226
-
227
-
228
-
229
-
230
-
231
-
232
-
233
-
234
-
235
-
236
-
237
-
238
-
239
-
240
 |
 |