Roxio Creator 2010 Product Manual - Page 76
Converting files, Edit Audio Tags
 |
View all Roxio Creator 2010 manuals
Add to My Manuals
Save this manual to your list of manuals |
Page 76 highlights
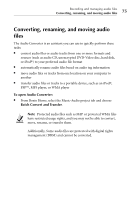
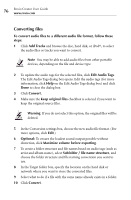
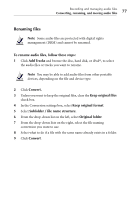
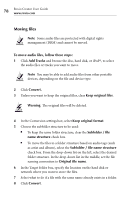
76 Roxio Creator User Guide www.roxio.com Converting files To convert audio files to a different audio file format, follow these steps: 1 Click Add Tracks and browse the disc, hard disk, or iPod®, to select the audio files or tracks you want to convert. Note You may be able to add audio files from other portable devices, depending on the file and device type. 2 To update the audio tags for the selected files, click Edit Audio Tags. The Edit Audio Tags dialog box opens. Edit the audio tags (for more information, click Help on the Edit Audio Tags dialog box) and click Done to close the dialog box. 3 Click Convert. 4 Make sure the Keep original files checkbox is selected if you want to keep the original source files. Warning If you do not select this option, the original files will be deleted. 5 In the Conversion settings box, choose the new audio file format. (For more options, click Edit.) 6 Optional: To ensure the loudest sound output possible without distortion, click Maximize volume before exporting. 7 To create a folder structure and file names based on audio tags (such as artist and album name), select Subfolder / file name structure, and choose the folder structure and file naming convention you want to use. 8 In the Target folder box, specify the location on the hard disk or network where you want to store the converted files. 9 Select what to do if a file with the same name already exists in a folder. 10 Click Convert.
-
 1
1 -
2
-
3
-
4
-
5
-
6
-
7
-
8
-
9
-
10
-
11
-
12
-
13
-
14
-
15
-
16
-
17
-
18
-
19
-
20
-
21
-
22
-
23
-
24
-
25
-
26
-
27
-
28
-
29
-
30
-
31
-
32
-
33
-
34
-
35
-
36
-
37
-
38
-
39
-
40
-
41
-
42
-
43
-
44
-
45
-
46
-
47
-
48
-
49
-
50
-
51
-
52
-
53
-
54
-
55
-
56
-
57
-
58
-
59
-
60
-
61
-
62
-
63
-
64
-
65
-
66
-
67
-
68
-
69
-
70
-
 71
71 -
 72
72 -
 73
73 -
 74
74 -
 75
75 -
 76
76 -
 77
77 -
 78
78 -
 79
79 -
 80
80 -
 81
81 -
82
-
83
-
84
-
85
-
86
-
87
-
88
-
89
-
90
-
91
-
92
-
93
-
94
-
95
-
96
-
97
-
98
-
99
-
100
-
101
-
102
-
103
-
104
-
105
-
106
-
107
-
108
-
109
-
110
-
111
-
112
-
113
-
114
-
115
-
116
-
117
-
118
-
119
-
120
-
121
-
122
-
123
-
124
-
125
-
126
-
127
-
128
-
129
-
130
-
131
-
132
-
133
-
134
-
135
-
136
-
137
-
138
-
139
-
140
-
141
-
142
-
143
-
144
-
145
-
146
-
147
-
148
-
149
-
150
-
151
-
152
-
153
-
154
-
155
-
156
-
157
-
158
-
159
-
160
-
161
-
162
-
163
-
164
-
165
-
166
-
167
-
168
-
169
-
170
-
171
-
172
-
173
-
174
-
175
-
176
-
177
-
178
-
179
-
180
-
181
-
182
-
183
-
184
-
185
-
186
-
187
-
188
-
189
-
190
-
191
-
192
-
193
-
194
-
195
-
196
-
197
-
198
-
199
-
200
-
201
-
202
-
203
-
204
-
205
-
206
-
207
-
208
-
209
-
210
-
211
-
212
-
213
-
214
-
215
-
216
-
217
-
218
-
219
-
220
-
221
-
222
-
223
-
224
-
225
-
226
-
227
-
228
-
229
-
230
-
231
-
232
-
233
-
234
-
235
-
236
-
237
-
238
-
239
-
240
 |
 |