Roxio Creator 2010 Product Manual - Page 143
Quality, an e-mail message appears.
 |
View all Roxio Creator 2010 manuals
Add to My Manuals
Save this manual to your list of manuals |
Page 143 highlights
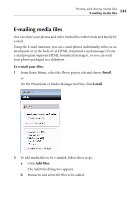
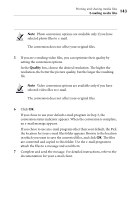
Printing and sharing media files E-mailing media files 143 Note Photo conversion options are available only if you have selected photo files to e-mail. The conversion does not affect your original files. 5 If you are e-mailing video files, you can optimize their quality by setting the conversion options. In the Quality box, choose the desired resolution. The higher the resolution, the better the picture quality, but the larger the resulting file. Note Video conversion options are available only if you have selected video files to e-mail. The conversion does not affect your original files. 6 Click OK. If you chose to use your default e-mail program in Step 3, the conversion status indicator appears. When the conversion is complete, an e-mail message appears. If you chose to use an e-mail program other than your default, the Pick the location for your e-mail files folder appears. Browse to the location in which you want to save the converted files, and click OK. The files are converted and copied to this folder. Use the e-mail program to attach the files to a message and send them. 7 Complete and send the message. For detailed instructions, refer to the documentation for your e-mail client.
-
 1
1 -
2
-
3
-
4
-
5
-
6
-
7
-
8
-
9
-
10
-
11
-
12
-
13
-
14
-
15
-
16
-
17
-
18
-
19
-
20
-
21
-
22
-
23
-
24
-
25
-
26
-
27
-
28
-
29
-
30
-
31
-
32
-
33
-
34
-
35
-
36
-
37
-
38
-
39
-
40
-
41
-
42
-
43
-
44
-
45
-
46
-
47
-
48
-
49
-
50
-
51
-
52
-
53
-
54
-
55
-
56
-
57
-
58
-
59
-
60
-
61
-
62
-
63
-
64
-
65
-
66
-
67
-
68
-
69
-
70
-
71
-
72
-
73
-
74
-
75
-
76
-
77
-
78
-
79
-
80
-
81
-
82
-
83
-
84
-
85
-
86
-
87
-
88
-
89
-
90
-
91
-
92
-
93
-
94
-
95
-
96
-
97
-
98
-
99
-
100
-
101
-
102
-
103
-
104
-
105
-
106
-
107
-
108
-
109
-
110
-
111
-
112
-
113
-
114
-
115
-
116
-
117
-
118
-
119
-
120
-
121
-
122
-
123
-
124
-
125
-
126
-
127
-
128
-
129
-
130
-
131
-
132
-
133
-
134
-
135
-
136
-
137
-
 138
138 -
 139
139 -
 140
140 -
 141
141 -
 142
142 -
 143
143 -
 144
144 -
 145
145 -
 146
146 -
 147
147 -
 148
148 -
149
-
150
-
151
-
152
-
153
-
154
-
155
-
156
-
157
-
158
-
159
-
160
-
161
-
162
-
163
-
164
-
165
-
166
-
167
-
168
-
169
-
170
-
171
-
172
-
173
-
174
-
175
-
176
-
177
-
178
-
179
-
180
-
181
-
182
-
183
-
184
-
185
-
186
-
187
-
188
-
189
-
190
-
191
-
192
-
193
-
194
-
195
-
196
-
197
-
198
-
199
-
200
-
201
-
202
-
203
-
204
-
205
-
206
-
207
-
208
-
209
-
210
-
211
-
212
-
213
-
214
-
215
-
216
-
217
-
218
-
219
-
220
-
221
-
222
-
223
-
224
-
225
-
226
-
227
-
228
-
229
-
230
-
231
-
232
-
233
-
234
-
235
-
236
-
237
-
238
-
239
-
240
 |
 |