Roxio Creator 2010 Product Manual - Page 29
Importing and organizing media files, Creating labels and disc inserts, Don't forget the Tools menu
 |
View all Roxio Creator 2010 manuals
Add to My Manuals
Save this manual to your list of manuals |
Page 29 highlights
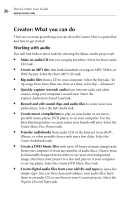
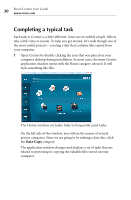
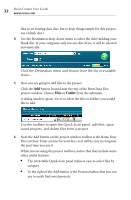
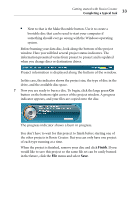
Getting started with Roxio Creator Creator: What you can do 29 ■ Back up the files on your computer to a wide range of storage devices including discs, external hard drives, and flash drives. Select the Backup and Restore task. Note The Backup and Restore task is not available in all versions of Roxio Creator. Importing and organizing media files You may find links to these tasks on more than one project tab: ■ Import photos and video files to your computer from your digital camera, mobile phone, or camcorder. Select the Import Photos or Capture Video tasks. ■ View and manage your media files in folders, and to organize them into personalized albums. Find files quickly by browsing or searching, and burn your files to a disc. Select the Browse and Manage Media task. ■ Transfer files to your wireless devices, and upload video files to the Internet. Select the Browse and Manage Media task. For more information, see Chapter 10, Making advanced data discs, on page 163. Creating labels and disc inserts You will find links to this task on all of the project tabs: ■ Make personalized disc labels and jewel case covers using a simple task assistant. Choose from dozens of professional designs, or create your own. Select the Create Labels task. ■ Make personalized disc labels and jewel case covers using our full-featured label-making application. Choose from dozens of professional designs, or create your own. Select the Create Labels-Advanced task. Don't forget the Tools menu ■ Erase or finalize a disc, get disc information, and keep track of what's on your discs. All of these tasks can be started from the Tools menu. This is also where you'll go to create virtual disc drives.
-
 1
1 -
2
-
3
-
4
-
5
-
6
-
7
-
8
-
9
-
10
-
11
-
12
-
13
-
14
-
15
-
16
-
17
-
18
-
19
-
20
-
21
-
22
-
23
-
 24
24 -
 25
25 -
 26
26 -
 27
27 -
 28
28 -
 29
29 -
 30
30 -
 31
31 -
 32
32 -
 33
33 -
 34
34 -
35
-
36
-
37
-
38
-
39
-
40
-
41
-
42
-
43
-
44
-
45
-
46
-
47
-
48
-
49
-
50
-
51
-
52
-
53
-
54
-
55
-
56
-
57
-
58
-
59
-
60
-
61
-
62
-
63
-
64
-
65
-
66
-
67
-
68
-
69
-
70
-
71
-
72
-
73
-
74
-
75
-
76
-
77
-
78
-
79
-
80
-
81
-
82
-
83
-
84
-
85
-
86
-
87
-
88
-
89
-
90
-
91
-
92
-
93
-
94
-
95
-
96
-
97
-
98
-
99
-
100
-
101
-
102
-
103
-
104
-
105
-
106
-
107
-
108
-
109
-
110
-
111
-
112
-
113
-
114
-
115
-
116
-
117
-
118
-
119
-
120
-
121
-
122
-
123
-
124
-
125
-
126
-
127
-
128
-
129
-
130
-
131
-
132
-
133
-
134
-
135
-
136
-
137
-
138
-
139
-
140
-
141
-
142
-
143
-
144
-
145
-
146
-
147
-
148
-
149
-
150
-
151
-
152
-
153
-
154
-
155
-
156
-
157
-
158
-
159
-
160
-
161
-
162
-
163
-
164
-
165
-
166
-
167
-
168
-
169
-
170
-
171
-
172
-
173
-
174
-
175
-
176
-
177
-
178
-
179
-
180
-
181
-
182
-
183
-
184
-
185
-
186
-
187
-
188
-
189
-
190
-
191
-
192
-
193
-
194
-
195
-
196
-
197
-
198
-
199
-
200
-
201
-
202
-
203
-
204
-
205
-
206
-
207
-
208
-
209
-
210
-
211
-
212
-
213
-
214
-
215
-
216
-
217
-
218
-
219
-
220
-
221
-
222
-
223
-
224
-
225
-
226
-
227
-
228
-
229
-
230
-
231
-
232
-
233
-
234
-
235
-
236
-
237
-
238
-
239
-
240
 |
 |