Samsung BD-C8000 User Manual (user Manual) (ver.1.0) (English) - Page 61
Settings, Starting Internet@TV for the First Time, Account Login, System Setup - netflix
 |
UPC - 036725608290
View all Samsung BD-C8000 manuals
Add to My Manuals
Save this manual to your list of manuals |
Page 61 highlights
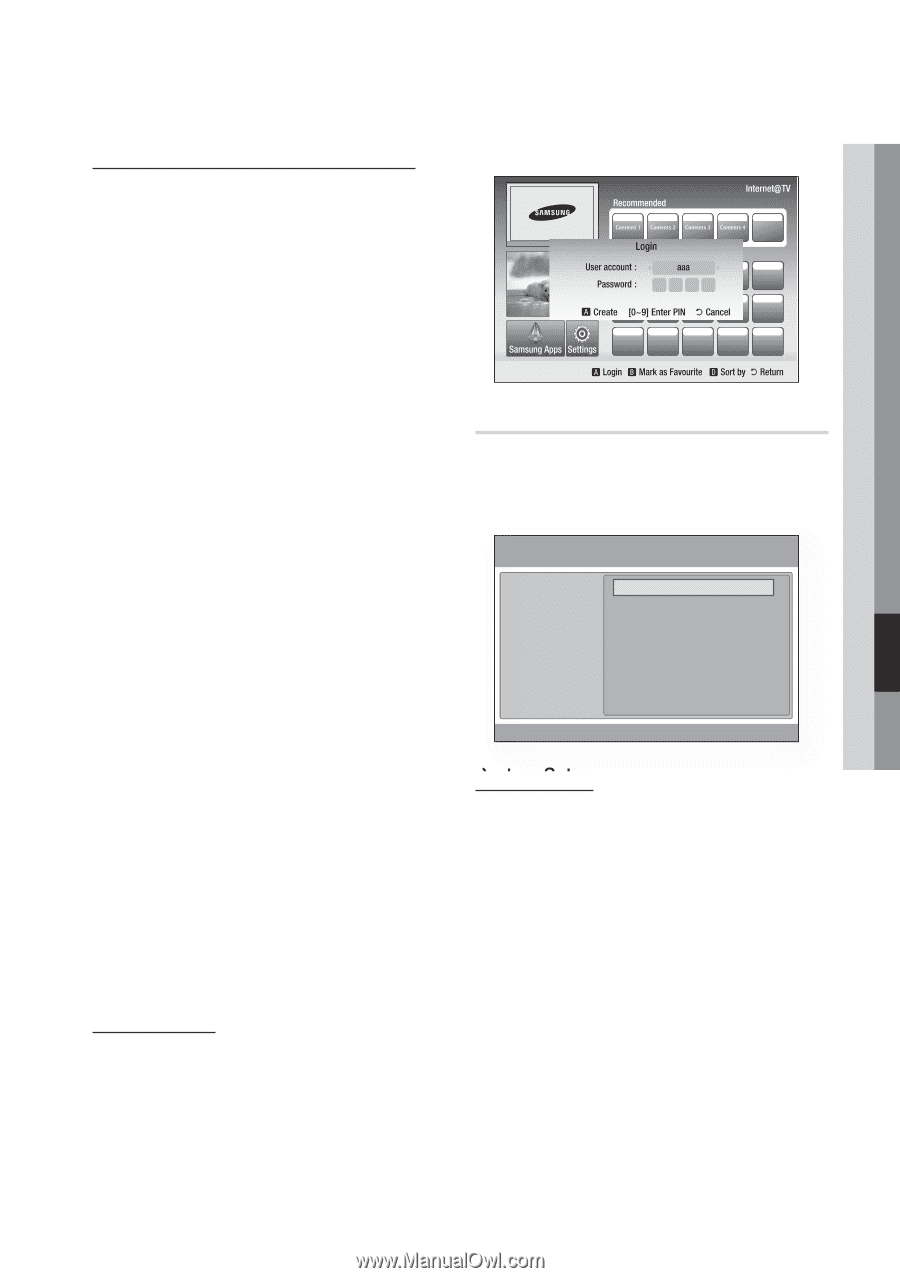
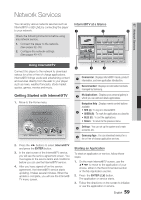
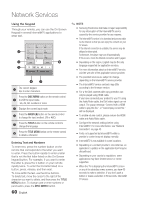
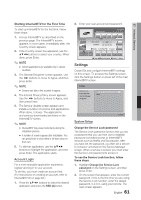
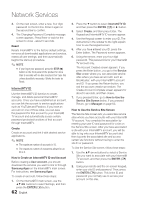
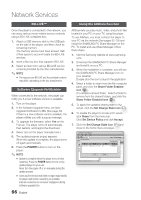
Starting Internet@TV for the First Time To start up Internet@TV for the first time, follow these steps: 1. Access Internet@TV as described on the previous page. The Internet@TV screen appears. In most cases, immediately after, the Country screen appears. 2. If the Country screen has appeared, use the buttons to select your country. When done, press Enter. ✎ NOTE ▪ Certain applications are available only in certain countries. 3. The General Disclaimer screen appears. Use the ◄► buttons to move to Agree, and then press Enter. ✎ NOTE ▪ Screens can take a few seconds to appear. 4. The Internet Privacy Policy screen appears. Use the ◄► buttons to move to Agree, and then press Enter. 5. The Service Update screen appears and installs a number of services and applications. When done, it closes. The applications and services downloaded are listed on the Internet@TV screen. ✎ NOTE ▪ Internet@TV may close momentarily during the installation process. ▪ A number of screens appear after installation. You can press Enter to close them or let them close on their own. 6. To start an application, use the buttons to highlight the application, and then press Enter. The application starts. Account Login For a more enjoyable application experience, register and log in to your account. To do this, you must create an account first. (For instructions on creating an account, refer to Internet@TV ID on page 62.) 1. Press the buttons to select the desired application and press the RED (A) button. 2. Enter your user account and password. Settings Create IDs and configure Internet@TV settings on this screen. To accesss the Settings screen, click the Settings button on lower left of the main Internet@TV screen. Settings System setup Internet@TV ID Service Manager Properties Change the Service Lock password Reset ' Cancel System Setup Change the Service Lock password The Service Lock password function lets you set a password that you can then use to establish password controlled access to Internet@TV services such as Netflix and Blockbuster. After you have set the password, you then set a service to locked or unlocked on the Service Manager screen. When a service is locked, you must enter the Service Lock password to access it. To use the Service Lock function, follow these steps: 1. Highlight Change the Service Lock password on the Settngs screen, and then press Enter. 2. On the screen that appears, enter the current password. If this is the first time you are using the Service Lock function, enter the default password, 0-0-0-0, using your remote. The next screen appears. English 61 07 Network Services
-
 1
1 -
2
-
3
-
4
-
5
-
6
-
7
-
8
-
9
-
10
-
11
-
12
-
13
-
14
-
15
-
16
-
17
-
18
-
19
-
20
-
21
-
22
-
23
-
24
-
25
-
26
-
27
-
28
-
29
-
30
-
31
-
32
-
33
-
34
-
35
-
36
-
37
-
38
-
39
-
40
-
41
-
42
-
43
-
44
-
45
-
46
-
47
-
48
-
49
-
50
-
51
-
52
-
53
-
54
-
55
-
 56
56 -
 57
57 -
 58
58 -
 59
59 -
 60
60 -
 61
61 -
 62
62 -
 63
63 -
 64
64 -
 65
65 -
 66
66 -
67
-
68
-
69
-
70
-
71
-
72
-
73
-
74
-
75
-
76
-
77
-
78
-
79
-
80
-
81
-
82
-
83
-
84
-
85
 |
 |