Samsung BD-C8000 User Manual (user Manual) (ver.1.0) (English) - Page 63
Service Site, Change Password, Delete, Network Services, Internet@TV, Manager, ENTER
 |
UPC - 036725608290
View all Samsung BD-C8000 manuals
Add to My Manuals
Save this manual to your list of manuals |
Page 63 highlights
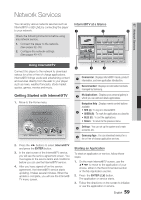
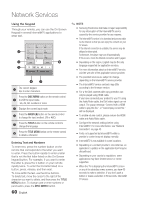
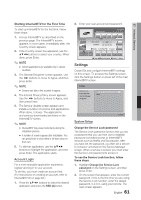
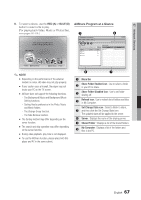
07 Network Services 3. If you have entered the ID and password correctly, the Registered Successfully message appears, asking you if you want to add another service site. If you do, press Enter, and then go to Step 4. If not, press Return and return to the Settings Screen. 4. If you pressed Enter, repeat Steps 1 and 2 to associate another Service site. 5. When you are done, press the Return button. Manager On this screen you can access the following functions: • Service Site : Register login information for service sites. • Change Password : Change account password. • Delete : Delete an account. Instructions for using these functions are below. Service Site 1. On the Settings screen, select Internet@TV ID. On the Internet@TV ID screen, select Manager, and then press Enter. 2. On the Account Management screen, use the ▲▼ arrow buttons to select your account, and then press Enter. 3. Use the ◄► buttons to select Service Site, and then press Enter. 4. Enter your Internet@TV password. The Service Site screen appears. 5. Use the ▲▼ to select a service site, and then press Enter. The Service ID/Password screen and the Keypad screen appears. 6. Using your remote and the on-screen Keypad, enter your site ID and password. Then, press the ENTER (E) button. This is the ID and password you normally use to access your account on this site. 7. If you have entered the ID and password correctly, the Registered Successfully message appears, asking you if you want to add another service site. If you do, press Enter, and then go to Step 8. If not, press Return and return to the Settings Screen. 8. If you pressed Enter, repeat Steps 5 and 6 to associate another Service site. 9. When you are done, press the Return button. Change Password 1. On the Internet@TV ID screen, select Manager, and then press Enter. 2. On the Account Management screen, use the ▲▼ arrow buttons to select your account, and then press Enter. 3. Use the ◄► buttons to select Change Password, and then press Enter. 4. Enter your current password. The next screen appears. 5. On the next screen, enter a new, four digit password on the first line. Enter it again on the second line to confirm. 6. The Changing Password Complete message screen appears. Press Enter or wait for the screen to close - about 5 seconds. Delete 1. On the Internet@TV ID screen, select Manager, and then press Enter. 2. On the Account Management screen, use the ▲▼ arrow buttons to select your account, and then press Enter. 3. Use the ◄► buttons to select Delete Account and then press Enter. 4. Enter your current password. Your account is deleted. The Account Deleted message appears for about 5 seconds, and then closes. English 63
-
 1
1 -
2
-
3
-
4
-
5
-
6
-
7
-
8
-
9
-
10
-
11
-
12
-
13
-
14
-
15
-
16
-
17
-
18
-
19
-
20
-
21
-
22
-
23
-
24
-
25
-
26
-
27
-
28
-
29
-
30
-
31
-
32
-
33
-
34
-
35
-
36
-
37
-
38
-
39
-
40
-
41
-
42
-
43
-
44
-
45
-
46
-
47
-
48
-
49
-
50
-
51
-
52
-
53
-
54
-
55
-
56
-
57
-
 58
58 -
 59
59 -
 60
60 -
 61
61 -
 62
62 -
 63
63 -
 64
64 -
 65
65 -
 66
66 -
 67
67 -
 68
68 -
69
-
70
-
71
-
72
-
73
-
74
-
75
-
76
-
77
-
78
-
79
-
80
-
81
-
82
-
83
-
84
-
85
 |
 |