Samsung SHR-5162 User Manual - Page 15
Bscrew-machine 6-32unc, L4. 2 - drivers
 |
View all Samsung SHR-5162 manuals
Add to My Manuals
Save this manual to your list of manuals |
Page 15 highlights
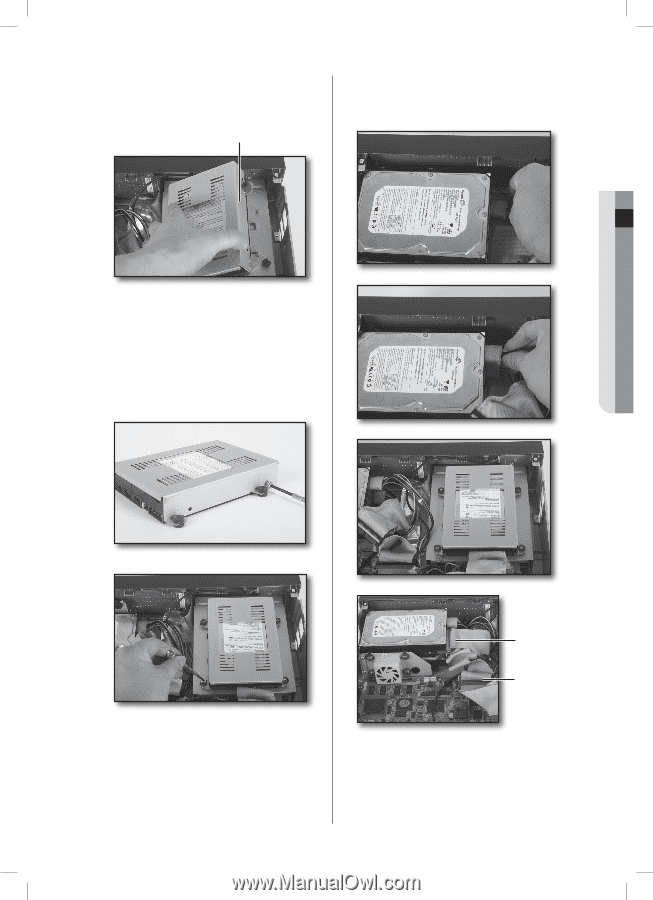
02 INSTALLATION 6. To add another hard disk after adding a hard disk completes, remove the Bracket-HDD(B) on the DVD-RW driver. BRACKET-HDD(B) 8. When adding hard disks completes, connect the power supply cable, signal transmission cable (IDE Cable), and fan cable to the hard disks. 7. Fix the hard disk to the Bracket using 4 (B)SCREW-MACHINE (6-32UNC, L4. 2) provided when purchasing the HDD. The screws should be fastened not to come loose. Fix the Bracket-HDD(B) using screws after aligning 4 spots on the bottom and mounting holes. SHR-5162_Eng.indb 11 Primary HDD IDE Connector Secondary HDD IDE Connector 9. After checking whether or not the connections have no problem, close the cover. 10. Fix the cover using screws. (Each of left and right sides has 5 spots and the back side has 1 spot.) installation _11 2007-06-18 11:47:52
-
 1
1 -
2
-
3
-
4
-
5
-
6
-
7
-
8
-
9
-
 10
10 -
 11
11 -
 12
12 -
 13
13 -
 14
14 -
 15
15 -
 16
16 -
 17
17 -
 18
18 -
 19
19 -
 20
20 -
21
-
22
-
23
-
24
-
25
-
26
-
27
-
28
-
29
-
30
-
31
-
32
-
33
-
34
-
35
-
36
-
37
-
38
-
39
-
40
-
41
-
42
-
43
-
44
-
45
-
46
-
47
-
48
-
49
-
50
-
51
-
52
-
53
-
54
-
55
-
56
-
57
-
58
-
59
-
60
-
61
-
62
-
63
-
64
-
65
-
66
-
67
-
68
-
69
-
70
-
71
-
72
-
73
-
74
-
75
-
76
-
77
-
78
-
79
-
80
-
81
-
82
-
83
-
84
-
85
-
86
-
87
-
88
-
89
-
90
-
91
-
92
-
93
 |
 |