Samsung SHR-5162 User Manual - Page 70
> Viewer Setup > File Converting >
 |
View all Samsung SHR-5162 manuals
Add to My Manuals
Save this manual to your list of manuals |
Page 70 highlights
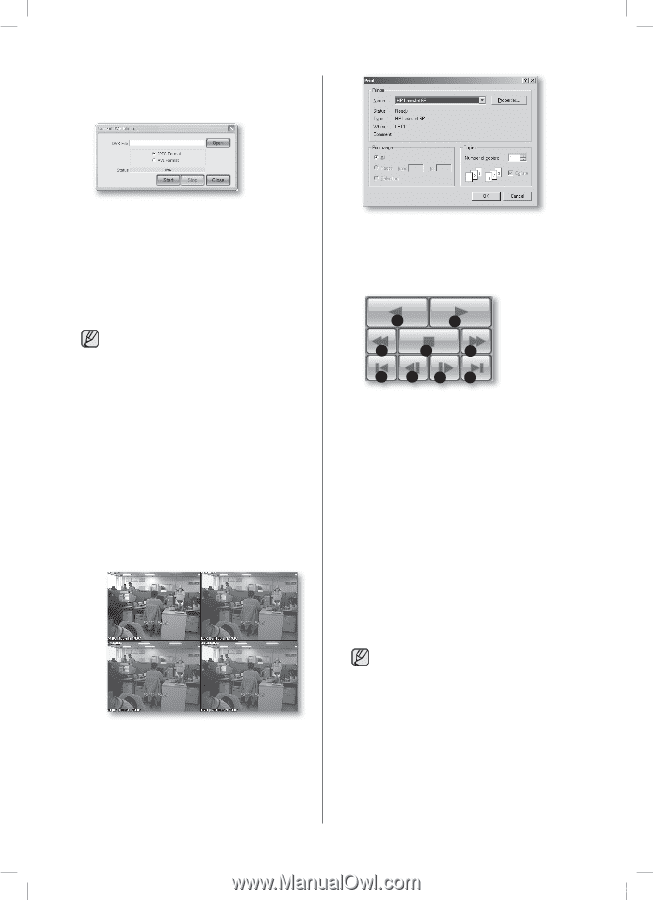
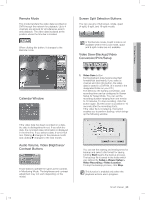
2. File Conversion button When this button is clicked, the system converts a DVR file into JPEG or AVI format. To perform this function a. Click Open to select a DVR file to be converted. b. Select JPEG Frame or AVI Video. c. Click Start to convert the file. To stop conversion, click Stop. If JPEG Frame is selected, the file is converted to "*.jpg" file after clicking Start. The converted JPG file is saved according to the preset route: Setup > Viewer Setup > File Converting > Jpeg Location. If AVI Video is selected, the file is converted to the "*.avi" file after clicking Start. The converted AVI file is saved according to the preset route: Setup > Viewer Setup > File Converting > AVI Location. In case of AVI backup, you need the divX codec for playing saved files. The divX codec can be found at www.divx. com. 3. Print button This button prints the playback screen that is now being displayed. 4. Setup Mode button This button brings up the Setup Mode window. 5. Play buttons 1 2 3 4 5 6 78 9 1. Reverse Play: Performs Reverse Play 2. Play: Performs playback 3. Fast Backward: Reverse-plays faster 4. Stop: Stops playing 5. Fast Forward: Plays faster 6. Go to Last: Plays the latest (last) image in the time line 7. Step Backward: Performs one step reverse-play by one second 8. Step Forward: Performs one step forward by one second 9. Go to First: Plays the first image in the time line During play (Play/RevPlay/FF/FB), disconnection or change to both Monitoring and Local modes is not permitted. Click Stop first before any change. 66_ Smart Viewer SHR-5162_Eng.indb 66 2007-06-18 11:50:23
-
 1
1 -
2
-
3
-
4
-
5
-
6
-
7
-
8
-
9
-
10
-
11
-
12
-
13
-
14
-
15
-
16
-
17
-
18
-
19
-
20
-
21
-
22
-
23
-
24
-
25
-
26
-
27
-
28
-
29
-
30
-
31
-
32
-
33
-
34
-
35
-
36
-
37
-
38
-
39
-
40
-
41
-
42
-
43
-
44
-
45
-
46
-
47
-
48
-
49
-
50
-
51
-
52
-
53
-
54
-
55
-
56
-
57
-
58
-
59
-
60
-
61
-
62
-
63
-
64
-
 65
65 -
 66
66 -
 67
67 -
 68
68 -
 69
69 -
 70
70 -
 71
71 -
 72
72 -
 73
73 -
 74
74 -
 75
75 -
76
-
77
-
78
-
79
-
80
-
81
-
82
-
83
-
84
-
85
-
86
-
87
-
88
-
89
-
90
-
91
-
92
-
93
 |
 |