Canon PIXMA MP800R Setup Guide - Page 17
Close the Scanning Unit Printer Cover.
 |
View all Canon PIXMA MP800R manuals
Add to My Manuals
Save this manual to your list of manuals |
Page 17 highlights
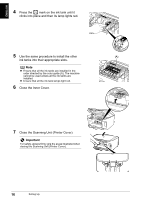
ENGLISH 4 Press the mark on the ink tank until it clicks into place and then its lamp lights red. 5 Use the same procedure to install the other (A) ink tanks into their appropriate slots. Note z Ensure that all the ink tanks are installed in the order directed by the color guide (A). The machine cannot be used unless all the ink tanks are installed. z Ensure that all the ink tank lamps light red. 6 Close the Inner Cover. 7 Close the Scanning Unit (Printer Cover). Important For safety, always firmly grip the areas illustrated when closing the Scanning Unit (Printer Cover). 16 Setting Up
-
 1
1 -
2
-
3
-
4
-
5
-
6
-
7
-
8
-
9
-
10
-
11
-
 12
12 -
 13
13 -
 14
14 -
 15
15 -
 16
16 -
 17
17 -
 18
18 -
 19
19 -
 20
20 -
 21
21 -
 22
22 -
23
-
24
-
25
-
26
-
27
-
28
-
29
-
30
-
31
-
32
-
33
-
34
-
35
-
36
-
37
-
38
-
39
-
40
-
41
-
42
-
43
-
44
-
45
-
46
-
47
-
48
-
49
-
50
-
51
-
52
-
53
-
54
-
55
-
56
-
57
-
58
-
59
-
60
-
61
-
62
-
63
-
64
-
65
-
66
-
67
-
68
-
69
-
70
-
71
-
72
-
73
-
74
-
75
-
76
-
77
-
78
 |
 |
16
Setting Up
ENGLISH
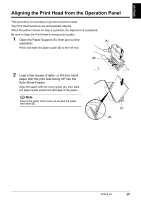
4
Press the
mark on the ink tank until it
clicks into place and then its lamp lights red.
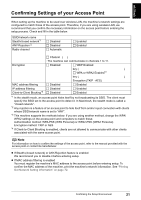
5
Use the same procedure to install the other
ink tanks into their appropriate slots.
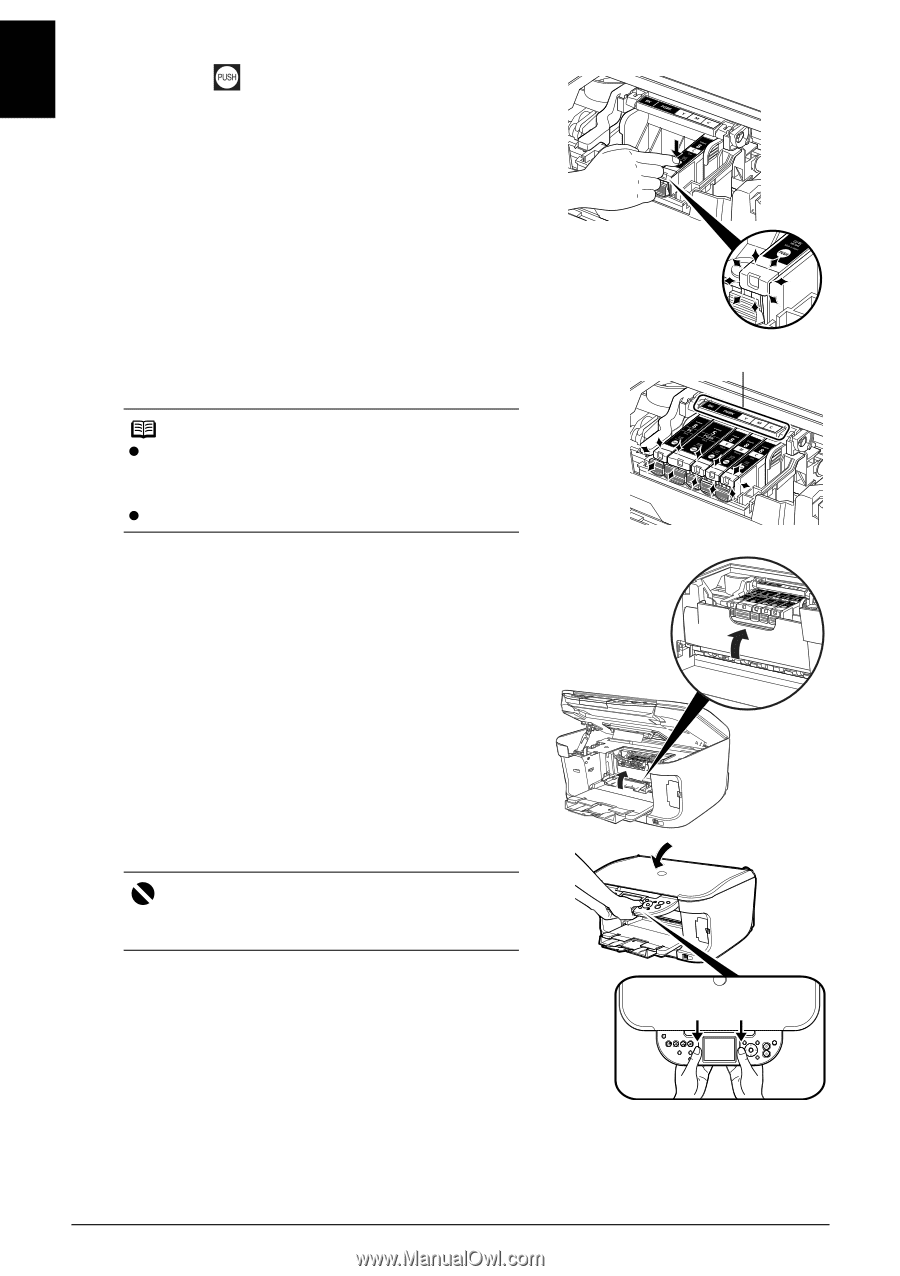
6
Close the Inner Cover.
7
Close the Scanning Unit (Printer Cover).
Note
Ensure that all the ink tanks are installed in the
order directed by the color guide (A). The machine
cannot be used unless all the ink tanks are
installed.
Ensure that all the ink tank lamps light red.
Important
For safety, always firmly grip the areas illustrated when
closing the Scanning Unit (Printer Cover).
(A)