Canon PIXMA MP800R Setup Guide - Page 33
Yes]. Then click [Next].
 |
View all Canon PIXMA MP800R manuals
Add to My Manuals
Save this manual to your list of manuals |
Page 33 highlights
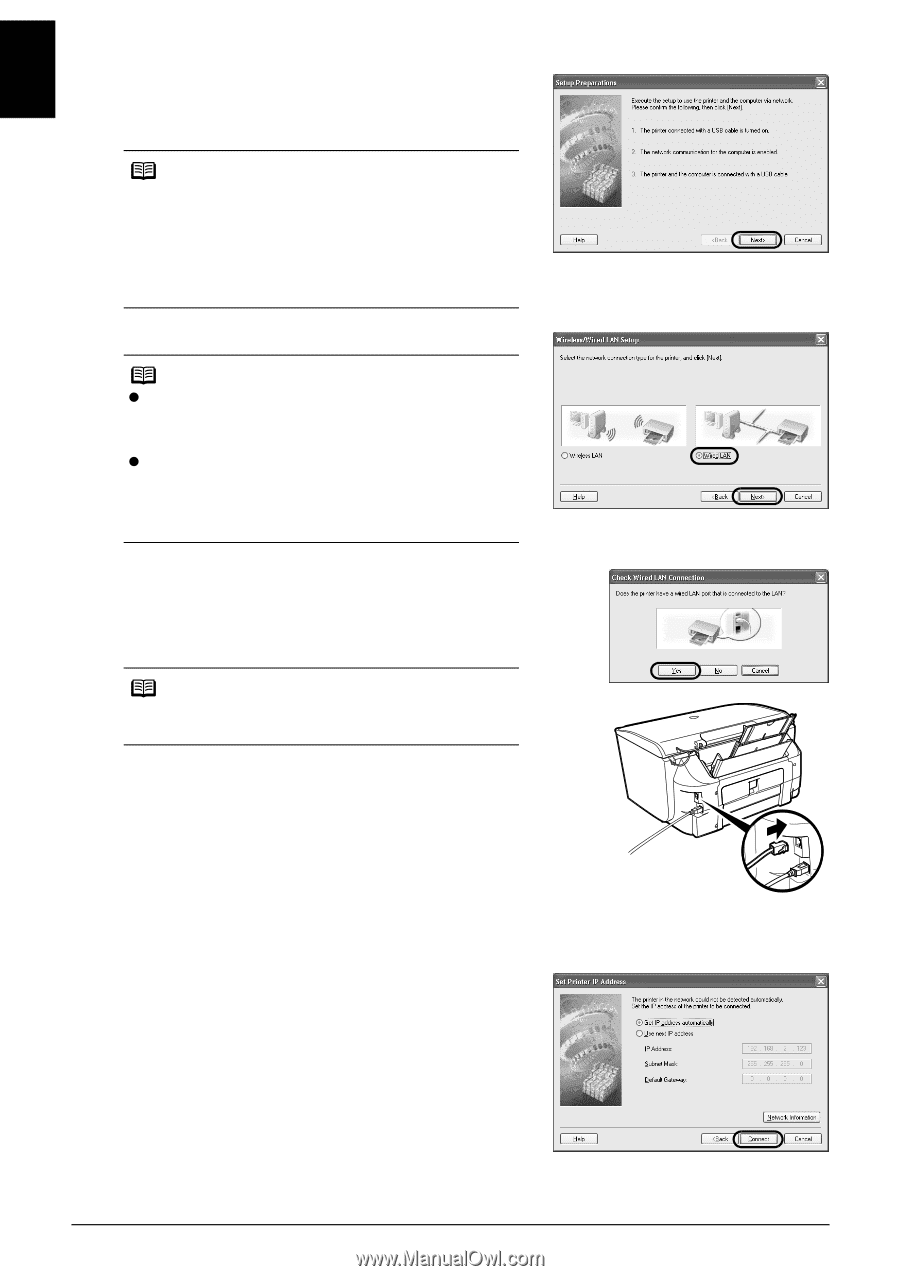
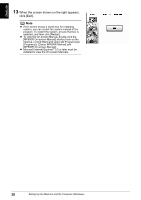
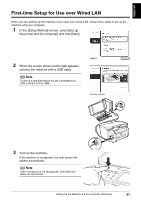
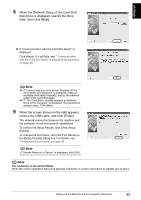
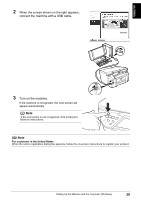
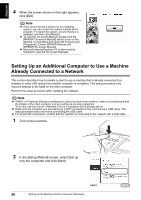
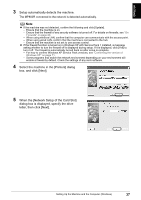
ENGLISH 4 When the [Setup Preparations] dialog box is displayed, confirm that preparation is complete, then click [Next]. Note If the machine's network settings are already configured, the [Setup Environment Confirmation] dialog box appears asking you for confirmation to use the machine with the current settings. You can proceed with the setup using the current network settings. To do so, click [Use as is]. To reconfigure the network settings, click [Reconfigure]. 5 Select [Wired LAN]. Note z If the wireless LAN settings are already configured, the [Note on Network Settings] dialog box is displayed. Generally, click [Wired connection only] to enable only wired LAN. z If the machine's network settings have been set before, the [Printer Network Setup] dialog box is displayed. For details, see "The [Printer Network Setup] dialog box is displayed during setup" on page 66. 6 When the screen shown on the right appears, connect the machine to the network devices such as hubs with a LAN cable and click [Yes]. Then click [Next]. Note Connection may vary depending on your network setup. 7 Setup automatically detects the machine. The MP800R connected with the USB cable is detected automatically. If the machine was not detected, the [Set Printer IP Address] dialog box appears. Ensure that the machine is on and connected to your computer with a USB cable, then click [Connect] to retry detection. If the machine is still not detected, refer to "The [Set Printer IP Address / Printer IP Address Setup] dialog box is displayed during setup" on page 64. 32 Setting Up the Machine and the Computer (Windows)
-
 1
1 -
2
-
3
-
4
-
5
-
6
-
7
-
8
-
9
-
10
-
11
-
12
-
13
-
14
-
15
-
16
-
17
-
18
-
19
-
20
-
21
-
22
-
23
-
24
-
25
-
26
-
27
-
 28
28 -
 29
29 -
 30
30 -
 31
31 -
 32
32 -
 33
33 -
 34
34 -
 35
35 -
 36
36 -
 37
37 -
 38
38 -
39
-
40
-
41
-
42
-
43
-
44
-
45
-
46
-
47
-
48
-
49
-
50
-
51
-
52
-
53
-
54
-
55
-
56
-
57
-
58
-
59
-
60
-
61
-
62
-
63
-
64
-
65
-
66
-
67
-
68
-
69
-
70
-
71
-
72
-
73
-
74
-
75
-
76
-
77
-
78
 |
 |