Canon PIXMA MP800R Setup Guide - Page 30
Click [Next] in the [Connection Performance
 |
View all Canon PIXMA MP800R manuals
Add to My Manuals
Save this manual to your list of manuals |
Page 30 highlights
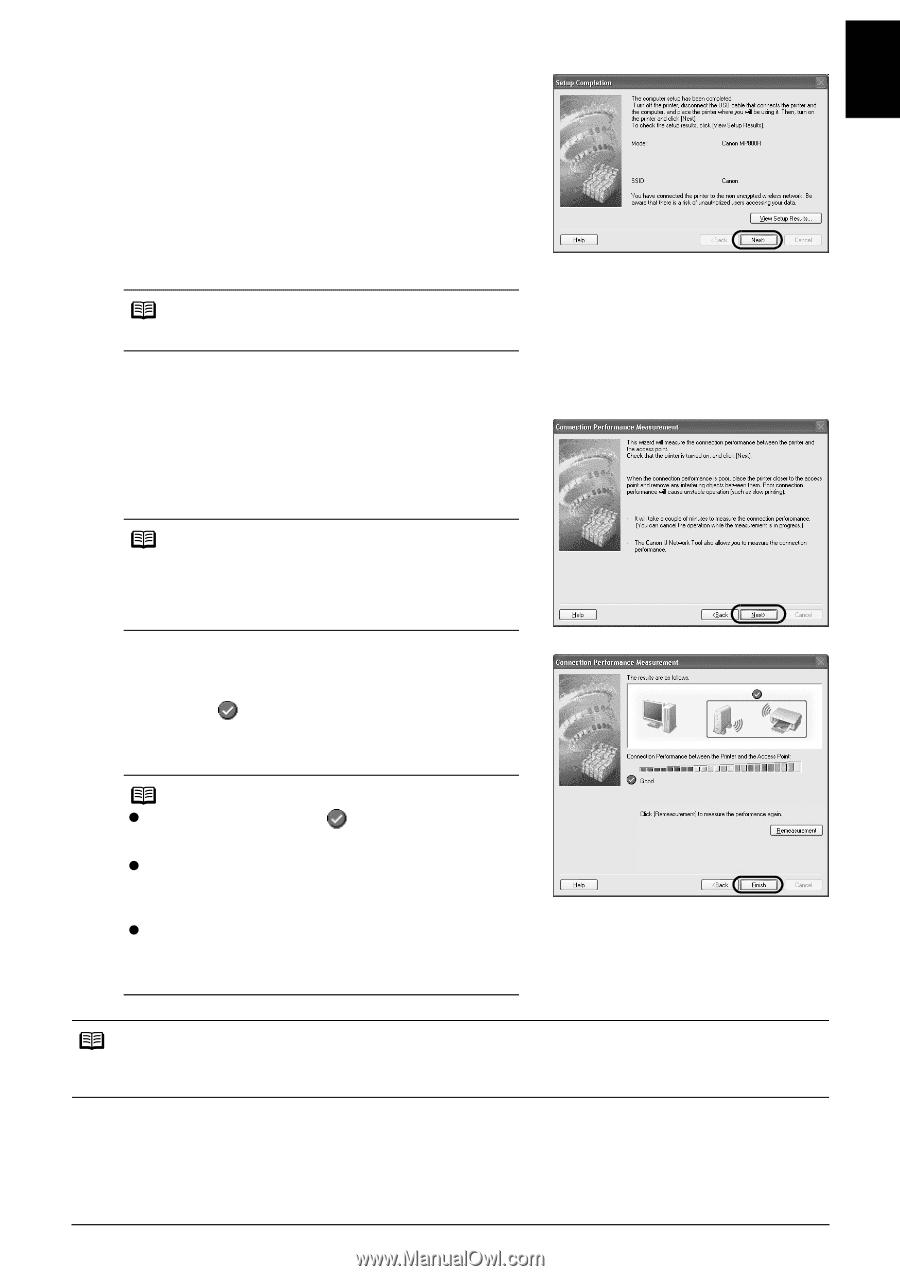
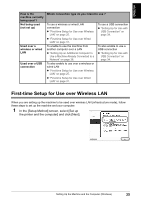
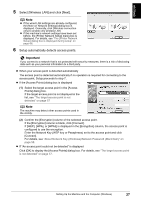
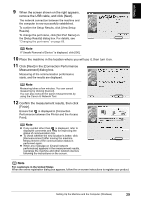
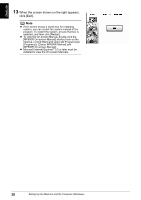
ENGLISH 9 When the screen shown on the right appears, remove the USB cable, and click [Next]. The network connection between the machine and the computer is now successfully established. To confirm the Setup Results, click [View Setup Results]. To change the port name, click [Set Port Name] on the [Setup Results] dialog box. For details, see "Changing the port name" on page 69. Note If "Unsafe Removal of Device" is displayed, click [OK]. 10 Place the machine in the location where you will use it, then turn it on. 11 Click [Next] in the [Connection Performance Measurement] dialog box. Measuring of the communication performance starts, and the results are displayed. Note Measuring takes a few minutes. You can cancel measuring by clicking [Cancel]. You can also execute the same measurements by using the Canon IJ Network Tool. 12 Confirm the measurement results, then click [Finish]. Ensure that is displayed in [Connection Performance between the Printer and the Access Point]. Note z If any symbol other than is displayed, refer to displayed comments and Help for improving the status of communication link. z To check whether the new location is better, click [Remeasurement] after moving the machine. Measurement of the communication status is performed again. z When any message on [Overall network performance] appears in the measurement results, rearrange the machine and other network devices following the instructions on the screen. Note For customers in the United States When the online registration dialog box appears, follow the on-screen instructions to register your product. Setting Up the Machine and the Computer (Windows) 29
-
 1
1 -
2
-
3
-
4
-
5
-
6
-
7
-
8
-
9
-
10
-
11
-
12
-
13
-
14
-
15
-
16
-
17
-
18
-
19
-
20
-
21
-
22
-
23
-
24
-
 25
25 -
 26
26 -
 27
27 -
 28
28 -
 29
29 -
 30
30 -
 31
31 -
 32
32 -
 33
33 -
 34
34 -
 35
35 -
36
-
37
-
38
-
39
-
40
-
41
-
42
-
43
-
44
-
45
-
46
-
47
-
48
-
49
-
50
-
51
-
52
-
53
-
54
-
55
-
56
-
57
-
58
-
59
-
60
-
61
-
62
-
63
-
64
-
65
-
66
-
67
-
68
-
69
-
70
-
71
-
72
-
73
-
74
-
75
-
76
-
77
-
78
 |
 |