Canon VIXIA HF M30 VIXIA HF M30 / HF M31 / HF M300 Instruction Manual - Page 108
Automatic], Red-Eye Auto], Flash On], Flash Off]
 |
View all Canon VIXIA HF M30 manuals
Add to My Manuals
Save this manual to your list of manuals |
Page 108 highlights
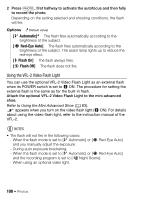
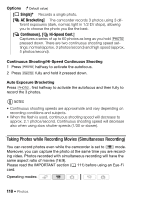
2 Press j, first halfway to activate the autofocus and then fully to record the photo. Depending on the setting selected and shooting conditions, the flash will fire. Options ( Default value) [U Automatic] The flash fires automatically according to the brightness of the subject. [V Red-Eye Auto] The flash fires automatically according to the brightness of the subject. The assist lamp lights up to reduce the red-eye effect. [S Flash On] The flash always fires. [W Flash Off] The flash does not fire. Using the VFL-2 Video Flash Light You can use the optional VFL-2 Video Flash Light as an external flash when its POWER switch is set to n ON. The procedure for setting the external flash is the same as for the built-in flash. Attach the optional VFL-2 Video Flash Light to the mini advanced shoe. Refer to Using the Mini Advanced Shoe (0 83). appears when you turn on the video flash light (n ON). For details about using the video flash light, refer to the instruction manual of the VFL-2. NOTES • The flash will not fire in the following cases: - When the flash mode is set to [U Automatic] or [V Red-Eye Auto] and you manually adjust the exposure. - During auto exposure bracketing. - When the flash mode is set to [U Automatic] or [V Red-Eye Auto] and the recording program is set to [q Night Scene]. - When using an optional video light. 108 Š Photos
-
 1
1 -
2
-
3
-
4
-
5
-
6
-
7
-
8
-
9
-
10
-
11
-
12
-
13
-
14
-
15
-
16
-
17
-
18
-
19
-
20
-
21
-
22
-
23
-
24
-
25
-
26
-
27
-
28
-
29
-
30
-
31
-
32
-
33
-
34
-
35
-
36
-
37
-
38
-
39
-
40
-
41
-
42
-
43
-
44
-
45
-
46
-
47
-
48
-
49
-
50
-
51
-
52
-
53
-
54
-
55
-
56
-
57
-
58
-
59
-
60
-
61
-
62
-
63
-
64
-
65
-
66
-
67
-
68
-
69
-
70
-
71
-
72
-
73
-
74
-
75
-
76
-
77
-
78
-
79
-
80
-
81
-
82
-
83
-
84
-
85
-
86
-
87
-
88
-
89
-
90
-
91
-
92
-
93
-
94
-
95
-
96
-
97
-
98
-
99
-
100
-
101
-
102
-
 103
103 -
 104
104 -
 105
105 -
 106
106 -
 107
107 -
 108
108 -
 109
109 -
 110
110 -
 111
111 -
 112
112 -
 113
113 -
114
-
115
-
116
-
117
-
118
-
119
-
120
-
121
-
122
-
123
-
124
-
125
-
126
-
127
-
128
-
129
-
130
-
131
-
132
-
133
-
134
-
135
-
136
-
137
-
138
-
139
-
140
-
141
-
142
-
143
-
144
-
145
-
146
-
147
-
148
-
149
-
150
-
151
-
152
-
153
-
154
-
155
-
156
-
157
-
158
-
159
-
160
-
161
-
162
-
163
-
164
-
165
-
166
-
167
-
168
-
169
-
170
-
171
-
172
-
173
-
174
-
175
-
176
-
177
-
178
-
179
-
180
-
181
-
182
-
183
-
184
-
185
-
186
-
187
-
188
-
189
-
190
-
191
-
192
-
193
-
194
-
195
-
196
-
197
-
198
-
199
-
200
-
201
-
202
-
203
-
204
-
205
-
206
-
207
-
208
-
209
-
210
 |
 |