Canon VIXIA HF M30 VIXIA HF M30 / HF M31 / HF M300 Instruction Manual - Page 143
Embed Date/Time], Bit Rate Quality], Desired option
 |
View all Canon VIXIA HF M30 manuals
Add to My Manuals
Save this manual to your list of manuals |
Page 143 highlights
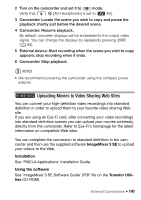
7 When the conversion is completed, a confirmation screen will appear. Connect the camcorder to the computer at this point (0 144) to continue uploading the converted videos to the Web or touch [End Without Connecting] to connect to the computer later. To embed the recording date and time The recording date and time will always be displayed on the converted scene. [5] 8 [Embed Date/Time] 8 [On] 8 [f] 8 [f] To select the bit rate Using a higher bit rate will result in better video quality for the converted scenes, while a lower bit rate will result in smaller file sizes and faster uploads. [5] 8 [Bit Rate (Quality)] 8 Desired option 8 [f] 8 [f] To convert only part of a scene Instead of steps 4 and 5 above, touch on the scene you want to convert to start playing it back. Pause the playback at the point where you want the conversion to begin and continue with step 6. NOTES • When converting scenes in the [Playlist] or [Video Snapshot] → [Original]/ [Playlist] index screen: - The scenes are converted with the selected background music (0 89) instead of the original sound. External Connections Š 143
-
 1
1 -
2
-
3
-
4
-
5
-
6
-
7
-
8
-
9
-
10
-
11
-
12
-
13
-
14
-
15
-
16
-
17
-
18
-
19
-
20
-
21
-
22
-
23
-
24
-
25
-
26
-
27
-
28
-
29
-
30
-
31
-
32
-
33
-
34
-
35
-
36
-
37
-
38
-
39
-
40
-
41
-
42
-
43
-
44
-
45
-
46
-
47
-
48
-
49
-
50
-
51
-
52
-
53
-
54
-
55
-
56
-
57
-
58
-
59
-
60
-
61
-
62
-
63
-
64
-
65
-
66
-
67
-
68
-
69
-
70
-
71
-
72
-
73
-
74
-
75
-
76
-
77
-
78
-
79
-
80
-
81
-
82
-
83
-
84
-
85
-
86
-
87
-
88
-
89
-
90
-
91
-
92
-
93
-
94
-
95
-
96
-
97
-
98
-
99
-
100
-
101
-
102
-
103
-
104
-
105
-
106
-
107
-
108
-
109
-
110
-
111
-
112
-
113
-
114
-
115
-
116
-
117
-
118
-
119
-
120
-
121
-
122
-
123
-
124
-
125
-
126
-
127
-
128
-
129
-
130
-
131
-
132
-
133
-
134
-
135
-
136
-
137
-
 138
138 -
 139
139 -
 140
140 -
 141
141 -
 142
142 -
 143
143 -
 144
144 -
 145
145 -
 146
146 -
 147
147 -
 148
148 -
149
-
150
-
151
-
152
-
153
-
154
-
155
-
156
-
157
-
158
-
159
-
160
-
161
-
162
-
163
-
164
-
165
-
166
-
167
-
168
-
169
-
170
-
171
-
172
-
173
-
174
-
175
-
176
-
177
-
178
-
179
-
180
-
181
-
182
-
183
-
184
-
185
-
186
-
187
-
188
-
189
-
190
-
191
-
192
-
193
-
194
-
195
-
196
-
197
-
198
-
199
-
200
-
201
-
202
-
203
-
204
-
205
-
206
-
207
-
208
-
209
-
210
 |
 |