Canon XF100 XF100 / XF105 Instruction Manual
Canon XF100 Manual
 |
View all Canon XF100 manuals
Add to My Manuals
Save this manual to your list of manuals |
Canon XF100 manual content summary:
- Canon XF100 | XF100 / XF105 Instruction Manual - Page 1
PUB. DIM-0972-000 HD Camcorder Instruction Manual Caméscope HD Manuel d'instruction Videocámara HD Manual de Instrucciones English Français Español - Canon XF100 | XF100 / XF105 Instruction Manual - Page 2
AND TO REDUCE ANNOYING INTERFERENCE, USE THE RECOMMENDED ACCESSORIES ONLY. COPYRIGHT WARNING: Unauthorized recording of copyrighted materials may infringe on the rights of copyright owners and be contrary to copyright laws. HD Camcorder, XF105 A / XF100 A Systems. This device complies with Part 15 - Canon XF100 | XF100 / XF105 Instruction Manual - Page 3
servicing) instructions in the literature accompanying the product. Important Safety Instructions In these safety instructions the word "product" refers to the Canon HD Camcorder XF105 A / XF100 A and all its accessories. 1. Read these instructions an electrician for replacement of the obsolete - Canon XF100 | XF100 / XF105 Instruction Manual - Page 4
, Final Cut Pro are trademarks of Apple Inc., registered in the U.S. and other countries. • Avid, Media Composer and NewsCutter are trademarks or registered trademarks of Avid Technology, Inc. or its subsidiaries in the United States and/or other countries. • HDMI, the HDMI logo and High-Definition - Canon XF100 | XF100 / XF105 Instruction Manual - Page 5
). Custom picture settings With custom picture settings (0 99), you can enjoy unparalleled image control to deliver the "look" you want by adjusting parameters, such as gamma and sharpness. The custom picture settings can be recorded onto an SD card, which allows multiple XF105/XF100 camcorders to - Canon XF100 | XF100 / XF105 Instruction Manual - Page 6
Save custom picture and menu settings to an SD card so that you can transfer your setting preferences to other XF105/XF100 camcorders in order to use them in the same way. Other Functions Audio Sound is recorded as 2-channel linear PCM audio (16-bit/48 kHz). You can use the built-in microphone, MIC - Canon XF100 | XF100 / XF105 Instruction Manual - Page 7
the Available Recording Time 39 Recovering Data on the CF Card 39 7 3. Recording 40 Recording Video 40 Preparing to Record 40 Recording 40 Onscreen Displays 43 Power Save Mode 45 Video Configuration: Bit Rate, Resolution and Frame Rate 46 Custom Button and Dial 47 Adjusting the Focus 48 Manual - Canon XF100 | XF100 / XF105 Instruction Manual - Page 8
Custom Picture Files 101 Embedding Custom Picture Settings in a Recording 102 Available Custom Picture Settings 102 Customizing Functions and Onscreen Displays 107 Customizing Functions 107 Customizing Onscreen Displays 108 Saving and Loading Camera Settings 109 Saving Camera Settings to an SD Card - Canon XF100 | XF100 / XF105 Instruction Manual - Page 9
) 132 Installing and Uninstalling Canon XF Utility (Mac OS) 134 Viewing the Software Instruction Manuals 137 7. Photos 138 Taking Photos 138 Taking Photos in CAMERA Mode 138 Capturing Photos in MEDIA Mode 138 Photo Playback 140 Displaying the [Photos] Index Screen 140 Viewing Photos 140 Photo - Canon XF100 | XF100 / XF105 Instruction Manual - Page 10
this manual. "Screen" refers to the LCD screen and the viewfinder screen. "CF card" refers to a CompactFlash (CF) card. "SD card" refers to an SD or SDHC memory card. "Recording media" refers to CF cards and SD cards. • Photographs in the manual are simulated pictures taken with a still camera. Some - Canon XF100 | XF100 / XF105 Instruction Manual - Page 11
and then press SET. 3 After you finish recording, press the U button. • The last clip that was recorded is played back without audio for the selected duration. [A REVIEW] appears at the top of the screen. • Press the CANCEL button to stop reviewing the clip and change the camcorder back to record - Canon XF100 | XF100 / XF105 Instruction Manual - Page 12
with the camcorder. 12 CA-930 Compact Power Adapter (incl. power cord) Microphone holder unit BP-925 Battery Pack (incl. terminal cover) DC-930 DC Cable CTC-100/S Component Cable Lens Hood Lens Cap WL-D6000 Wireless Controller (incl. CR2025 Lithium Battery) SS-1200 Shoulder Strap Canon XF - Canon XF100 | XF100 / XF105 Instruction Manual - Page 13
(white balance) button (0 60) 12 CAMERA switch (0 42) 13 CF card slot cover switches for CF card slot A (CFj) and CF card slot B (CFl) (0 35) 14 SHUTTER button (0 57) 15 GAIN button (0 55) 16 IRIS button (0 58) 17 CUSTOM (customizable) dial (0 47) 18 AF/MF (autofocus/manual focus) button (0 48, 50 - Canon XF100 | XF100 / XF105 Instruction Manual - Page 14
3 45 6 14 Terminals ቢ (0 20) 10 9 87 1 REMOTE terminal 2 SD card access indicator (0 37) 3 SD card slot (0 37) 4 SD card slot cover 5 MIC (microphone) terminal (0 77) 6 XLR terminals (CH1 and CH2) (0 78) 7 Lens hood lock screw (0 30) 8 b HD/SD SDI terminal (0 127) 9 b GENLOCK terminal (0 74 - Canon XF100 | XF100 / XF105 Instruction Manual - Page 15
2 Built-in speaker (0 115) 3 Strap mount (0 32) 4 CUSTOM (customizable) button (0 47) 5 INFRARED switch (0 93) 6 Instant AF sensor (0 50) 7 Remote sensor (0 34) 8 Infrared light (0 93) 9 Microphone cable clamp (0 78) 10 Microphone holder unit (0 78) 11 Microphone lock screw (0 78) Names of Parts 15 - Canon XF100 | XF100 / XF105 Instruction Manual - Page 16
BATT. RELEASE (battery release) key (0 23) 4 START/STOP button (0 40) 5 Strap mount (0 32) 6 WFM (waveform monitor) button (0 84)/Assignable button 3 (0 97) 7 ZEBRA button (0 68)/Assignable button 2 (0 97) 8 CANCEL button (0 28) 9 Joystick (0 28)/SET button (0 28) 10 MENU button (0 28) 11 LCD screen - Canon XF100 | XF100 / XF105 Instruction Manual - Page 17
For attaching accessories such as the optional VL-10Li II Battery Video Light. 3 Rear tally lamp (0 40) 4 START/STOP lock lever (0 41) 5 START/STOP button (0 40) 6 Handle socket for 1/4" screws 7 Grip zoom rocker (0 64) 8 MAGN. (magnification) button (0 50)/Assignable button 4 (0 97) 9 CF card slot - Canon XF100 | XF100 / XF105 Instruction Manual - Page 18
Names of Parts 18 1 2 43 1 Attachment sockets for the optional TA-100 Tripod Adapter (0 34) 2 Attachment screws for a tripod base (0 34) 3 Tripod socket (0 34) 4 Tripod base for tripods with 1/4" screws (0 34) - Canon XF100 | XF100 / XF105 Instruction Manual - Page 19
level switches for CH1 and CH2 (0 81) 2 XLR terminal switches for CH1 and CH2 (0 79) 3 AUDIO IN switches for CH1 and CH2 (0 77, 79) 1 2 3 4 D (play/pause) button (0 112)/ Assignable button 6 (0 97) 5 I (fast playback) button (0 114)/ Assignable button 7 (0 97) 6 K (skip forward) button (0 - Canon XF100 | XF100 / XF105 Instruction Manual - Page 20
Names of Parts 20 Terminals ቢ 12 3 Terminals ባ 1 HD/SD COMPONENT OUT terminal (0 127) 2 USB terminal (0 131) 3 HDMI OUT terminal (0 127) 4 W (headphone) terminal (0 81) 5 AV terminal (0 128) 6 DC IN terminal (0 24) 45 6 - Canon XF100 | XF100 / XF105 Instruction Manual - Page 21
65) 3 F/O/E/A buttons 4 MENU button (0 28) 5 J/I (fast playback/reverse playback) buttons (0 114) 6 Z/Y (frame forward/reverse) buttons (0 114) 7 B (stop) button (0 112) 8 D (play/pause) button (0 112) 9 INDEX button (0 112) 10 SET button (0 28) 11 CANCEL button (0 28) 12 SHOT1 (shot mark 1) button - Canon XF100 | XF100 / XF105 Instruction Manual - Page 22
to the camcorder while a battery pack is attached, the camcorder will draw power from the power outlet. Charge battery packs before use outlet (ባ). 4 Attach the battery pack to the compact power adapter (ቤ). CHARGE indicator ባ • Press lightly and slide the battery pack in the direction of the - Canon XF100 | XF100 / XF105 Instruction Manual - Page 23
is turned off. When the camcorder is turned on, you can check on the remaining battery charge by looking at any recording/playback screen or the [Battery / Hour Meter] status screen (0 160). Press the CHECK button on the battery pack. An indicator will light for approximately 3 seconds and show - Canon XF100 | XF100 / XF105 Instruction Manual - Page 24
BP-925 or optional BP-955 or BP-975 Battery Pack, you can check the battery life on the [Battery / Hour Meter] status screen (0 160) or the battery information screen (press the BATT. button while the camcorder is turned off). Fully charging the battery pack and then discharging it will give you - Canon XF100 | XF100 / XF105 Instruction Manual - Page 25
coupler after use. • Push the BATT. RELEASE key and pull out the DC coupler. IMPORTANT • Turn off the camcorder before connecting or disconnecting the compact power adapter. Turning the Camcorder On and Off The camcorder has two operating modes: CAMERA ( ) mode for making recordings and MEDIA - Canon XF100 | XF100 / XF105 Instruction Manual - Page 26
Date, Time and Language Settings Date, Time and Language Settings Setting the Date and Time 26 You will need to set the date and time of the camcorder before you can start using it. When the camcorder's clock is not set, the [Date/Time] screen will appear automatically with the year selected. - Canon XF100 | XF100 / XF105 Instruction Manual - Page 27
Date, Time and Language Settings Displaying the Date and Time while Recording You can display the date and time in the lower left of the screen. Operating modes: 1 Press the MENU button. 2 Push the joystick up/down to select [M LCD/VF Setup]. 3 Select [Custom Display 2] and then [Date/Time] in a - Canon XF100 | XF100 / XF105 Instruction Manual - Page 28
for general 28 settings or SET to open the clip menu for clip operations. For details about the available menu options and settings, refer to camcorder was turned off). 2 Push the joystick up/down to select the desired submenu. 3 Push the joystick right or press SET. • The orange selection frame - Canon XF100 | XF100 / XF105 Instruction Manual - Page 29
NOTES • Unavailable items may appear grayed out. • Pressing the MENU button at any time closes the menu. • When using the wireless controller, use the h, i, f, g and SET buttons in the same way as the 29 camcorder's joystick. • You can check the current settings on the status screens (0 156). - Canon XF100 | XF100 / XF105 Instruction Manual - Page 30
section outlines the basic preparations for the camcorder such as attaching the lens hood, attaching the microphone holder unit, and adjusting the viewfinder and LCD screen. 30 Attaching the Microphone Holder Unit Use the supplied screws to attach the microphone holder unit to the handle. Attaching - Canon XF100 | XF100 / XF105 Instruction Manual - Page 31
. See the following section. • You can set the LCD screen to black & white (0 32). • When you use a commercially available lens adapter and the image on the screen is inverted, you can use the [J Other Functions] [Custom Function] [Scan Reverse Rec] setting to return the image to the correct - Canon XF100 | XF100 / XF105 Instruction Manual - Page 32
Camcorder Setting the Screen to Black & White The viewfinder and LCD screen display in color by default but you can set them to black & white. Even when the screen to drop the camcorder when adjusting the grip belt. Attaching a Shoulder Strap Pass the ends through the strap mount and adjust the - Canon XF100 | XF100 / XF105 Instruction Manual - Page 33
AV and DC IN terminals • REMOTE terminal • HD/SD COMPONENT OUT, USB and HDMI OUT terminals * b only. Removing the Terminal Covers 1 Open the terminal cover. 2 Grasp the strip connecting the terminal cover to the camcorder and pull straight out. Preparing the Camcorder 33 Attaching the Terminal - Canon XF100 | XF100 / XF105 Instruction Manual - Page 34
be operated at very close range, replace the battery. • The wireless controller may not work properly when the remote sensor is located under strong light sources or direct sunlight. Using a Tripod You can mount the camcorder on a tripod but do not use tripods with mounting screws longer than 5.5 mm - Canon XF100 | XF100 / XF105 Instruction Manual - Page 35
first time. 35 * The camcorder can record custom picture settings (0 101) and camera settings (0 109) on to an SD card. To record a user memo (0 82) with a clip, use the supplied Canon XF Utility software to a create user memo file and save it to the SD card. The camcorder can read the file and - Canon XF100 | XF100 / XF105 Instruction Manual - Page 36
card release button (ቤ). • The release button partially pops out. 4 Push in the CF card release button to release the CF card (ብ). 5 Pull the CF card all the way out and close the CF card off the camcorder. - Do not open the cover of the CF card slot being accessed. NOTES • If you set the [J Other - Canon XF100 | XF100 / XF105 Instruction Manual - Page 37
Inserting an SD card facing the wrong direction can cause a malfunction of the camcorder. Be sure to insert the SD card as described in step 3. NOTES • To remove the SD card: Push the SD card once to release it. When the SD card springs out, pull it all the way out. • If you set the [J Other - Canon XF100 | XF100 / XF105 Instruction Manual - Page 38
5 When the confirmation message appears, press SET. • The SD card is initialized and all the data it contains is erased. IMPORTANT • Initializing the recording media will permanently erase all data, including clips with an e mark, protected photos, and custom picture information. Lost data cannot be - Canon XF100 | XF100 / XF105 Instruction Manual - Page 39
Functions] [Double Slot Rec] [Off] NOTES • When the bit rate is set to 50 Mbps (0 46) during slow motion recording, relay recording is not available. • If a CF card becomes full during double slot recording, recording on both cards will stop. On the other hand, if an error occurs with one of the - Canon XF100 | XF100 / XF105 Instruction Manual - Page 40
can attach commercially available accessories to the handle by using the socket for 1/4" mounting screws. Recording 1 Hold down the button on the d switch and move it to CAMERA. • The camcorder turns on in mode and enters record pause mode. • The access indicator for the CF card slot selected - Canon XF100 | XF100 / XF105 Instruction Manual - Page 41
to the CF card and the camcorder enters record pause mode. The tally lamps will also go out. * "Clip" refers to one movie unit from the point you press the START/STOP button to start recording until you press again to pause the recording. You can also include custom picture settings (0 99) and - Canon XF100 | XF100 / XF105 Instruction Manual - Page 42
on the other CF card when relay recording (0 39) is activated. In such case, the recording will be recorded as separate clips. • If you record using the custom picture and metadata settings, those settings will be recorded with the clip. For more details, refer to Custom Picture Settings (0 99) and - Canon XF100 | XF100 / XF105 Instruction Manual - Page 43
(0 107) 5 Genlock (0 74) 6 Time code* (0 70) 7 Interval counter* (0 88) 8 SD card status* 9 Bit rate/Resolution* (0 46) 10 Frame rate* (0 46) 11 SDI recording command* (0 154) 12 Output displays* (0 150) 13 Wireless controller* (0 150) 14 Object distance* (0 150) 15 Conversion lens* 16 Magnification - Canon XF100 | XF100 / XF105 Instruction Manual - Page 44
Wide-converter is attached to the camcorder, the Z icon will appear. When the optional TL-H58 Tele-converter is attached, the W icon will appear. 38 CF card status/available recording time • The following indicates the CF card status. j/l Can record on CF card k/m No CF card or cannot record on CF - Canon XF100 | XF100 / XF105 Instruction Manual - Page 45
Mode Activate the power save mode to turn off the screen and reduce battery consumption. At the press of a button, the camcorder will immediately return to record pause mode. 1 Hold the POWER SAVE button pressed down for at least 2 seconds. • The screen will turn off and the ON/OFF indicator will - Canon XF100 | XF100 / XF105 Instruction Manual - Page 46
on the right side of the screen. [50 Mbps 1920x1080] [J Other Functions] [Frame Rate] [60i] NOTES • For details on the signal output from each terminal, refer to Video Output Configuration (0 124). Available bit rate, resolution and frame rate settings Bit rate* 50 Mbps (CBR 4:2:2) 35 Mbps (VBR - Canon XF100 | XF100 / XF105 Instruction Manual - Page 47
and then press SET. • If you selected [Normal], [IR Light] will not be an available option. If you selected [Infrared], [Iris(ND)] and [Face AF] will not be available options. Options [Iris(ND)]: Aperture adjustment (0 58). Press the CUSTOM button to toggle between manual and automatic aperture - Canon XF100 | XF100 / XF105 Instruction Manual - Page 48
ring, the more quickly you can focus on your subject. 1 Move the manual ring switch to FOCUS. • If [MF] appears on the bottom left of the screen, the camcorder is in manual focus mode. Skip to step 3. If A appears instead, the camcorder is in autofocus mode. Proceed to step 2. 2 Press the AF/MF - Canon XF100 | XF100 / XF105 Instruction Manual - Page 49
will return to autofocus mode after you manually adjust the focus. • You can set the response sensitivity of the manual ring using the [J Other Functions] [Custom Function] [F. Ring Control] setting (0 107). • If you focus manually and then leave the camcorder with the power turned on, the focus - Canon XF100 | XF100 / XF105 Instruction Manual - Page 50
side of a window. Press the AF/MF button. • A appears on the bottom left of the screen. Setting the Autofocus Mode You can select how the camcorder focuses during autofocus mode. 1 Open the autofocus [Speed] submenu. [l Camera Setup] [AF Mode] [Speed] 2 Select the desired option and then press - Canon XF100 | XF100 / XF105 Instruction Manual - Page 51
Tele-converter to the camcorder, the [Instant] and [Medium] settings are not available. • Autofocus takes longer to focus when the frame rate is set to [30P] or [24P] than when it is set to [60i]. • When recording under dark conditions, the focusing range narrows and the picture may appear blurred - Canon XF100 | XF100 / XF105 Instruction Manual - Page 52
on. • When a subject's face is detected, the camcorder adds an event mark to that frame. You can then use the supplied Canon XF Utility software to search for event marks in a clip. • If you set an assignable button to [Face AF] (0 97) or set the CUSTOM button and dial to [Face AF] (0 47), you can - Canon XF100 | XF100 / XF105 Instruction Manual - Page 53
Open the [OIS Functions] submenu. [l Camera Setup] [OIS Functions] 2 Select [Img Stab.] and then press SET. • Select [Off] to turn off picture may be adversely affected (such as ghosting, artifacts and dark areas) when compensating for a high degree of camcorder shake. • When the camcorder is mounted - Canon XF100 | XF100 / XF105 Instruction Manual - Page 54
gain based on the subject's brightness. If manual gain control is activated, follow the procedure below to activate automatic gain control. Press the GAIN button repeatedly until the A icon appears next to the gain value on the screen. • When you set the camcorder to full auto mode (0 42), automatic - Canon XF100 | XF100 / XF105 Instruction Manual - Page 55
Gain Manual Gain Control You can manually adjust the gain of the 3 preset gain levels (L: low, M: middle, H: high). Each level can be set independently. You can also fine-tune the gain in 0.5 dB increments. Assigning Gain Values You can assign separate gain values to the L, M and H preset levels. - Canon XF100 | XF100 / XF105 Instruction Manual - Page 56
screen. Slow shutter ([Slow]): You can set slower shutter speeds to obtain brighter recordings in places with insufficient lighting. This mode is not available during slow & fast motion recording mode. Available Shutter Speeds The available shutter speeds vary depending on the frame rate. Shutter - Canon XF100 | XF100 / XF105 Instruction Manual - Page 57
perform the following procedure to have the camcorder automatically detect and reduce flicker. * Available depending on the frame rate. 1 Open the [Flicker Reduction] submenu. [l Camera Setup] [Flicker Reduction] 2 Select [Automatic] and then press SET. [l Camera Setup] [Flicker Reduction] [Off] - Canon XF100 | XF100 / XF105 Instruction Manual - Page 58
ring switch to IRIS(ND). • Alternatively, you can use the CUSTOM dial to manually adjust the aperture (0 47). 2 Turn the manual ring to adjust the aperture. • The f-number displayed on the screen will be in 1/4-stop increments. Available aperture settings F1.8 F2.0 F2.2 F2.4 F2.6 F2.8 F3.2 F3.4 F3 - Canon XF100 | XF100 / XF105 Instruction Manual - Page 59
AE level if the camcorder is set to full auto mode (0 42). • You can set the [J Other Functions] [Custom Function] [ZR-2000 AE Shift] setting (0 107) to [AE Shift] to adjust the AE level using the AE SHIFT dial on the optional ZR-2000 Zoom Remote Controller. Setting the Light Metering Mode Select - Canon XF100 | XF100 / XF105 Instruction Manual - Page 60
lights, we recommend using auto white balance or setting the custom white balance. Operating modes: NOTES • The settings in the [Custom Picture] over the white balance settings. [Color Matrix] and [White Balance] settings (0 99) take precedence Auto White Balance The camcorder constantly - Canon XF100 | XF100 / XF105 Instruction Manual - Page 61
studio lighting or sodium lamps. [Kelvin]: Allows you to set the color temperature value (0 61). Fine-tuning the Preset White Balance You can fine-tune the [Daylight] and [Tungsten] settings within a range of -9 to 9. 1 Press the S button. • The white balance icon on the screen is highlighted - Canon XF100 | XF100 / XF105 Instruction Manual - Page 62
screen until the procedure is completed. • After the icon stops flashing, the procedure is completed. The setting is retained even if you turn off the camcorder. NOTES • Set the [l Camera Setup] [Tele-converter] setting (0 146) to [Off] in advance. • Readjust the custom white balance if the light - Canon XF100 | XF100 / XF105 Instruction Manual - Page 63
, the camcorder will zoom after you finish turning the manual ring. Using the Zoom Rockers, Wireless Controller or Optional Remote Control When you operate the zoom, a zoom indicator* will appear on the screen that shows the approximate zoom position. * You can use the [J Other Functions] [Custom - Canon XF100 | XF100 / XF105 Instruction Manual - Page 64
] 4 min. 45 sec. 4 sec. 4 sec. to 4 min. 45 sec. [Speed Level] setting [Normal] 3 min. 3 sec. 3 sec. to 3 min. [Fast] 1 min. 2 sec.* 2 sec.* to 1 min. * When the zoom speed is too fast (approximately 2 seconds end-to-end), the camcorder will have more trouble focusing automatically while zooming. - Canon XF100 | XF100 / XF105 Instruction Manual - Page 65
), the camcorder will have more trouble focusing automatically while zooming. Using the Wireless Controller or Optional Remote Control The zoom speeds when using the wireless controller and when using an optional (ZR-2000 or ZR-1000 Zoom Remote Controller) or commercially available remote control - Canon XF100 | XF100 / XF105 Instruction Manual - Page 66
Camera Setup] [Zoom] [Wireless Controller] 4 Select the desired level and then press SET. • This setting affects both the wireless controller and optional remote controls. Zoom speeds Accessory Wireless controller (supplied) Remote control without variable zoom speed control (commercially available - Canon XF100 | XF100 / XF105 Instruction Manual - Page 67
object distance for the particular lens. Operating modes: [l Camera Setup] 67 [Conversion Lens] [Off] 1 Open the [Conversion Lens] submenu. [l Camera Setup] [Conversion Lens] 2 Select [TL-H58] or [WD-H58W] and then press SET. • If the autofocus is set to Instant AF or Medium AF, it will change to - Canon XF100 | XF100 / XF105 Instruction Manual - Page 68
you to make sure your subject is correctly framed and is within the appropriate safe area. . Operating modes: Displaying Onscreen Markers Available types of onscreen markers are a see Options below) 2 Select [White] or [Gray] and then press SET. • Select [Off] to turn off the selected marker. • You - Canon XF100 | XF100 / XF105 Instruction Manual - Page 69
an external monitor connected to the HD/SD SDI terminal (b only), HDMI OUT terminal or HD/SD COMPONENT OUT terminal (HD output only). • When the HD/SD COMPONENT OUT terminal is set to output a standard definition signal, the output will switch to a high definition signal while the zebra pattern is - Canon XF100 | XF100 / XF105 Instruction Manual - Page 70
75). In addition, you can superimpose the time code on video output from the HDMI OUT terminal, HD/SD COMPONENT OUT terminal or AV terminal. You can also select between a drop frame and non-drop frame time code. b To synchronize the camcorder's time code to an external time code generator, refer to - Canon XF100 | XF100 / XF105 Instruction Manual - Page 71
recording. When the [J Other Functions] [Frame Rate] setting is set to [24P], the time code will be set to non-drop frame. 1 Open the [DF/NDF] output from the HD/SD SDI terminal (b only) or GENLOCK/TC terminal (b only) will not be put on hold. The time code superimposed on the video signal output - Canon XF100 | XF100 / XF105 Instruction Manual - Page 72
Other Functions] [Frame Rate] setting is set to [24P], the frames value in the time code runs from 0 to 23. For other settings, it runs from 0 to 29. 72 • b When the [J Other Functions] [Frame Rate] setting is set to [24P], the frames value in the time code signal output from the HD/ SD SDI terminal - Canon XF100 | XF100 / XF105 Instruction Manual - Page 73
date for the user bit, select [Date]. In such case, the rest of the procedure is not necessary. 2 Select [Set] and then press SET. • The user bit setting screen appears with an orange selection frame on the leftmost digit. • To reset the user bit to [00 00 00 00], select [Reset] instead. 3 Select an - Canon XF100 | XF100 / XF105 Instruction Manual - Page 74
time code signal with multiple cameras allows you to set up a multi-camera recording. You can also output the time code signal from this camcorder to achieve the same result. If you output the time code from the HD/SD SDI terminal to an editing device, the editor can create video with the same time - Canon XF100 | XF100 / XF105 Instruction Manual - Page 75
mode to - Changing the video configuration mode - Changing the frame rate • If the external time code signal is incorrect or there is no input signal, the internal time code set in the [L TC/UB Setup] [Time Code] submenu will be recorded instead. Time Code Signal Output The time code will be - Canon XF100 | XF100 / XF105 Instruction Manual - Page 76
in mode. When the [J Other Functions] [Frame Rate] setting is set to [24P] and 76 the [L TC/UB Setup] [User Bit] [Output Mode] setting is set to [Pulldown], the user bit will be 2:3 pulldown data. In other words, when a recording in 24P mode is output from the HD/SD SDI terminal, the signal is - Canon XF100 | XF100 / XF105 Instruction Manual - Page 77
while the AUDIO IN switch is set to INT, the camcorder will switch automatically from the built-in microphone to the external microphone. Configuring the Built-in Microphone's Low-Cut Filter 1 Open the [Int. Mic Low Cut] submenu. [m Audio Setup] [Audio Input] [Int. Mic Low Cut] 2 Select the - Canon XF100 | XF100 / XF105 Instruction Manual - Page 78
to the 78 MIC terminal, activate the microphone attenuator (12 dB for the built-in microphone, 20 dB for an external microphone). 1 Open the [Int. Mic Att.] submenu. [m Audio Setup] [Audio Input] 2 Select [On] and then press SET. [Int. Mic Att.] [m Audio Setup] [Audio Input] [Int. Mic Att.] [Off - Canon XF100 | XF100 / XF105 Instruction Manual - Page 79
the external microphone's sensitivity if the XLR terminal switch is set to MIC or MIC+48V. 1 Open the desired XLR terminal's sensitivity submenu. [m Audio Setup] [Audio Input] [XLR1 Mic Trimming] or [XLR2 Mic Trimming] 2 Select the desired level and then press SET. Available Sensitivity Levels - Canon XF100 | XF100 / XF105 Instruction Manual - Page 80
or device that does not support phantom power, make sure to set the XLR terminal switch to MIC or LINE, respectively. If you set the switch to MIC+48V, the microphone or device may be damaged. Adjusting the Audio Level You can set the audio level to auto or manual for each channel. When both - Canon XF100 | XF100 / XF105 Instruction Manual - Page 81
volume. Alternatively, you can use the CUSTOM dial (0 47). NOTES • When you are monitoring the audio, you can choose to synchronize the audio signal with the video signal or monitor the audio in real time. Use the [m Audio Setup] [Audio Output] [Monitor Delay] setting to select the method. Note that - Canon XF100 | XF100 / XF105 Instruction Manual - Page 82
Canon XF Utility software (0 137). [J Other Functions] [Set Metadata] [User Memo] 1 Use Canon XF Utility to save a user memo to an SD card. • For details, refer to Managing User Memo Profiles in the Canon XF Utility Instruction Manual. 2 Insert the SD card into the SD card slot of the camcorder - Canon XF100 | XF100 / XF105 Instruction Manual - Page 83
have the camcorder generate and record color bars and a 1 kHz audio reference signal and output them from the HD/SD SDI terminal (b only), HDMI OUT terminal, HD/SD COMPONENT OUT terminal1, AV terminal and W (headphone) terminal2. 83 1 Outputs color bars only. 2 Outputs audio reference signal - Canon XF100 | XF100 / XF105 Instruction Manual - Page 84
entire picture and displays the results as a waveform. The edge monitor is available only in mode. Operating modes: Displaying a Video Scope SET. Options [Line]: [Line+Spot]: [Field]: [RGB]: [YPbPr]: Sets the waveform monitor to line display mode. The waveform of the area in the red frame - Canon XF100 | XF100 / XF105 Instruction Manual - Page 85
the camcorder is in manual focus mode. The edge monitor features 2 modes. 1 Open the [Edge Monitor] submenu. [J Other Functions] [WFM (LCD)] [Edge Monitor] 2 Select the desired option and then press SET. Options [Type 1]: [Type 2]: The waveform that represents the focus of the entire picture is - Canon XF100 | XF100 / XF105 Instruction Manual - Page 86
controller to add the c mark. 1 Set an assignable button to [Shot Mark 1] or [Shot Mark 2] (0 97). • To add both shot marks, set one when you press the button to when the camcorder adds the shot mark. • When you are using interval recording or frame recording mode, you cannot add shot marks to - Canon XF100 | XF100 / XF105 Instruction Manual - Page 87
and then press SET. 3 After you finish recording, press the U button. • The last clip that was recorded is played back without audio for the selected duration. [A REVIEW] appears at the top of the screen. • Press the CANCEL button to stop reviewing the clip and change the camcorder back to record - Canon XF100 | XF100 / XF105 Instruction Manual - Page 88
. • See the following table for the available intervals. 3 Select [Rec Frames], select the desired number of frames and then press SET. • Available options are 1, 3, 6 and 9 (2, 6 and 12 if [J Other Functions] [Frame Rate] is set to [24P] or [60P]). Available Intervals* 1 sec 2 sec 3 sec 4 sec 5 sec - Canon XF100 | XF100 / XF105 Instruction Manual - Page 89
special recording mode, the time code signal will not be output from the GENLOCK/TC terminal or HD/SD SDI terminal. Frame Recording Mode Set the number of frames in advance. We recommend using the wireless controller or stabilizing the camcorder, for example, on a tripod. Sound is not recorded in - Canon XF100 | XF100 / XF105 Instruction Manual - Page 90
the time code signal will not be output from the GENLOCK/TC terminal or HD/SD SDI terminal. Slow & Fast Motion Mode When you set [J Other Functions] [Frame Rate] to a progressive frame rate (0 46), the camcorder can record with a frame rate (shooting frame rate) that is different from the playback - Canon XF100 | XF100 / XF105 Instruction Manual - Page 91
. • b During special recording mode, the time code signal will not be output from the GENLOCK/TC terminal or HD/SD SDI terminal. • When the bit rate is set to 50 Mbps (0 46) during slow motion recording, relay recording is not available. Pre-recording Mode When pre-recording mode is activated, the - Canon XF100 | XF100 / XF105 Instruction Manual - Page 92
turned off. It will be 92 deactivated also if you change the video configuration. • During pre-recording mode, the time code will be recorded with the running mode (0 70) set to [Free Run], regardless of the previous setting. Alternatively, you can use an external time code signal (b only). When the - Canon XF100 | XF100 / XF105 Instruction Manual - Page 93
[Toggle]: Allows you to turn the infrared light on and off using an assignable button or the CUSTOM button. Set an assignable button (0 97) or CUSTOM button (0 47) to [IR Light] in advance. [Always On]: The infrared light is always on while the camcorder is in Infrared mode. [Always Off]: The - Canon XF100 | XF100 / XF105 Instruction Manual - Page 94
, white balance and custom picture cannot be set. 94 - ND filter cannot be activated. • When switching the camcorder to Infrared mode, do not point the lens at strong sources of light or heat. The camcorder's sensitivity to such sources is much higher than when shooting video normally. If there - Canon XF100 | XF100 / XF105 Instruction Manual - Page 95
icons appear on the screen. Use the joystick or wireless controller to adjust the picture. If the picture cannot be adjusted anymore in a particular direction, the corresponding directional icon will turn gray. • You can use the [l Camera Setup] [Axis Shift] [GUI Color] setting to change the color - Canon XF100 | XF100 / XF105 Instruction Manual - Page 96
96 calibrate both camcorders. Operating modes: 1 Set up two camcorders and align their picture angle. 2 Open the [Focal Length Guide] submenu. [l Camera Setup] [l Camera Setup] [Zoom] [Focal Length Guide] [Zoom] 3 Select [Set To 0] and then press SET. • The focal length guide appears on the - Canon XF100 | XF100 / XF105 Instruction Manual - Page 97
NONE)] • You can check the [Buttons / Remote] status screen (0 157) to see what functions are set for the assignable buttons. • You can use the [J Other Functions] [Reset] [Assignable Buttons] setting to reset the assignable buttons to their default settings. Using an Assignable Button After you - Canon XF100 | XF100 / XF105 Instruction Manual - Page 98
color bars on/off. N [IR Monochrome] Switches between white and green when the camcorder is in Infrared mode. N [IR Light] Turns the infrared light on/off when [l Camera Setup] [Infrared] [Light] is set N to [Toggle]. [Markers] Turns onscreen markers on/off. N [LCD Setup] Opens the [LCD - Canon XF100 | XF100 / XF105 Instruction Manual - Page 99
created with previous Canon camcorders are not compatible with this camcorder. Custom picture files created with this camcorder are compatible with only the XF105 and XF100. Operating modes: Available custom picture settings Category Menu item Submenu 0 Settings related to light and dark - Canon XF100 | XF100 / XF105 Instruction Manual - Page 100
Custom Picture Settings 100 Preset Custom Picture Files By default, the custom picture files in the camcorder in file slots [C7] to [C9] are protected. Remove the protection (0 100) to edit the file. The following describes when to use the preset files. [C7 VIDEO.C]: For playing back video on - Canon XF100 | XF100 / XF105 Instruction Manual - Page 101
first available slot. 3 Select [OK] and then press SET. • The currently selected file will be copied to the selected slot on the SD card, overwriting the file in that slot. 4 Press the MENU button to exit the menu. [l Camera Setup] [Custom Picture] [H X Transfer File] [Copy To b] Replacing a File - Canon XF100 | XF100 / XF105 Instruction Manual - Page 102
NOTES • You can also copy a custom picture file embedded in a clip to the camcorder (0 121). 102 Embedding Custom Picture Settings in a Recording You can record video or take a photo with your custom picture settings applied to it. Later, those embedded settings in the video or photo can be copied - Canon XF100 | XF100 / XF105 Instruction Manual - Page 103
Custom Picture Settings Master Black Corrects color cast in blacks. [Red]: -50 to 50 (Default: 0) [Green]: -50 to 50 (Default: 0) [Blue]: -50 to 50 (Default: 0) Black Gamma Controls the lower part of the gamma curve (dark areas of the image). Black Gamma [Level]: Raises or lowers the lower part - Canon XF100 | XF100 / XF105 Instruction Manual - Page 104
Custom Picture Settings 104 Sharpness Sets the sharpness of the output and recording signal. [Level]: Sets the sharpness level. This setting can be adjusted from -10 to 50. (Default: 0) [H Detail Freq.]: Sets the center frequency of horizontal sharpness. Setting higher values increases the - Canon XF100 | XF100 / XF105 Instruction Manual - Page 105
will appear over targeted areas on the screen. [Effect Level]: Adjusts the level of the noise reduction filter. The available options are [Off], [Low], [Middle] and [High]. (Default: [Off]) [Hue]: Adjusts the hue for the color to be detected. This setting can be adjusted from 0 to 31. (Default - Canon XF100 | XF100 / XF105 Instruction Manual - Page 106
Custom Picture Settings 106 Color Correction The camcorder detects the characteristics of a certain color (color phase, chroma, area and Y level) and corrects them when recording. You can set the color correction for up to two different areas (A and B). [Select Area]: Selects the area or areas to - Canon XF100 | XF100 / XF105 Instruction Manual - Page 107
adjust how some of the camcorder's controls and functions operate in mode. Similarly, use the [M LCD/VF Setup] [Custom Display] setting to customize the onscreen displays that appear during recording. You can save these preferences along with other menu settings to an SD card and use them again - Canon XF100 | XF100 / XF105 Instruction Manual - Page 108
can choose to have the camcorder display some icons while hiding other ones. For details on which onscreen displays can be customized, refer to Onscreen Displays (0 43). For details on the setting options, refer to [Custom Display 1] (0 150) and [Custom Display 2] (0 150). Operating modes: 1 Open - Canon XF100 | XF100 / XF105 Instruction Manual - Page 109
.TXT". • The camera settings can be used with other XF105 and XF100 camcorders. However, camera settings from Canon XF305 and XF300 camcorders cannot be used with this camcorder. • When loading camera settings from an SD card, even protected custom picture settings in the camcorder will be replaced. - Canon XF100 | XF100 / XF105 Instruction Manual - Page 110
monitor, refer to Connecting to an External Monitor (0 126). For details on viewing photos on the SD card, refer to Viewing Photos (0 140). Operating modes: Clip Index Screen Playback functions are accessed from the clip index screen. To open the clip index screen, set the camcorder to mode. - Canon XF100 | XF100 / XF105 Instruction Manual - Page 111
name (0 42) 10 Embedded custom picture file (0 99) 11 Bit rate and resolution (0 46) 12 Frame rate 13 Total recording time 14 Time code of thumbnail 15 Special recording mode (0 88) 16 Clip number / Total number of clips 111 v Switching Between the CF Card Slots If both CF card slots contain a CF - Canon XF100 | XF100 / XF105 Instruction Manual - Page 112
with a Z mark ([Z Mark] index screen), or photos* ([Photos] index screen). * Photos are saved on the SD card. 1 Press the INDEX button. • The index screen selection menu appears. 2 Select the desired index screen and then press SET. • The selected index screen appears. • Select [Cancel] instead to - Canon XF100 | XF100 / XF105 Instruction Manual - Page 113
14 1 Remaining battery time (0 44) 2 Playback operation 3 Selected CF card 4 Relay recording 5 Time code (0 70) 6 Clip number / Total number of clips 7 Bit rate and resolution (0 46) 8 Frame rate (0 46) 9 Embedded custom picture file (0 99) 10 Output displays (0 128) 11 Wireless controller (0 150 - Canon XF100 | XF100 / XF105 Instruction Manual - Page 114
is no audio during any of the playback types listed in the previous table. • During some special playback modes, you may notice some anomalies (blocky video artifacts, banding, etc.) in the playback picture. • During frame advance, playback advances 0.2 seconds when the resolution/frame rate is - Canon XF100 | XF100 / XF105 Instruction Manual - Page 115
[m Audio Setup] [Audio Output] [Speaker Volume] [8] 115 Adding Shot Marks during Playback You can add an c mark, d mark or both marks to a clip during playback or playback pause. You can add either mark using assignable buttons or an c mark using the wireless controller's SHOT1 button. 1 Set an - Canon XF100 | XF100 / XF105 Instruction Manual - Page 116
have the d mark. N [Expand Clip] Displays an index screen that shows frames of a clip at a fixed interval. N [Delete User Memo] Deletes the user memo of a clip. N [Copy X File] Copies the custom picture file from a clip to the N camcorder. [Add Shot Mark 1]/ Adds or deletes the c mark - Canon XF100 | XF100 / XF105 Instruction Manual - Page 117
88): For slow & fast motion recording mode, the shooting and playback frame rates will be displayed. 7 e mark / Z mark (0 118) 8 Embedded custom picture file (0 99) 9 Time code of the last frame in clip 10 Clip duration 11 Time code of the first frame in clip 12 Time code of the clip thumbnail 13 - Canon XF100 | XF100 / XF105 Instruction Manual - Page 118
index screen the selected mark is deleted. • Select [Cancel] instead to cancel the operation. Deleting e Marks from All Clips 1 Open the [Delete All e Marks] submenu. [J Other Functions] [Delete All e Marks] 2 Select [OK] and then press SET. • All e marks from clips on the selected CF card will - Canon XF100 | XF100 / XF105 Instruction Manual - Page 119
the operation. • While the clip is being copied, you can press SET to cancel. 4 When the confirmation message appears, press SET. • The selected clip is copied to the other CF card and the screen changes back to the clip index screen. 119 Copying All Clips 1 Open the [Copy All Clips] submenu - Canon XF100 | XF100 / XF105 Instruction Manual - Page 120
the power source or turn off the camcorder. - Do not open the cover of the selected CF card slot. Deleting the User Memo 1 Select the desired clip and then press SET to open the clip menu. 2 Select [Delete User Memo] and then press SET. • The [Delete User Memo] screen appears and it prompts you to - Canon XF100 | XF100 / XF105 Instruction Manual - Page 121
You can copy the custom picture file embedded in a clip to the camcorder. 1 Select the desired clip and then press SET to open the clip menu. 2 Select [Copy X File] and then press SET. • The [X Data 1/3] screen appears with the orange selection frame indicating the first custom picture file slot in - Canon XF100 | XF100 / XF105 Instruction Manual - Page 122
can add or delete both shot marks, only the c mark or only the d mark. Adding a Shot Mark 1 Open the [Shot Mark] index screen or [Expand Clip] index screen. 2 Select the desired frame (thumbnail) and then press SET to open the clip menu. 3 Select [Add Shot Mark 1] or [Add Shot Mark 2] and then press - Canon XF100 | XF100 / XF105 Instruction Manual - Page 123
[Shot Mark] index screen or [Expand Clip] index screen. 1 Open the [Shot Mark] index screen or [Expand Clip] index screen. 2 Select the desired frame (thumbnail) and then press SET to open the clip menu. 3 Select [Set Index Picture] and then press SET. • The clip information screen appears and it - Canon XF100 | XF100 / XF105 Instruction Manual - Page 124
Frame rate L HD output SD output 1080/60i 1080/30P 1080/24P 1080/60i 480/60i5 1080/slow or fast motion 720/60P 720/30P 720/24P 720/60P 480/60i5 720/slow or fast motion HDMI OUT2, 3 HD output SD output 1080/60i 480/60P 720/60P 480/60P HD/SD COMPONENT OUT2, 4 HD output SD output - Canon XF100 | XF100 / XF105 Instruction Manual - Page 125
Output When HD video (16:9 aspect ratio) is converted and output as SD video (4:3 aspect ratio), you can choose how it appears on the external monitor. 1 Open the [SD Output] submenu. [N Video Setup] [SD Output] [N Video Setup] [SD Output] [Squeeze] 2 Select the desired option and then press SET - Canon XF100 | XF100 / XF105 Instruction Manual - Page 126
select the video signal output configuration (0 124). The camcorder can output video from all of the video output terminals simultaneously. Operating modes: Connection Diagram When you connect the camcorder to an external monitor using the HD/SD COMPONENT OUT terminal, audio is output by connecting - Canon XF100 | XF100 / XF105 Instruction Manual - Page 127
to change the output to HD or SD. Turning the output off will conserve the camcorder's power. 1 Open the [SDI Output] submenu. [N Video Setup] [SDI Output] [N Video Setup] [SDI Output] [Off] 2 Select the desired option and then press SET. • If you selected [HD], no more settings need to be - Canon XF100 | XF100 / XF105 Instruction Manual - Page 128
right side of the screen (when [M LCD/VF Setup] Display] is set to [On]). [N Video Setup] [HD Onscreen Disp.] [SD Onscreen Disp.] [Off] [Custom Display 2] [Output NOTES • Onscreen displays will not appear on an external monitor for SD output if [N Video Setup] set to [Side Crop]. [SD Output] is - Canon XF100 | XF100 / XF105 Instruction Manual - Page 129
the audio signal along with the video signal being output from the HD/SD SDI terminal. If you set the [Video Setup] [SDI Output] setting to [HD] or [SD], the camcorder will automatically embed audio. Operating modes: Synchronizing the Video with the Audio being Monitored When audio is output from - Canon XF100 | XF100 / XF105 Instruction Manual - Page 130
. [m Audio Setup] [Audio Output] [Level] 2 Select the desired level and then press SET. Options [1 Vrms]: [2 Vrms]: The audio output level is normal. The audio output level is 6 dB higher. NOTES • This setting does not affect audio output to headphones. [m Audio Setup] [Audio Output] [Level - Canon XF100 | XF100 / XF105 Instruction Manual - Page 131
or a CF card (connected via USB reader to a computer) to the NLE software. The following plugins are included. - Canon XF Plugin for Avid Media Access (for computers running Windows or Mac OS) - Canon XF Plugin for Final Cut Pro (for computers running Mac OS) 131 The instruction manual for each - Canon XF100 | XF100 / XF105 Instruction Manual - Page 132
install the Canon XF Utility software. Note that the language displayed during installation will be in English, French or Spanish but the rest of the application's menus and messages will be in English only. 1 Insert the Canon XF Utilities CD-ROM into the computer. • The installation screen appears - Canon XF100 | XF100 / XF105 Instruction Manual - Page 133
skip to step 7. Saving Clips to a Computer 133 5 Select the software to install and the destination folder. Then, click [Next]. 6 Click . Uninstalling Canon XF Utility 1 From the Start menu, select [All Programs] Utility]. • A confirmation screen appears. [Canon Utilities] [Canon XF Utility - Canon XF100 | XF100 / XF105 Instruction Manual - Page 134
Control Panel is displayed. Uninstalling the Canon XF Plugin for Avid Media Access Instructions 1 From the [Start] menu, open [All Programs] [Canon Utilities] [Canon XF Plugin for Avid Media Access] [Uninstall Canon XF Plugin for Avid Media Access Instruction Manual]. 2 When the confirmation screen - Canon XF100 | XF100 / XF105 Instruction Manual - Page 135
then click [Next]. Saving Clips to a Computer 135 6 Read the license agreement and click [Agree]. • If you do not select [Agree], you cannot install the software. • If you selected the [Easy Installation] installation method, skip to step 8. 7 Select the - Canon XF100 | XF100 / XF105 Instruction Manual - Page 136
1 From [Applications], open [Canon Utilities]. 2 Move [Canon XF Utility] to the [Trash]. Uninstalling Canon XF Plugin for Final Cut Pro Move the following file to [Trash]. /Library/Application Support/ProApps/MIO/RAD/Plugins/CanonXF.RADPlug Uninstalling Canon XF Plugin for Avid Media Access Move - Canon XF100 | XF100 / XF105 Instruction Manual - Page 137
[Applications], open [Canon Utilities] [Canon XF Plugin for Avid Media Access] 2 Open the folder of the language and double-click the PDF file. [Manual]. Canon XF Plugin for Final Cut Pro Instructions: 1 From [Applications], open [Canon Utilities] [Canon XF Plugin for Final Cut Pro] 2 Open the - Canon XF100 | XF100 / XF105 Instruction Manual - Page 138
670 photos on a 1 GB SD card. Taking Photos in CAMERA Mode You can take a photo while the camcorder is recording a clip or is in record pause mode. If a custom picture file is selected in advance, it will be recorded with the photo (0 99). To take a photo, set an assignable button to [Photo - Canon XF100 | XF100 / XF105 Instruction Manual - Page 139
to do so may result in permanent data loss. - Do not disconnect the power source or turn off the camcorder. - Do not remove the SD card. 139 NOTES • If the LOCK switch on the SD card is set to prevent writing, you will not be able to record a photo. Change the position of the LOCK switch - Canon XF100 | XF100 / XF105 Instruction Manual - Page 140
to the [Photos] index screen. IMPORTANT • Observe the following precautions while the SD card access indicator is flashing. Failure to do so may result in permanent data loss. - Do not disconnect the power source or turn off the camcorder. - Do not remove the SD card. • The following photos may - Canon XF100 | XF100 / XF105 Instruction Manual - Page 141
and the next photo is displayed. • If a custom picture file is embedded in the photo, it is also deleted. 5 When the confirmation message appears, press SET. Deleting a Photo from the Index Screen 1 Open the [Photos] index screen (0 140). 2 Move the orange selection frame to the photo to be deleted - Canon XF100 | XF100 / XF105 Instruction Manual - Page 142
left portion of the screen. • If a custom picture file is embedded in the photo, it is also protected. Protecting a Photo from the Index Screen 1 Open the [Photos] Index Screen • Refer to Viewing Photos (0 140). 2 Move the orange selection frame to the photo to be protected. 3 Press SET to open the - Canon XF100 | XF100 / XF105 Instruction Manual - Page 143
protected. IMPORTANT • Initializing an SD card will permanently erase all the data it contains, including protected photos and custom picture files. 143 Copying Custom Picture Files You can copy to the camcorder a custom picture file embedded in a photo. Custom picture files can be copied from - Canon XF100 | XF100 / XF105 Instruction Manual - Page 144
press SET. Options [Reset]: [Continu.]: Photo numbers will restart from 101-0101 every time you insert a new SD card. If an SD card following that of the last photo recorded with the camcorder. NOTES • If you select [Continu.] and the SD card you insert already contains a photo with a larger - Canon XF100 | XF100 / XF105 Instruction Manual - Page 145
options in boldface indicate default values. Menu items not available appear grayed out. 145 To skip directly to the page of a specific menu: [l Camera Setup] menu Custom picture [X Edit File] settings [m Audio Setup] menu [N Video Setup] menu [M LCD/VF Setup] menu [L TC/UB Setup] menu [L User - Canon XF100 | XF100 / XF105 Instruction Manual - Page 146
custom picture files in the camcorder: [Copy To b], [Load From b] 101 For custom picture files on the SD card: [Copy To Cam.], [Load From Cam.] [ND Filter]: Allows the camcorder to control the ND filter automatically. When the ND filter is activated, the icon of one of three available settings - Canon XF100 | XF100 / XF105 Instruction Manual - Page 147
] [Low Key Satur.] [Knee] [Sharpness] Gain] [Phase] [R-G] [R-B] [G-R] [G-B] [B-R] [B-G] Menu Options Setting options 0 -50 to 50 (0) -5 to 50 (0) 103 104 [Off], [Low], [Middle], [High] -16 to 16 (0) 0 to 31 (16) 104 0 to 31 (16) 0 to 31 (16) [Off], [Low], [Middle], [High] -16 to 16 - Canon XF100 | XF100 / XF105 Instruction Manual - Page 148
Int. Mic Low Cut] [Int. Mic Sensitivity] [Int. Mic Att.] [XLR1 Mic Trimming] [XLR2 Mic Trimming] [XLR1 Mic Att.] [XLR2 Mic Att.] [XLR ALC Link] [Limiter] [1 kHz Tone] [Monitor Delay] [Channel] [Level] [Headphone Volume] [Speaker Volume] * Not available in the [Photos] index screen. Setting options - Canon XF100 | XF100 / XF105 Instruction Manual - Page 149
Select] [Zebra 1 Level] Submenu [Brightness] [Contrast] [Color] [Sharpness] [Backlight] [Brightness] [Contrast] [Color] [Backlight] [Date/Time] [Camera Data] [Color] [Gain] [Frequency] [Color] [Gain] [Frequency] [Zebra 2 Level] [HD Output] Setting options -99 to 99 (0) N -99 to 99 (0) N -20 - Canon XF100 | XF100 / XF105 Instruction Manual - Page 150
] [Time Code] [Interval Counter] [SD Card Status] [Bit Rate/Resolution] [Frame Rate] [Character Rec] [Wireless Controller] [Output Display] [SDI Rec Command] [User Memo] [User Bit] [Audio Output CH] [Date/Time] * Not avNot available in the [Photos] index screen. Setting options [On], [Off] [White - Canon XF100 | XF100 / XF105 Instruction Manual - Page 151
the zoom. [Light Metering]: When set to [On], the light metering icon (K or J) is displayed if [l Camera Setup] [Light Metering] is set to [Backlight] or [Spotlight]. [Custom Picture]: Displays the custom picture icon (X) when set to [On], indicating that a custom picture profile will be recorded - Canon XF100 | XF100 / XF105 Instruction Manual - Page 152
152 [SD Card Status]: Controls when the SD card status indicator appears. [Normal]: Always appears on the screen. [Warning]: Appears only when there is a warning. [Bit rate/Resolution]: Displays the bit rate and resolution when set to [On]. [Frame Rate]: Displays the frame rate when set to [On - Canon XF100 | XF100 / XF105 Instruction Manual - Page 153
Monitor] [Wireless Controller] [Assign Button] [Custom Key/Dial] [1] to [10] [Normal] [Infrared] [Tally Lamp] [Front] [Rear] [Media Access LED] [Genlock/TC Term.](b only) [Genlock Adjust.](b only) [Relay Rec] [Double Slot Rec] [Bit Rate/Resolution] [Frame Rate] [Special Rec] [Interval - Canon XF100 | XF100 / XF105 Instruction Manual - Page 154
screen and [e Mark] index screen only. 6 Available in the [Photos] index screen only. [Reset] [All Settings]: Resets all of the camcorder settings except for the hour meter to default settings. [Camera Settings]: Resets all [l Camera Setup] settings and custom picture settings to default settings - Canon XF100 | XF100 / XF105 Instruction Manual - Page 155
] is set to [0000]. [SDI Rec Command]: When you connect the camcorder to another device using the HD/SD SDI terminal, if you start or stop recording with the camcorder, the other device will also start or stop recording. [Delete All Photos]: Deletes all the photos recorded on the SD card. [Reset - Canon XF100 | XF100 / XF105 Instruction Manual - Page 156
button. Pressing the MENU button will exit the status screen and open the menu. Status screen [Camera] [Buttons/Remote] [Audio]* [Media] [Video] [User Memo] [Battery/Hour Meter] [X Data 1/3] [X Data 2/3] [X Data 3/3] Description Displays settings related to recording, such as gain, focus and - Canon XF100 | XF100 / XF105 Instruction Manual - Page 157
(0 54) 2 Gain limit (0 54) 3 Autofocus mode (0 50) 4 Soft zoom control (0 146) 5 Grip zoom rocker setting (0 64) 6 Zoom speed of handle zoom rocker (0 65) [Buttons/Remote] Status Screen 8 9 10 11 12 7 Flicker reduction (0 57) 8 Focus limit (0 52) 9 Face AF (0 51) 10 Zoom speed level (0 64) 11 Zoom - Canon XF100 | XF100 / XF105 Instruction Manual - Page 158
) 10 Microphone attenuator (microphones connected to XLR terminals) (0 80) 11 Audio reference signal (0 83) 12 Headphone volume (0 114) 13 Speaker volume (0 115) [Media] Status Screen 1 2 3 1 CF card A 2 CF card B 3 SD card 4 Total space on CF card A 5 Used space on CF card A 6 Available recording - Canon XF100 | XF100 / XF105 Instruction Manual - Page 159
Displaying the Status Screens [Video] Status Screen 159 1 4 2 5 3 6 7 8 9 1 HDMI OUT terminal status (0 127) 2 HD/SD SDI terminal output setting (b only, 0 127) 3 Superimposing onscreen displays to HD output (0 128) 4 HD/SD COMPONENT OUT terminal output status (0 127) * In mode only. - Canon XF100 | XF100 / XF105 Instruction Manual - Page 160
Remaining recording time 2 Remaining recording time indicator 3 Battery life indicator 1 2 3 4 5 4 Total operation time (0 155) 5 Operation time since using [Reset Hour Meter] (0 155) [X Data 1/3] Status Screen ( mode) 10 1 2 3 4 5 6 7 8 1 Custom picture file name (0 99) 2 Gamma (0 102) 3 Master - Canon XF100 | XF100 / XF105 Instruction Manual - Page 161
the Status Screens [X Data 2/3] Status Screen ( mode) 1 2 3 4 5 6 7 1 Sharpness settings (level, horizontal detail frequency, horizontal/vertical detail balance, and limit) (0 104) 2 Sharpness settings (knee aperture, gain and ingredient ratio) (0 104) 3 Level depend settings (level, slope - Canon XF100 | XF100 / XF105 Instruction Manual - Page 162
Troubleshooting Troubleshooting If you have a problem with your camcorder, refer to this section. Consult your dealer or a Canon Service Center if the problem persists. 162 Power source The camcorder will not turn on or it turns off by itself. - The battery pack is exhausted. Replace or charge the - Canon XF100 | XF100 / XF105 Instruction Manual - Page 163
the problem, consult a Canon Service Center. The tally lamps flash slowly (1 flash per second). - The combined available space on both CF cards is low. Replace the CF card that is not being recorded onto. b appears in red on the screen. - An SD card error occurred. Turn off the camcorder. Remove - Canon XF100 | XF100 / XF105 Instruction Manual - Page 164
and initialize the SD card (0 37). The wireless controller will not work. - Set [Other Functions] [Wireless Controller] to [On]. - Replace the battery of the wireless controller. Connections with External Devices Video noise appears on a nearby TV screen. - When using the camcorder in a room where - Canon XF100 | XF100 / XF105 Instruction Manual - Page 165
Canon XF Utility or plugins. Cannot record - There was an encoder error. Turn off the camcorder and back on again. Then, remove the CF card being used and reinsert it. Alternatively, replace the CF card. If this does not solve the problem, consult a Canon Service Center. Cannot switch CF card - Canon XF100 | XF100 / XF105 Instruction Manual - Page 166
pack - The battery pack is exhausted. Replace or charge the battery pack. Check data on CF A/CF B and initializing the card is recommended - The CF card cannot be used for any of the following reasons. • A problem has occurred with the CF card. • The camcorder cannot read the CF card's data. • The - Canon XF100 | XF100 / XF105 Instruction Manual - Page 167
when there is no CF card in the camcorder. Media full - CF card A and CF card B are full. Delete some clips (0 120) to free some space or replace a CF card. Media is almost full - The amount of available space on CF card A and CF card B combined is low. Replace the CF card that is not selected - Canon XF100 | XF100 / XF105 Instruction Manual - Page 168
inside of a car parked under direct sunlight), or high humidity. • Do not use the camcorder near strong electromagnetic fields such as above TVs, near plasma TVs or mobile phones. Using the camcorder in such places may cause anomalies in the video or audio or video noise to appear. • Do not use or - Canon XF100 | XF100 / XF105 Instruction Manual - Page 169
shown on the screen as an approximation. Regarding the use of non-Canon battery packs • We recommend using genuine Canon battery packs bearing the Intelligent System mark. • If you attach to the camcorder battery packs that are not genuine Canon battery packs, the remaining battery time will not - Canon XF100 | XF100 / XF105 Instruction Manual - Page 170
Precautions 170 • SD cards: SD cards have a physical switch to prevent writing on the card so as to avoid the accidental erasure of the card's content. To write-protect the SD card, set the switch to the LOCK position. LOCK switch Built-in Rechargeable Lithium Battery The camcorder has a built - Canon XF100 | XF100 / XF105 Instruction Manual - Page 171
use the compact power adapter to operate the camcorder and to charge battery packs in any country with power supply between 100 and 240 V AC, 50/60 Hz. Consult a Canon Service Center for information on plug adapters for overseas use. Playback on a TV Screen You can only play back your recordings on - Canon XF100 | XF100 / XF105 Instruction Manual - Page 172
Shooting Brace WD-H58W Wide-converter TL-H58 Tele-converter Protect Filter 58 mm, ND4-L Filter 58 mm, ND8-L Filter 58 mm VL-10Li II Battery Video Light STV-250N Stereo Video Cable CTC-100 Component Cable ZR-2000 Zoom Remote Controller ZR-1000 Zoom Remote Controller IFC-400PCU USB Cable - Canon XF100 | XF100 / XF105 Instruction Manual - Page 173
to recording mode and charging, recording or playback conditions. The effective usage time of the battery pack may decrease when recording in cold surroundings, when using the brighter screen settings, etc. b Bit rate 50 Mbps 35 Mbps 25 Mbps Usage time Recording (maximum) Viewfinder LCD - Canon XF100 | XF100 / XF105 Instruction Manual - Page 174
socket and runs off a 12-24V DC negative ground battery. TA-100 Tripod Adapter The TA-100 allows you to quickly mount/unmount the camcorder on/from a tripod. SBR-1000 Shooting Brace Using the SBR-1000 for additional support of the camcorder with the neck strap will significantly lighten the load - Canon XF100 | XF100 / XF105 Instruction Manual - Page 175
while reviewing the picture on an external monitor without touching the camcorder. This is particularly useful while the camcorder is mounted on a tripod and you want to ensure maximum stability of a shot. This mark identifies genuine Canon video accessories. When you use Canon video equipment - Canon XF100 | XF100 / XF105 Instruction Manual - Page 176
Battery Pack SS-1200 Shoulder Strap WL-D6000 Wireless Controller Optional accessories: BP-955 Battery Pack BP-975 Battery Pack BP-950G Battery Pack BP-970G Battery Battery Video Light STV-250N Stereo Video Cable CTC-100 Component Cable ZR-2000 Zoom Remote Controller ZR-1000 Zoom Remote Controller - Canon XF100 | XF100 / XF105 Instruction Manual - Page 177
(CBR, 4:2:0, MP@H14) 1440x1080: 60i, 30P, 24P • Recording Media (not included) Movies: CompactFlash (CF) Card Type I (two slots) Photos*: SD or SDHC (SD High Capacity) memory card *Custom picture files, camera settings and user memo files can be saved and loaded. • Maximum Recording Time** 16 GB CF - Canon XF100 | XF100 / XF105 Instruction Manual - Page 178
Specifications 178 • Iris: Auto or manual setting • Gain: Auto (AGC) or manual (-6.0 dB to 33.0 dB, fine-tuning available) • Shutter speed: Auto, speed, angle, clear scan or slow shutter mode, off; 1/4 sec to 1/2000 sec (when [Frame Rate] is [24P]: 1/3 sec to 1/2000) • Minimum Illumination: 0.11 - Canon XF100 | XF100 / XF105 Instruction Manual - Page 179
, SDI output off) b Viewfinder: 6.3 W, LCD screen: 6.4 W c Viewfinder: 5.2 W, LCD screen: 5.3 W Maximum rated power consumption: 18.8 W • Operating temperature 0 - 40 °C (32 - 104 °F) • Dimensions (W x H x D) 121 x 148 x 250 mm (4.8 x 5.8 x 9.8 in.) (excluding lens hood, microphone holder unit - Canon XF100 | XF100 / XF105 Instruction Manual - Page 180
Specifications BP-925 Battery Pack 180 • Battery type Rechargeable lithium ion battery, compatible with Intelligent System • Rated voltage 7.4 V DC • Operating temperature 0 - 40 °C (32 - 104 °F) • Battery capacity Typical: 2,600 mAh Minimum: 19 Wh / 2,450 mAh • Dimensions (W x H x D) 38.2 x - Canon XF100 | XF100 / XF105 Instruction Manual - Page 181
audio 129 F Flicker reduction 57 Focal length guide 96 Focus 48 Focus limit 52 Frame rate 46 Frame recording mode 89 Free-run (time code 70 Full auto mode 42 G Gain 54 Genlock 74 GENLOCK/TC terminal 74 Grip belt 32 H HD/SD COMPONENT OUT terminal 127 HD/SD SDI terminal 127 HDMI - Canon XF100 | XF100 / XF105 Instruction Manual - Page 182
REMOTE terminal 65 Resetting all settings 152 Resolution (frame size 46 Reviewing a recording 87 Running mode (time code 70 S Safety zone 68 Saving clips to a computer 131 SD card 37 Shooting frame rate 90 Shot marks 86 Shutter speed 56 Slow & fast motion recording mode 90 Specifications - Canon XF100 | XF100 / XF105 Instruction Manual - Page 183
U USB terminal 20 User bit 73 User memo 82 V Video configuration 46 Video output configuration 124 Viewfinder 31 W Waveform monitor 84 White balance 60 Wireless controller 21 X XLR terminals 77 Z Zebra pattern 69 Zoom 63 Zoom rockers 63 183 *b only - Canon XF100 | XF100 / XF105 Instruction Manual - Page 184
peripheral products and incompatible software. TO OBTAIN WARRANTY SERVICE You may obtain technical support for your Products as follows: Internet support at www.usa.canon.com/support (E-mail support also available) Telephone assistance from a Canon U.S.A. Customer Care representative free of - Canon XF100 | XF100 / XF105 Instruction Manual - Page 185
the instruction manual; ii) the use of accessories, attachments, products, supplies, parts or devices with the Products that do not conform to Canon specifications or that cause abnormally frequent service problems; iii) repairs or services performed by any party other than a Canon Service Facility - Canon XF100 | XF100 / XF105 Instruction Manual - Page 186
U.S.A., INC. HONOLULU OFFICE 210 Ward Avenue, Suite 200, Honolulu, Hl 96814 USA ❖ If you have any questions, call the Canon U.S.A. Information Center toll-free at 1-800-828-4040 (USA only). CANADA CANON CANADA INC. 6390 Dixie Road, Mississauga, ON L5T 1P7 ❖ If you have any questions, call the
-
 1
1 -
 2
2 -
 3
3 -
 4
4 -
 5
5 -
 6
6 -
 7
7 -
8
-
9
-
10
-
11
-
12
-
13
-
14
-
15
-
16
-
17
-
18
-
19
-
20
-
21
-
22
-
23
-
24
-
25
-
26
-
27
-
28
-
29
-
30
-
31
-
32
-
33
-
34
-
35
-
36
-
37
-
38
-
39
-
40
-
41
-
42
-
43
-
44
-
45
-
46
-
47
-
48
-
49
-
50
-
51
-
52
-
53
-
54
-
55
-
56
-
57
-
58
-
59
-
60
-
61
-
62
-
63
-
64
-
65
-
66
-
67
-
68
-
69
-
70
-
71
-
72
-
73
-
74
-
75
-
76
-
77
-
78
-
79
-
80
-
81
-
82
-
83
-
84
-
85
-
86
-
87
-
88
-
89
-
90
-
91
-
92
-
93
-
94
-
95
-
96
-
97
-
98
-
99
-
100
-
101
-
102
-
103
-
104
-
105
-
106
-
107
-
108
-
109
-
110
-
111
-
112
-
113
-
114
-
115
-
116
-
117
-
118
-
119
-
120
-
121
-
122
-
123
-
124
-
125
-
126
-
127
-
128
-
129
-
130
-
131
-
132
-
133
-
134
-
135
-
136
-
137
-
138
-
139
-
140
-
141
-
142
-
143
-
144
-
145
-
146
-
147
-
148
-
149
-
150
-
151
-
152
-
153
-
154
-
155
-
156
-
157
-
158
-
159
-
160
-
161
-
162
-
163
-
164
-
165
-
166
-
167
-
168
-
169
-
170
-
171
-
172
-
173
-
174
-
175
-
176
-
177
-
178
-
179
-
180
-
181
-
182
-
183
-
184
-
185
-
186
 |
 |
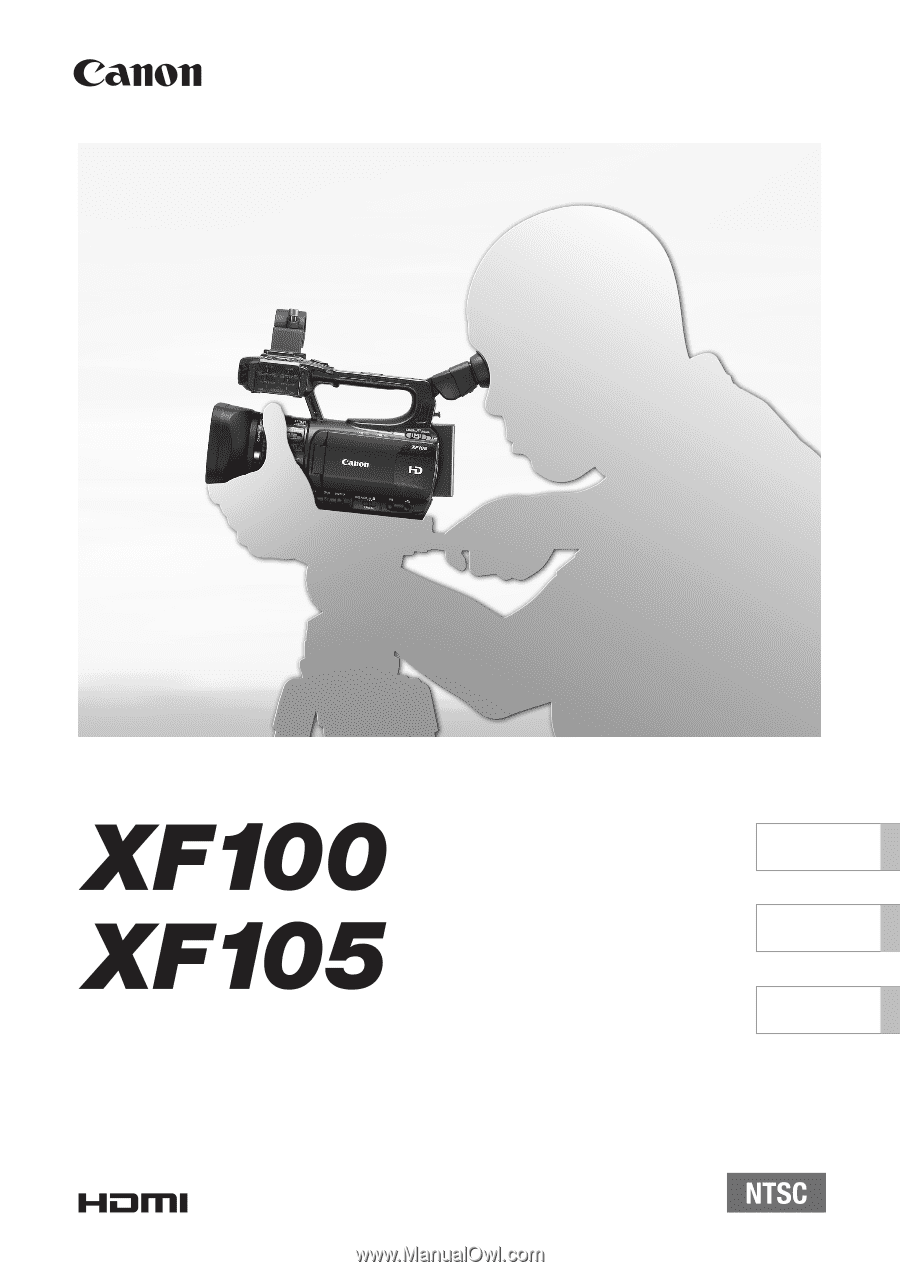
PUB. DIM-0972-000
HD Camcorder
Instruction Manual
Caméscope HD
Manuel d'instruction
Videocámara HD
Manual de Instrucciones
English
Français
Español