Canon XF100 XF100 / XF105 Instruction Manual - Page 81
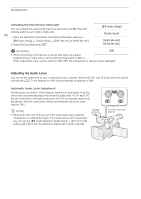
Monitoring the Audio with Headphones
 |
View all Canon XF100 manuals
Add to My Manuals
Save this manual to your list of manuals |
Page 81 highlights
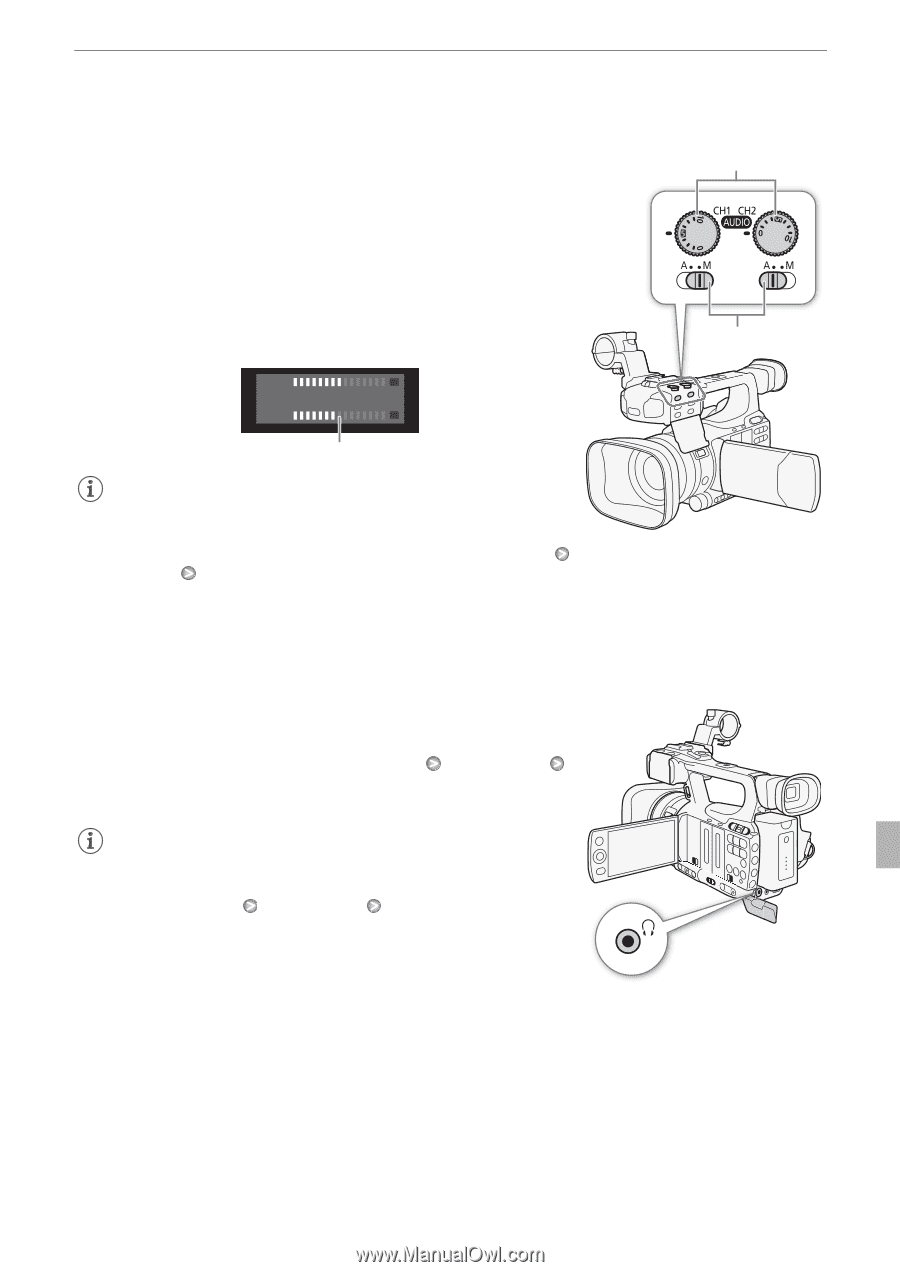
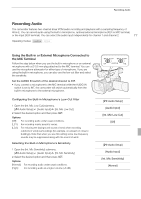
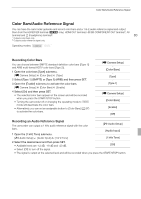
Recording Audio Manual Audio Level Adjustment You can set the audio level for each channel manually from -f to 18 dB. 1 Set the audio level switch of the desired channel to M. 2 Turn the corresponding audio level dial to adjust the audio level. • For reference, the 0 corresponds to -f, 5 corresponds to 0 dB, and 10 corresponds to +18 dB. • As a guideline, adjust the audio recording level so that the audio level meter will go to the right of the -18 dB mark (one mark right of the -20 dB mark) only occasionally. CH1 -dB 40 30 20 10 0 CH2 18 dB mark CH1/CH2 audio level dials 81 CH1/CH2 audio level switches NOTES • You can activate the audio peak limiter to prevent audio distortions. When activated, the audio peak limiter will limit the amplitude of audio input signals when they exceed -4 dBFS. Use the [m Audio Setup] [Audio Input] [Limiter] setting. The audio peak limiter can be activated if at least one of the channels is set to manual audio level adjustment. • We recommend using headphones when adjusting the audio level. If the input level is too high, audio may become distorted even if the audio level indicator shows an appropriate level. Monitoring the Audio with Headphones Connect headphones to the W (headphone) terminal to monitor the recorded audio. You can use the [m Audio Setup] [Audio Output] [Headphone Volume] setting to adjust the volume. Alternatively, you can use the CUSTOM dial (0 47). NOTES • When you are monitoring the audio, you can choose to synchronize the audio signal with the video signal or monitor the audio in real time. Use the [m Audio Setup] [Audio Output] [Monitor Delay] setting to select the method. Note that there will be a slight delay when you monitor in real time. Regardless of the setting, however, the audio and video signals recorded will be synchronized.
-
 1
1 -
2
-
3
-
4
-
5
-
6
-
7
-
8
-
9
-
10
-
11
-
12
-
13
-
14
-
15
-
16
-
17
-
18
-
19
-
20
-
21
-
22
-
23
-
24
-
25
-
26
-
27
-
28
-
29
-
30
-
31
-
32
-
33
-
34
-
35
-
36
-
37
-
38
-
39
-
40
-
41
-
42
-
43
-
44
-
45
-
46
-
47
-
48
-
49
-
50
-
51
-
52
-
53
-
54
-
55
-
56
-
57
-
58
-
59
-
60
-
61
-
62
-
63
-
64
-
65
-
66
-
67
-
68
-
69
-
70
-
71
-
72
-
73
-
74
-
75
-
 76
76 -
 77
77 -
 78
78 -
 79
79 -
 80
80 -
 81
81 -
 82
82 -
 83
83 -
 84
84 -
 85
85 -
 86
86 -
87
-
88
-
89
-
90
-
91
-
92
-
93
-
94
-
95
-
96
-
97
-
98
-
99
-
100
-
101
-
102
-
103
-
104
-
105
-
106
-
107
-
108
-
109
-
110
-
111
-
112
-
113
-
114
-
115
-
116
-
117
-
118
-
119
-
120
-
121
-
122
-
123
-
124
-
125
-
126
-
127
-
128
-
129
-
130
-
131
-
132
-
133
-
134
-
135
-
136
-
137
-
138
-
139
-
140
-
141
-
142
-
143
-
144
-
145
-
146
-
147
-
148
-
149
-
150
-
151
-
152
-
153
-
154
-
155
-
156
-
157
-
158
-
159
-
160
-
161
-
162
-
163
-
164
-
165
-
166
-
167
-
168
-
169
-
170
-
171
-
172
-
173
-
174
-
175
-
176
-
177
-
178
-
179
-
180
-
181
-
182
-
183
-
184
-
185
-
186
 |
 |