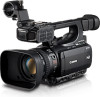
Canon XF100 XF100 / XF105 Instruction Manual - Page 7
Table of Contents - availability
 |
View all Canon XF100 manuals
Add to My Manuals
Save this manual to your list of manuals |
Page 7 highlights
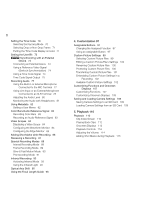
Table of Contents 1. Introduction 10 About this Manual 10 Conventions Used in this Manual 10 Supplied Accessories 12 Names of Parts 13 2. Preparations 22 Preparing the Power Supply 22 Using a Battery Pack 22 Turning the Camcorder On and Off 25 Date, Time and Language Settings 26 Setting the Date and Time 26 Changing the Time Zone 26 Displaying the Date and Time while Recording 27 Changing the Language 27 Using the Menus 28 Selecting an Option from the Menu 28 Preparing the Camcorder 30 Attaching the Microphone Holder Unit 30 Attaching the Lens Hood 30 Dioptric Adjustment 30 Using the LCD Panel 31 Using the Viewfinder and LCD Screen Simultaneously 31 Adjusting the Viewfinder/LCD Screen 31 Setting the Screen to Black & White 32 Adjusting the Grip Belt 32 Attaching a Shoulder Strap 32 Removing and Attaching the Terminal Covers 33 Using the Wireless Controller 33 Using a Tripod 34 Preparing Recording Media 35 Inserting a CF Card 35 Checking the Status of the CF Card Slots 36 Removing a CF card 36 Inserting and Removing an SD Card 37 Initializing the Recording Media 37 Switching Between the CF Card Slots 38 Selecting the CF Card Recording Method 38 Checking the Available Recording Time 39 Recovering Data on the CF Card 39 7 3. Recording 40 Recording Video 40 Preparing to Record 40 Recording 40 Onscreen Displays 43 Power Save Mode 45 Video Configuration: Bit Rate, Resolution and Frame Rate 46 Custom Button and Dial 47 Adjusting the Focus 48 Manual Focus Mode 48 Using the Focus Assistance Functions 49 Autofocus Mode 50 Detecting and Focusing On Faces 51 Focus Limit and Macro Shooting 52 Image Stabilizer 53 Gain 54 Automatic Gain Control (AGC) 54 Manual Gain Control 55 Shutter Speed 56 Changing the Shutter Speed Mode 57 Flicker Reduction 57 Adjusting the Aperture 58 Automatic Aperture Control 58 Manual Aperture Control 58 Adjusting the AE Level 59 Setting the Light Metering Mode 59 White Balance 60 Auto White Balance 60 Preset White Balance 60 Setting the Color Temperature 61 Custom White Balance 62 Zooming 63 Using the Manual Ring 63 Using the Zoom Rockers, Wireless Controller or Optional Remote Control 63 Soft Zoom Control 66 Using Optional Conversion Lenses 67 Onscreen Markers and Zebra Patterns 68 Displaying Onscreen Markers 68 Displaying Zebra Patterns 69
-
 1
1 -
 2
2 -
 3
3 -
 4
4 -
 5
5 -
 6
6 -
 7
7 -
 8
8 -
 9
9 -
 10
10 -
 11
11 -
 12
12 -
13
-
14
-
15
-
16
-
17
-
18
-
19
-
20
-
21
-
22
-
23
-
24
-
25
-
26
-
27
-
28
-
29
-
30
-
31
-
32
-
33
-
34
-
35
-
36
-
37
-
38
-
39
-
40
-
41
-
42
-
43
-
44
-
45
-
46
-
47
-
48
-
49
-
50
-
51
-
52
-
53
-
54
-
55
-
56
-
57
-
58
-
59
-
60
-
61
-
62
-
63
-
64
-
65
-
66
-
67
-
68
-
69
-
70
-
71
-
72
-
73
-
74
-
75
-
76
-
77
-
78
-
79
-
80
-
81
-
82
-
83
-
84
-
85
-
86
-
87
-
88
-
89
-
90
-
91
-
92
-
93
-
94
-
95
-
96
-
97
-
98
-
99
-
100
-
101
-
102
-
103
-
104
-
105
-
106
-
107
-
108
-
109
-
110
-
111
-
112
-
113
-
114
-
115
-
116
-
117
-
118
-
119
-
120
-
121
-
122
-
123
-
124
-
125
-
126
-
127
-
128
-
129
-
130
-
131
-
132
-
133
-
134
-
135
-
136
-
137
-
138
-
139
-
140
-
141
-
142
-
143
-
144
-
145
-
146
-
147
-
148
-
149
-
150
-
151
-
152
-
153
-
154
-
155
-
156
-
157
-
158
-
159
-
160
-
161
-
162
-
163
-
164
-
165
-
166
-
167
-
168
-
169
-
170
-
171
-
172
-
173
-
174
-
175
-
176
-
177
-
178
-
179
-
180
-
181
-
182
-
183
-
184
-
185
-
186
 |
 |