Epson Stylus Pro WT7900 User's Guide - Page 74
Printing Your Custom Paper Settings, lets you adjust the tension
 |
View all Epson Stylus Pro WT7900 manuals
Add to My Manuals
Save this manual to your list of manuals |
Page 74 highlights
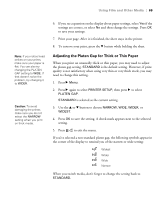
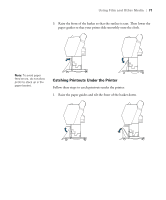
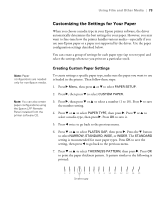
74 | Using Film and Other Media 8. Examine the printed pattern for the most evenly overlapping lines. Choose the number with the most even lines. In the example shown above, the lines under number 4 are the most even. After printing the pattern, THICKNESS NUMBER is highlighted. 9. Press u or d to select the number that you noted in step 8, then press OK. 10. Press l, then d to select any of the menu options shown below. Make adjustments as needed, and press OK to save each setting. Then press l to return to the menu. • PAPER FEED ADJUST helps eliminate banding. Choose a lower value if you see white lines on your prints, or a higher value if you see dark lines. • DRYING TIME lets you print with non-Epson media and avoid smearing the ink. You can make the print head wait up to 10 seconds after each pass to allow ink to dry on the page. • PAPER SUCTION lets you decrease the paper suction level when printing on thin media (under 12 lb), such as drafting paper or backlight film. • SET ROLL PAPER TENSION lets you adjust the tension to HIGH or HIGHER for cloth or thin paper, or if the paper wrinkles during printing. • REMOVE SKEW helps reduce paper skew for very thin media or film. 11. When done, press . After you settings, you can use the TEST PRINT menu to print out a list of paper numbers showing the settings for each one. Printing Your Custom Paper Settings You can print a list showing the customized settings for all your papers. This makes it easy to select the settings you want for a particular type of paper. 1. Press r Menu, then press d to highlight TEST PRINT. Press r again. 74
-
 1
1 -
2
-
3
-
4
-
5
-
6
-
7
-
8
-
9
-
10
-
11
-
12
-
13
-
14
-
15
-
16
-
17
-
18
-
19
-
20
-
21
-
22
-
23
-
24
-
25
-
26
-
27
-
28
-
29
-
30
-
31
-
32
-
33
-
34
-
35
-
36
-
37
-
38
-
39
-
40
-
41
-
42
-
43
-
44
-
45
-
46
-
47
-
48
-
49
-
50
-
51
-
52
-
53
-
54
-
55
-
56
-
57
-
58
-
59
-
60
-
61
-
62
-
63
-
64
-
65
-
66
-
67
-
68
-
 69
69 -
 70
70 -
 71
71 -
 72
72 -
 73
73 -
 74
74 -
 75
75 -
 76
76 -
 77
77 -
 78
78 -
 79
79 -
80
-
81
-
82
-
83
-
84
-
85
-
86
-
87
-
88
-
89
-
90
-
91
-
92
-
93
-
94
-
95
-
96
-
97
-
98
-
99
-
100
-
101
-
102
-
103
-
104
-
105
-
106
-
107
-
108
-
109
-
110
-
111
-
112
-
113
-
114
-
115
-
116
-
117
-
118
-
119
-
120
-
121
-
122
-
123
-
124
-
125
-
126
-
127
-
128
-
129
-
130
-
131
-
132
-
133
-
134
-
135
-
136
 |
 |
