Fluke 744 Fluke 744 Users Manual - Page 81
as PH. See Creating Custom Measurement, appears next to the value on the display and
 |
View all Fluke 744 manuals
Add to My Manuals
Save this manual to your list of manuals |
Page 81 highlights
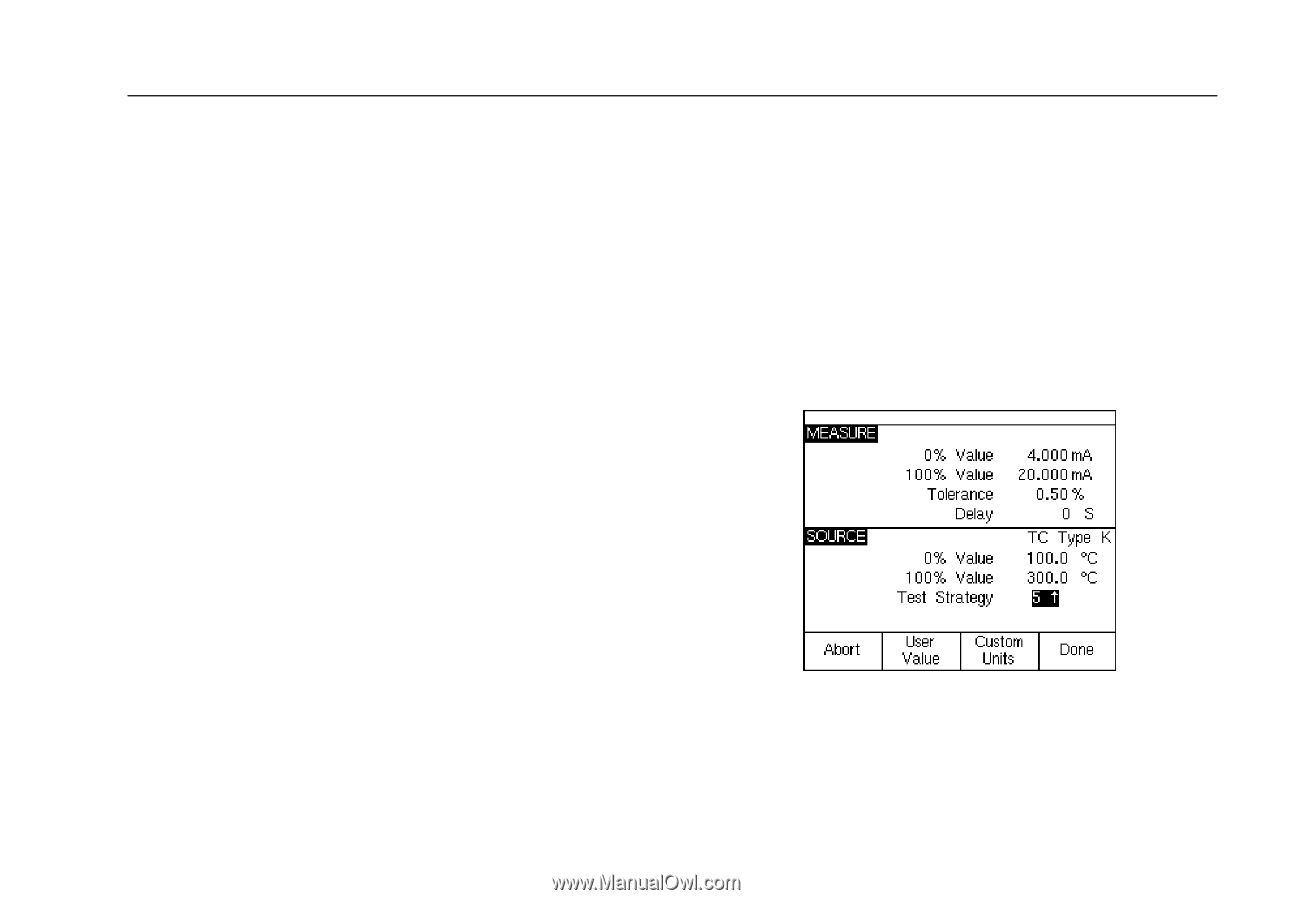
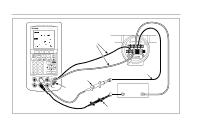
11. If the process instrument needs more time to settle than the calibrator's normal settling time (about 2 seconds) at each new stimulus level, enter that time in seconds for Delay. 12. Use the arrow keys to move the cursor down to enter 0% and 100% values for SOURCE temperature. Our example uses 100°C and 300°C. 13. If the instrument calibration procedure requires you to enter either the measurement value or source value by hand at each step, press the User Value softkey, for "user entered values." Custom Units lets you define your own units such as "PH." See "Creating Custom Measurement Units," earlier in this manual for an example. When you use custom units, the w symbol appears next to the value on the display and in results. Press the Done softkey after you have programmed your custom unit. 14. The Strategy is the number of test points and which test points are performed rising and falling Documenting Process Calibrator Calibrating a Process Instrument in percent of scale. Our example uses five points (0%, 25%, 50%, 75%, and 100%), rising only. Rising is indicated by the up arrow on the display. Change to another test strategy by pressing e on this line. A list of strategies appears from which to choose. Select one, then press Done. 15. When you finish selecting the calibration parameters, the display appears as follows: gj45s.eps 71
-
 1
1 -
2
-
3
-
4
-
5
-
6
-
7
-
8
-
9
-
10
-
11
-
12
-
13
-
14
-
15
-
16
-
17
-
18
-
19
-
20
-
21
-
22
-
23
-
24
-
25
-
26
-
27
-
28
-
29
-
30
-
31
-
32
-
33
-
34
-
35
-
36
-
37
-
38
-
39
-
40
-
41
-
42
-
43
-
44
-
45
-
46
-
47
-
48
-
49
-
50
-
51
-
52
-
53
-
54
-
55
-
56
-
57
-
58
-
59
-
60
-
61
-
62
-
63
-
64
-
65
-
66
-
67
-
68
-
69
-
70
-
71
-
72
-
73
-
74
-
75
-
 76
76 -
 77
77 -
 78
78 -
 79
79 -
 80
80 -
 81
81 -
 82
82 -
 83
83 -
 84
84 -
 85
85 -
 86
86 -
87
-
88
-
89
-
90
-
91
-
92
-
93
-
94
-
95
-
96
-
97
-
98
-
99
-
100
-
101
-
102
-
103
-
104
-
105
-
106
-
107
-
108
-
109
-
110
-
111
-
112
-
113
-
114
-
115
-
116
-
117
-
118
-
119
-
120
-
121
-
122
-
123
-
124
-
125
-
126
-
127
-
128
-
129
-
130
-
131
-
132
-
133
-
134
-
135
-
136
-
137
-
138
 |
 |