Fujitsu S6520 S6520 User's Guide - Page 63
Registering Windows Vista with Microsoft, disconnect the power supply, press any buttons - review
 |
UPC - 611343085946
View all Fujitsu S6520 manuals
Add to My Manuals
Save this manual to your list of manuals |
Page 63 highlights
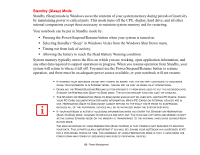
1 First of all, you will need to read and accept the End User License Agreements (EULAs). • IF YOU REJECT THE TERMS OF THE LICENSE AGREEMENTS YOU WILL BE ASKED TO REVIEW THE LICENSE AGREEMENTS FOR INFORMATION ON RETURNING WINDOWS OR TO SHUT DOWN YOUR LIFEBOOK NOTEBOOK. • YOU CANNOT USE YOUR NOTEBOOK UNTIL YOU HAVE ACCEPTED THE LICENSE AGREEMENTS. IF YOU STOP THE PROCESS YOUR NOTEBOOK WILL RETURN TO THE BEGINNING OF THE WINDOWS WELCOME PROCESS, EVEN IF YOU SHUT YOUR NOTEBOOK DOWN AND START IT UP AGAIN. 2 You will be prompted to enter your User Name and Password and you will be given a chance to select an icon for your account. 3 The next screen asks for a Computer Name and allows you to choose a desktop background. 4 You will next see a "Help protect Windows automatically" screen in which the default choice is "Use recommended settings". The other two choices are "Install important updates only" and "Ask me later". Select from the three choices. 5 On the next screen set your time and date settings. 6 You will next see the "Select your computer's current location" screen. Make your selection from Home, Work (Default), and Public location. 7 The "Thank you" screen follows and an offer for free Norton Internet Security is extended. Following are several screens while Windows checks the system performance. 8 Windows will then boot up for the first time. As noted above, the first time you initialize your Windows Vista system, the screen will be blank for approximately two minutes. This is normal. During this period, do not disconnect the power supply, press any buttons, or use any peripheral devices such as mouse, keyboard, or remote control. Registering Windows Vista with Microsoft 1 After Windows has booted up for the first time, the Control Panel Welcome Center will appear. If the Register Windows Online icon is not seen in the window, click on "Show all xx items" (where "xx" is the number of topics in the Welcome Center). 2 Click on Register Windows Online and follow the instructions that appear to register your copy of Windows. 58 - Starting Your LifeBook Notebook
-
 1
1 -
2
-
3
-
4
-
5
-
6
-
7
-
8
-
9
-
10
-
11
-
12
-
13
-
14
-
15
-
16
-
17
-
18
-
19
-
20
-
21
-
22
-
23
-
24
-
25
-
26
-
27
-
28
-
29
-
30
-
31
-
32
-
33
-
34
-
35
-
36
-
37
-
38
-
39
-
40
-
41
-
42
-
43
-
44
-
45
-
46
-
47
-
48
-
49
-
50
-
51
-
52
-
53
-
54
-
55
-
56
-
57
-
 58
58 -
 59
59 -
 60
60 -
 61
61 -
 62
62 -
 63
63 -
 64
64 -
 65
65 -
 66
66 -
 67
67 -
 68
68 -
69
-
70
-
71
-
72
-
73
-
74
-
75
-
76
-
77
-
78
-
79
-
80
-
81
-
82
-
83
-
84
-
85
-
86
-
87
-
88
-
89
-
90
-
91
-
92
-
93
-
94
-
95
-
96
-
97
-
98
-
99
-
100
-
101
-
102
-
103
-
104
-
105
-
106
-
107
-
108
-
109
-
110
-
111
-
112
-
113
-
114
-
115
-
116
-
117
-
118
-
119
-
120
-
121
-
122
-
123
-
124
-
125
-
126
-
127
-
128
-
129
-
130
-
131
-
132
-
133
-
134
-
135
-
136
-
137
-
138
-
139
-
140
-
141
-
142
-
143
-
144
-
145
-
146
-
147
-
148
-
149
-
150
-
151
-
152
-
153
-
154
-
155
-
156
-
157
-
158
-
159
-
160
-
161
-
162
-
163
-
164
-
165
-
166
-
167
-
168
-
169
-
170
-
171
-
172
-
173
-
174
-
175
-
176
-
177
-
178
-
179
-
180
-
181
-
182
-
183
-
184
-
185
-
186
-
187
-
188
-
189
-
190
-
191
-
192
-
193
-
194
-
195
-
196
-
197
-
198
-
199
-
200
-
201
-
202
-
203
 |
 |
