Hamilton Beach 29881 Use & Care - Page 12
Cleaning, Removing Bread - pan
 |
UPC - 040094298815
View all Hamilton Beach 29881 manuals
Add to My Manuals
Save this manual to your list of manuals |
Page 12 highlights
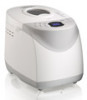
840194101 ENv01.qxd:Layout 1 7/30/10 8:38 AM Page 12 Removing Bread Bread pan and baking chamber will be hot and oven mitts should be used. Remove the bread pan by lifting the handle and turning it counterclockwise to unlock it from the base of the chamber. Carefully shake the bread upside down until the loaf falls out of the bread pan. Allow to cool on a wire rack for 10 minutes before slicing. TIP: If the kneading paddle comes out in the loaf, remove it with a spatula or small utensil. When baking is complete, the unit will switch to the Keep Warm setting for up to 1 hour. Press and hold the START/STOP button for 2 seconds to end this cycle before removing bread pan. Slicing Allow to cool for 10 minutes and slice with a bread knife. Storing Homemade Bread Fresh-baked bread is best when consumed as soon as possible. To store, wrap cooled loaf in foil or a plastic bag to preserve freshness. Bread can be frozen for up to 6 months. Cleaning w WARNING Electrical Shock Hazard. Disconnect power before cleaning. Do not immerse cord, plug, or housing in any liquid. Allow breadmaker to cool down completely before cleaning. 1 To clean kneading paddle: If the kneading paddle is difficult to remove from the bread, add water to the bottom of the bread pan and allow to soak for up to 1 hour. Wipe the paddle carefully with a damp cloth. The kneading paddle is dishwasher-safe. 12 2 3 To clean bread pan: Remove the bread pan by turning it counterclockwise. Wipe inside and outside of bread pan with a damp cloth. Do not use any abrasive agents, in order to protect the nonstick coating. The bread pan must be dried completely before installation. NOTE: The bread pan and kneading paddles are dishwasher-safe. The outside of the bread pan and base may discolor. This is normal. To clean housing and top lid: After use, allow unit to cool. Use a damp cloth to wipe lid, housing, baking chamber, and interior of viewing window. Do not use any abrasive cleaners for cleaning, since this will degrade the high polish of the surface. Never immerse the housing into water for cleaning. 4 Before the breadmaker is packed for storage, ensure that it has completely cooled down, is clean and dry, and the top lid is closed.
-
 1
1 -
2
-
3
-
4
-
5
-
6
-
 7
7 -
 8
8 -
 9
9 -
 10
10 -
 11
11 -
 12
12 -
 13
13 -
 14
14 -
 15
15 -
 16
16 -
 17
17 -
18
-
19
-
20
-
21
-
22
-
23
-
24
-
25
-
26
-
27
-
28
-
29
-
30
-
31
-
32
-
33
-
34
-
35
-
36
-
37
-
38
-
39
-
40
-
41
-
42
-
43
-
44
-
45
-
46
-
47
-
48
-
49
-
50
-
51
-
52
-
53
-
54
-
55
-
56
-
57
-
58
-
59
-
60
-
61
-
62
-
63
-
64
-
65
-
66
-
67
-
68
-
69
-
70
-
71
-
72
-
73
-
74
-
75
-
76
-
77
-
78
-
79
-
80
-
81
-
82
-
83
-
84
-
85
-
86
-
87
-
88
-
89
-
90
-
91
-
92
 |
 |
