HP 2605dn HP Color LaserJet 2605/2605dn/2605dtn - Software Technical Reference - Page 353

III. INSTALLATION INSTRUCTIONS, Troubleshooting Setup and Install

Page 353 highlights

● Functionality on systems that meet only minimum system requirements will be limited. Use of many images or videos requires a system that meets the recommended system requirements for acceptable performance and reliability. ● Troubleshooting Setup and Install If your device is not recognized: ● Verify that your cable is USB 2.0 high-speed compliant. ● Ensure that your cable is connected correctly. Remove the USB cable, look at the end of the cable, and then match it to the pattern on the USB port. Make sure that it is not upside down. Insert one end of the USB cable completely into the USB port on the HP device and the other end into the back of the computer. ● Check that the peripheral is turned on. Peripherals will not be recognized if the power is off. ● Ensure that your USB cable is no more than 15 feet or 5 meters in length. ● Check that the USB port is enabled. Some computers ship with disabled USB ports. Unloading and Memory Card Issues (HP Color LaserJet 2605dtn only) ● If possible, format memory cards in the image capture device (e.g., a digital camera). Do not use Windows Explorer to format cards. ● Secure digital cards have a lock switch that should never be set when the card is in the camera. ● If you experience trouble unloading images from the image capture device while a screen saver or power management feature on the computer has been activated, you may need to disable these features during the unload operation. The settings of these features can be configured from the system control panel. ● For best results, always exit the HP Photosmart Transfer software before removing or replacing the CompactFlash card from the card reader. ● If the memory card cannot be seen on your mapped network drive after an install, try removing and reinserting the card. III. INSTALLATION INSTRUCTIONS When operating in a Windows environment, the CD-ROM setup or installation software detects the version of the operating system that you are running. The software is installed in the language that you have selected. For example, if you are running an English version of Windows and have the language preference set to Spanish, the installation utility will install the Spanish version of the printing software for the appropriate Windows version. Engineering Detail ENWW Hewlett-Packard Color LaserJet 2605 Series Printing System Readme 329

  • 1
  • 2
  • 3
  • 4
  • 5
  • 6
  • 7
  • 8
  • 9
  • 10
  • 11
  • 12
  • 13
  • 14
  • 15
  • 16
  • 17
  • 18
  • 19
  • 20
  • 21
  • 22
  • 23
  • 24
  • 25
  • 26
  • 27
  • 28
  • 29
  • 30
  • 31
  • 32
  • 33
  • 34
  • 35
  • 36
  • 37
  • 38
  • 39
  • 40
  • 41
  • 42
  • 43
  • 44
  • 45
  • 46
  • 47
  • 48
  • 49
  • 50
  • 51
  • 52
  • 53
  • 54
  • 55
  • 56
  • 57
  • 58
  • 59
  • 60
  • 61
  • 62
  • 63
  • 64
  • 65
  • 66
  • 67
  • 68
  • 69
  • 70
  • 71
  • 72
  • 73
  • 74
  • 75
  • 76
  • 77
  • 78
  • 79
  • 80
  • 81
  • 82
  • 83
  • 84
  • 85
  • 86
  • 87
  • 88
  • 89
  • 90
  • 91
  • 92
  • 93
  • 94
  • 95
  • 96
  • 97
  • 98
  • 99
  • 100
  • 101
  • 102
  • 103
  • 104
  • 105
  • 106
  • 107
  • 108
  • 109
  • 110
  • 111
  • 112
  • 113
  • 114
  • 115
  • 116
  • 117
  • 118
  • 119
  • 120
  • 121
  • 122
  • 123
  • 124
  • 125
  • 126
  • 127
  • 128
  • 129
  • 130
  • 131
  • 132
  • 133
  • 134
  • 135
  • 136
  • 137
  • 138
  • 139
  • 140
  • 141
  • 142
  • 143
  • 144
  • 145
  • 146
  • 147
  • 148
  • 149
  • 150
  • 151
  • 152
  • 153
  • 154
  • 155
  • 156
  • 157
  • 158
  • 159
  • 160
  • 161
  • 162
  • 163
  • 164
  • 165
  • 166
  • 167
  • 168
  • 169
  • 170
  • 171
  • 172
  • 173
  • 174
  • 175
  • 176
  • 177
  • 178
  • 179
  • 180
  • 181
  • 182
  • 183
  • 184
  • 185
  • 186
  • 187
  • 188
  • 189
  • 190
  • 191
  • 192
  • 193
  • 194
  • 195
  • 196
  • 197
  • 198
  • 199
  • 200
  • 201
  • 202
  • 203
  • 204
  • 205
  • 206
  • 207
  • 208
  • 209
  • 210
  • 211
  • 212
  • 213
  • 214
  • 215
  • 216
  • 217
  • 218
  • 219
  • 220
  • 221
  • 222
  • 223
  • 224
  • 225
  • 226
  • 227
  • 228
  • 229
  • 230
  • 231
  • 232
  • 233
  • 234
  • 235
  • 236
  • 237
  • 238
  • 239
  • 240
  • 241
  • 242
  • 243
  • 244
  • 245
  • 246
  • 247
  • 248
  • 249
  • 250
  • 251
  • 252
  • 253
  • 254
  • 255
  • 256
  • 257
  • 258
  • 259
  • 260
  • 261
  • 262
  • 263
  • 264
  • 265
  • 266
  • 267
  • 268
  • 269
  • 270
  • 271
  • 272
  • 273
  • 274
  • 275
  • 276
  • 277
  • 278
  • 279
  • 280
  • 281
  • 282
  • 283
  • 284
  • 285
  • 286
  • 287
  • 288
  • 289
  • 290
  • 291
  • 292
  • 293
  • 294
  • 295
  • 296
  • 297
  • 298
  • 299
  • 300
  • 301
  • 302
  • 303
  • 304
  • 305
  • 306
  • 307
  • 308
  • 309
  • 310
  • 311
  • 312
  • 313
  • 314
  • 315
  • 316
  • 317
  • 318
  • 319
  • 320
  • 321
  • 322
  • 323
  • 324
  • 325
  • 326
  • 327
  • 328
  • 329
  • 330
  • 331
  • 332
  • 333
  • 334
  • 335
  • 336
  • 337
  • 338
  • 339
  • 340
  • 341
  • 342
  • 343
  • 344
  • 345
  • 346
  • 347
  • 348
  • 349
  • 350
  • 351
  • 352
  • 353
  • 354
  • 355
  • 356
  • 357
  • 358
  • 359
  • 360
  • 361
  • 362
  • 363
  • 364
  • 365
  • 366
  • 367
  • 368
  • 369
  • 370
  • 371
  • 372

Functionality on systems that meet only minimum system requirements will be limited. Use of many
images or videos requires a system that meets the recommended system requirements for
acceptable performance and reliability.
Troubleshooting Setup and Install
If your device is not recognized:
Verify that your cable is USB 2.0 high-speed compliant.
Ensure that your cable is connected correctly. Remove the USB cable, look at the end of the
cable, and then match it to the pattern on the USB port. Make sure that it is not upside down.
Insert one end of the USB cable completely into the USB port on the HP device and the other
end into the back of the computer.
Check that the peripheral is turned on. Peripherals will not be recognized if the power is off.
Ensure that your USB cable is no more than 15 feet or 5 meters in length.
Check that the USB port is enabled. Some computers ship with disabled USB ports.
Unloading and Memory Card Issues (HP Color LaserJet 2605dtn only)
If possible, format memory cards in the image capture device (e.g., a digital camera). Do not use
Windows Explorer to format cards.
Secure digital cards have a lock switch that should never be set when the card is in the camera.
If you experience trouble unloading images from the image capture device while a screen saver
or power management feature on the computer has been activated, you may need to disable these
features during the unload operation. The settings of these features can be configured from the
system control panel.
For best results, always exit the HP Photosmart Transfer software before removing or replacing
the CompactFlash card from the card reader.
If the memory card cannot be seen on your mapped network drive after an install, try removing and
reinserting the card.
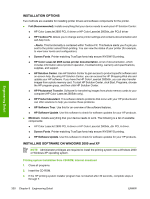
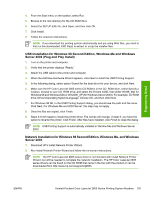
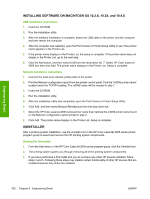
III. INSTALLATION INSTRUCTIONS
When operating in a Windows environment, the CD-ROM setup or installation software detects the
version of the operating system that you are running. The software is installed in the language that you
have selected. For example, if you are running an English version of Windows and have the language
preference set to Spanish, the installation utility will install the Spanish version of the printing software
for the appropriate Windows version.
ENWW
Hewlett-Packard Color LaserJet 2605 Series Printing System Readme
329
Engineering Detail