HP Deskjet 940c HP DeskJet 948C, 940C, and 920C Series - (English) Quick Help - Page 88
photos are not printing correctly, Print, Properties, Print Setup, Setup, PhotoREt, x 1200 dpi
 |
View all HP Deskjet 940c manuals
Add to My Manuals
Save this manual to your list of manuals |
Page 88 highlights
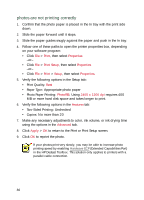
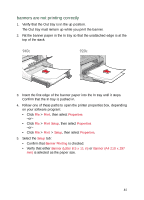
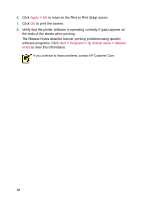
photos are not printing correctly 1. Confirm that the photo paper is placed in the In tray with the print side down. 2. Slide the paper forward until it stops. 3. Slide the paper guides snugly against the paper and push in the In tray. 4. Follow one of these paths to open the printer properties box, depending on your software program: • Click File > Print, then select Properties -or- • Click File > Print Setup, then select Properties -or- • Click File > Print > Setup, then select Properties. 5. Verify the following options in the Setup tab: • Print Quality: Best • Paper Type: Appropriate photo paper • Photo Paper Printing: PhotoREt. Using 2400 x 1200 dpi requires 400 MB or more hard disk space and takes longer to print. 6. Verify the following options in the Features tab: • Two-Sided Printing: Unchecked • Copies: No more than 20 7. Make any necessary adjustments to color, ink volume, or ink drying time using the options in the Advanced tab. 8. Click Apply > OK to return to the Print or Print Setup screen. 9. Click OK to reprint the photo. If your photos print very slowly, you may be able to increase photo printing speed by enabling Hardware ECP (Extended Capabilities Port) in the HP Deskjet Toolbox. This solution only applies to printers with a parallel cable connection. 86
-
 1
1 -
2
-
3
-
4
-
5
-
6
-
7
-
8
-
9
-
10
-
11
-
12
-
13
-
14
-
15
-
16
-
17
-
18
-
19
-
20
-
21
-
22
-
23
-
24
-
25
-
26
-
27
-
28
-
29
-
30
-
31
-
32
-
33
-
34
-
35
-
36
-
37
-
38
-
39
-
40
-
41
-
42
-
43
-
44
-
45
-
46
-
47
-
48
-
49
-
50
-
51
-
52
-
53
-
54
-
55
-
56
-
57
-
58
-
59
-
60
-
61
-
62
-
63
-
64
-
65
-
66
-
67
-
68
-
69
-
70
-
71
-
72
-
73
-
74
-
75
-
76
-
77
-
78
-
79
-
80
-
81
-
82
-
 83
83 -
 84
84 -
 85
85 -
 86
86 -
 87
87 -
 88
88 -
 89
89 -
 90
90 -
 91
91 -
 92
92 -
 93
93 -
94
-
95
-
96
-
97
-
98
-
99
-
100
-
101
-
102
-
103
-
104
-
105
-
106
-
107
-
108
-
109
-
110
-
111
-
112
-
113
-
114
-
115
-
116
 |
 |