HP Officejet Pro 276dw HP Officejet Pro 276dw - User Guide - Page 113
Cause, Solution 7: Contact HP support, Solution, printhead. For more information, see
 |
View all HP Officejet Pro 276dw manuals
Add to My Manuals
Save this manual to your list of manuals |
Page 113 highlights
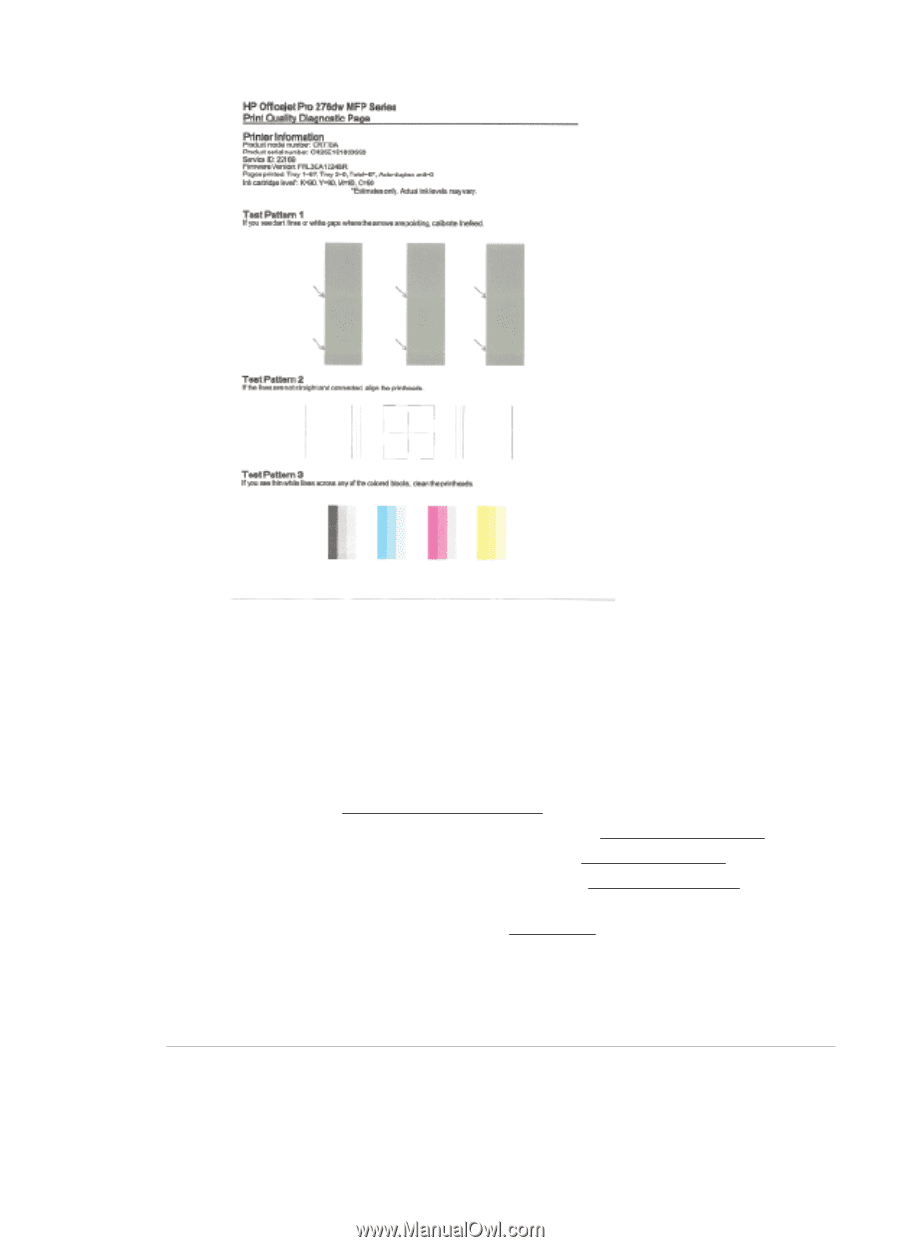
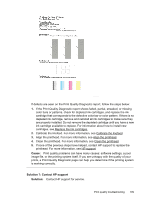
If defects are seen on the Print Quality Diagnostic report, follow the steps below: 1. If the Print Quality Diagnostic report shows faded, partial, streaked, or missing color bars or patterns, check for depleted ink cartridges, and replace the ink cartridge that corresponds to the defective color bar or color pattern. If there is no depleted ink cartridge, remove and reinstall all ink cartridges to make sure they are properly installed. Do not remove the depleted cartridge until you have a new ink cartridge available to replace. For information about how to install new cartridges, see Replace the ink cartridges. 2. Calibrate the linefeed. For more information, see Calibrate the linefeed. 3. Align the printhead. For more information, see Align the printhead. 4. Clean the printhead. For more information, see Clean the printhead. 5. If none of the previous steps have helped, contact HP support to replace the printhead. For more information, see HP support. Cause: Print quality problems can have many causes: software settings, a poor image file, or the printing system itself. If you are unhappy with the quality of your prints, a Print Quality Diagnostic page can help you determine if the printing system is working correctly. Solution 7: Contact HP support Solution: Contact HP support for service. Print quality troubleshooting 109
-
 1
1 -
2
-
3
-
4
-
5
-
6
-
7
-
8
-
9
-
10
-
11
-
12
-
13
-
14
-
15
-
16
-
17
-
18
-
19
-
20
-
21
-
22
-
23
-
24
-
25
-
26
-
27
-
28
-
29
-
30
-
31
-
32
-
33
-
34
-
35
-
36
-
37
-
38
-
39
-
40
-
41
-
42
-
43
-
44
-
45
-
46
-
47
-
48
-
49
-
50
-
51
-
52
-
53
-
54
-
55
-
56
-
57
-
58
-
59
-
60
-
61
-
62
-
63
-
64
-
65
-
66
-
67
-
68
-
69
-
70
-
71
-
72
-
73
-
74
-
75
-
76
-
77
-
78
-
79
-
80
-
81
-
82
-
83
-
84
-
85
-
86
-
87
-
88
-
89
-
90
-
91
-
92
-
93
-
94
-
95
-
96
-
97
-
98
-
99
-
100
-
101
-
102
-
103
-
104
-
105
-
106
-
107
-
 108
108 -
 109
109 -
 110
110 -
 111
111 -
 112
112 -
 113
113 -
 114
114 -
 115
115 -
 116
116 -
 117
117 -
 118
118 -
119
-
120
-
121
-
122
-
123
-
124
-
125
-
126
-
127
-
128
-
129
-
130
-
131
-
132
-
133
-
134
-
135
-
136
-
137
-
138
-
139
-
140
-
141
-
142
-
143
-
144
-
145
-
146
-
147
-
148
-
149
-
150
-
151
-
152
-
153
-
154
-
155
-
156
-
157
-
158
-
159
-
160
-
161
-
162
-
163
-
164
-
165
-
166
-
167
-
168
-
169
-
170
-
171
-
172
-
173
-
174
-
175
-
176
-
177
-
178
-
179
-
180
-
181
-
182
-
183
-
184
-
185
-
186
-
187
-
188
-
189
-
190
-
191
-
192
-
193
-
194
-
195
-
196
-
197
-
198
-
199
-
200
-
201
-
202
-
203
-
204
-
205
-
206
-
207
-
208
-
209
-
210
-
211
-
212
-
213
-
214
-
215
-
216
-
217
-
218
-
219
-
220
-
221
-
222
-
223
-
224
-
225
-
226
-
227
-
228
-
229
-
230
-
231
-
232
-
233
-
234
-
235
-
236
-
237
-
238
-
239
-
240
-
241
-
242
-
243
-
244
-
245
-
246
-
247
-
248
-
249
-
250
-
251
-
252
-
253
-
254
-
255
-
256
-
257
-
258
-
259
-
260
 |
 |