Lexmark Optra C710 Setup Guide - Page 91
Step 13: Con the network printer, Configuring the printer for your network, Printing a network - optra c710n
 |
View all Lexmark Optra C710 manuals
Add to My Manuals
Save this manual to your list of manuals |
Page 91 highlights
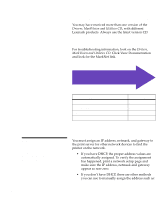
Step 13: Configure the network printer Configuring the printer for your network If you purchased an Optra C710N printer or if you have installed a network option, you can use these instructions to configure your printer on a network. If you installed the network card after initial printer setup or have not connected the printer to the network see "attach a cable to your printer" on page 66. Note: You may already have printed a network setup page during printer verification. Printing a network setup page Use the printer operator panel to print the network setup page. (Hint: Network Menu/Network Option x/Network x Setup/Print/Print Setup Page). The network setup page shows the physical address, known as the Universally Administered Address (UAA), of the print server and other important data. Look for the UAA under the Network heading on the setup page. Note: The UAA is preset at the factory. However, you can override it with an optional Locally Administered Address (LAA) if you want some particular physical address for this print server. The UAA is a 12-digit number. The left column shows the address in MSB form and the right column shows the address in canonical form. Save this page to use later. Configuring the printer for your network 87
-
 1
1 -
2
-
3
-
4
-
5
-
6
-
7
-
8
-
9
-
10
-
11
-
12
-
13
-
14
-
15
-
16
-
17
-
18
-
19
-
20
-
21
-
22
-
23
-
24
-
25
-
26
-
27
-
28
-
29
-
30
-
31
-
32
-
33
-
34
-
35
-
36
-
37
-
38
-
39
-
40
-
41
-
42
-
43
-
44
-
45
-
46
-
47
-
48
-
49
-
50
-
51
-
52
-
53
-
54
-
55
-
56
-
57
-
58
-
59
-
60
-
61
-
62
-
63
-
64
-
65
-
66
-
67
-
68
-
69
-
70
-
71
-
72
-
73
-
74
-
75
-
76
-
77
-
78
-
79
-
80
-
81
-
82
-
83
-
84
-
85
-
 86
86 -
 87
87 -
 88
88 -
 89
89 -
 90
90 -
 91
91 -
 92
92 -
 93
93 -
 94
94 -
 95
95 -
 96
96 -
97
-
98
-
99
-
100
-
101
-
102
-
103
-
104
-
105
-
106
-
107
-
108
-
109
-
110
-
111
 |
 |
