NEC 870 User Guide - Page 42
Graphic Watermark
 |
UPC - 050927215162
View all NEC 870 manuals
Add to My Manuals
Save this manual to your list of manuals |
Page 42 highlights
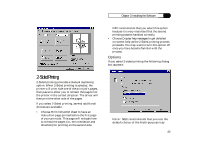
Chapter 3: Installing the Software Use this dialog box to enter the text and layout of your watermark. You can set the watermark's font, size, style, and darkness, as well as the angle and position on the page. The preview area at the right shows the effect of your settings. The preview will display both the currentlyselected text watermark and any selected graphic. However, you can change the text only in this dialog box. The text in the preview will overlay the graphic if the two overlap. You may name your watermark in the Name field. It will initially take the same name as the Text field, but you can use any name up to 16 characters in length. Click OK to add the new watermark to the list on the Watermark Options dialog. To edit one of the watermarks on the list, from the Watermark Options dialog box, highlight the watermark you want to change. Click Edit to bring up the Edit Watermark dialog box. The Edit dialog box is similar to the Add Watermark dialog box. When your changes are complete, click OK. Graphic Watermark To create a graphic watermark, click Add in the graphics area of the Watermark Options dialog box. A graphic watermark can be any uncompressed, valid bitmap (e.g. .bmp) file. The Watermark Graphics dialog box will appear. Note: You may use the graphic watermark feature to create a custom letterhead for your stationery. Simply position the bitmap graphic where you want it, for example in the top left corner or top center of the page, and set the darkness to "darkest." See the illustration below. 42
-
 1
1 -
2
-
3
-
4
-
5
-
6
-
7
-
8
-
9
-
10
-
11
-
12
-
13
-
14
-
15
-
16
-
17
-
18
-
19
-
20
-
21
-
22
-
23
-
24
-
25
-
26
-
27
-
28
-
29
-
30
-
31
-
32
-
33
-
34
-
35
-
36
-
 37
37 -
 38
38 -
 39
39 -
 40
40 -
 41
41 -
 42
42 -
 43
43 -
 44
44 -
 45
45 -
 46
46 -
 47
47 -
48
-
49
-
50
-
51
-
52
-
53
-
54
-
55
-
56
-
57
-
58
-
59
-
60
-
61
-
62
-
63
-
64
-
65
-
66
-
67
-
68
-
69
-
70
-
71
-
72
-
73
-
74
-
75
-
76
-
77
-
78
-
79
-
80
-
81
-
82
-
83
-
84
-
85
-
86
-
87
-
88
-
89
-
90
-
91
-
92
-
93
-
94
-
95
-
96
-
97
-
98
-
99
-
100
-
101
-
102
-
103
-
104
-
105
-
106
-
107
-
108
-
109
-
110
-
111
-
112
-
113
-
114
-
115
-
116
-
117
-
118
-
119
-
120
-
121
-
122
-
123
-
124
-
125
-
126
-
127
-
128
-
129
-
130
-
131
-
132
-
133
-
134
-
135
-
136
-
137
-
138
-
139
-
140
-
141
-
142
-
143
-
144
-
145
-
146
-
147
-
148
-
149
-
150
-
151
-
152
-
153
-
154
-
155
-
156
-
157
-
158
 |
 |
