Oki ML421 Network User's Guide for OkiLAN 6020e - Page 65
Specify Devices/Networks, OkiNet for NetWare, Columns Displayed, Columns, Available, Columns Available
 |
View all Oki ML421 manuals
Add to My Manuals
Save this manual to your list of manuals |
Page 65 highlights
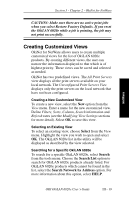
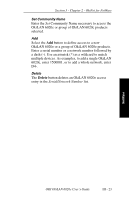
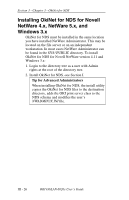
Section 3 - Chapter 2 - OkiNet for NetWare • Specify Devices/Networks - This method adds specific print servers (or groups of print servers) to the list. This can be useful when only a subset of the list of OkiLAN 6020e products is desired. To select all desired print servers, select Add. Sort The Sort option displays the OkiLAN 6020e list in a specific order. The list can also be sorted by clicking on the column by which you wish to sort. A sort order can only be defined on columns displayed on the main OkiNet for NetWare screen. Columns Column information for each print server can be modified. To define the location of a new column, select the location in the Columns Displayed field where you wish the new column to be inserted, then select Add. If no location is selected, the new column will be added to the end of the list and the column will be displayed to the right of the last column on the screen. For example, if you currently have three columns displayed and you wish to add a fourth column to the far left of the screen, follow these steps: 1. Select the first column in the Columns Displayed field. 2. Select the column to be added from the Columns Available field. 3. Select Add. Columns may also be removed by selecting Remove from the Columns Available field. NetWare OKI OkiLAN 6020e User's Guide III - 21
-
 1
1 -
2
-
3
-
4
-
5
-
6
-
7
-
8
-
9
-
10
-
11
-
12
-
13
-
14
-
15
-
16
-
17
-
18
-
19
-
20
-
21
-
22
-
23
-
24
-
25
-
26
-
27
-
28
-
29
-
30
-
31
-
32
-
33
-
34
-
35
-
36
-
37
-
38
-
39
-
40
-
41
-
42
-
43
-
44
-
45
-
46
-
47
-
48
-
49
-
50
-
51
-
52
-
53
-
54
-
55
-
56
-
57
-
58
-
59
-
 60
60 -
 61
61 -
 62
62 -
 63
63 -
 64
64 -
 65
65 -
 66
66 -
 67
67 -
 68
68 -
 69
69 -
 70
70 -
71
-
72
-
73
-
74
-
75
-
76
-
77
-
78
-
79
-
80
-
81
-
82
-
83
-
84
-
85
-
86
-
87
-
88
-
89
-
90
-
91
-
92
-
93
-
94
-
95
-
96
-
97
-
98
-
99
-
100
-
101
-
102
-
103
-
104
-
105
-
106
-
107
-
108
-
109
-
110
-
111
-
112
-
113
-
114
-
115
-
116
-
117
-
118
-
119
-
120
-
121
-
122
-
123
-
124
-
125
-
126
-
127
-
128
-
129
-
130
-
131
-
132
-
133
-
134
-
135
-
136
-
137
-
138
-
139
-
140
-
141
-
142
-
143
-
144
-
145
-
146
-
147
-
148
-
149
-
150
-
151
-
152
-
153
-
154
-
155
-
156
-
157
-
158
-
159
-
160
-
161
-
162
-
163
-
164
-
165
-
166
-
167
-
168
-
169
-
170
-
171
-
172
-
173
-
174
-
175
-
176
-
177
-
178
-
179
-
180
-
181
-
182
-
183
-
184
-
185
-
186
-
187
-
188
-
189
-
190
-
191
-
192
-
193
-
194
-
195
-
196
-
197
-
198
-
199
-
200
-
201
-
202
-
203
-
204
-
205
-
206
-
207
-
208
-
209
-
210
-
211
-
212
-
213
-
214
-
215
-
216
-
217
-
218
-
219
-
220
-
221
-
222
-
223
-
224
-
225
-
226
 |
 |